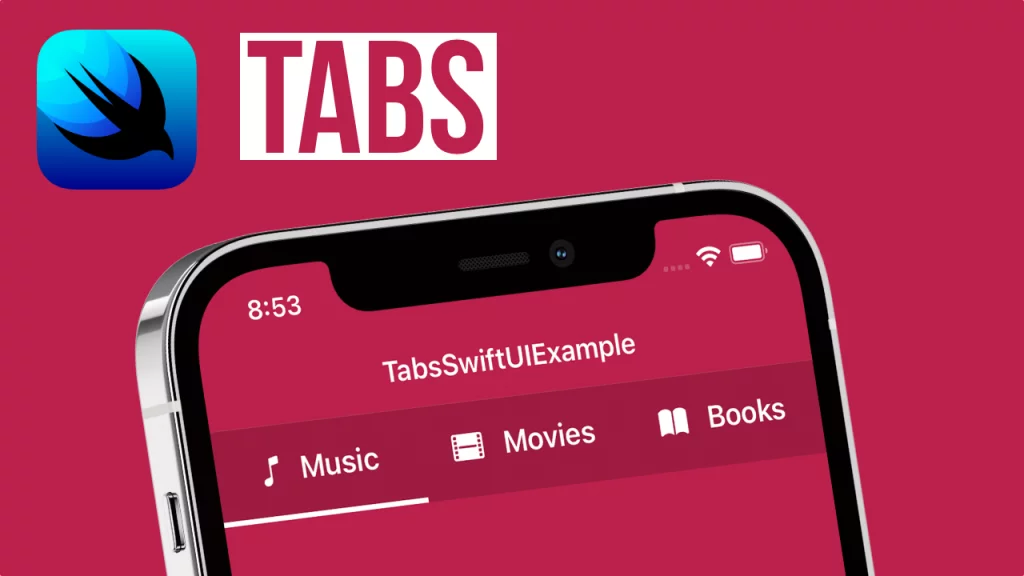
Last updated on: January 20, 2022
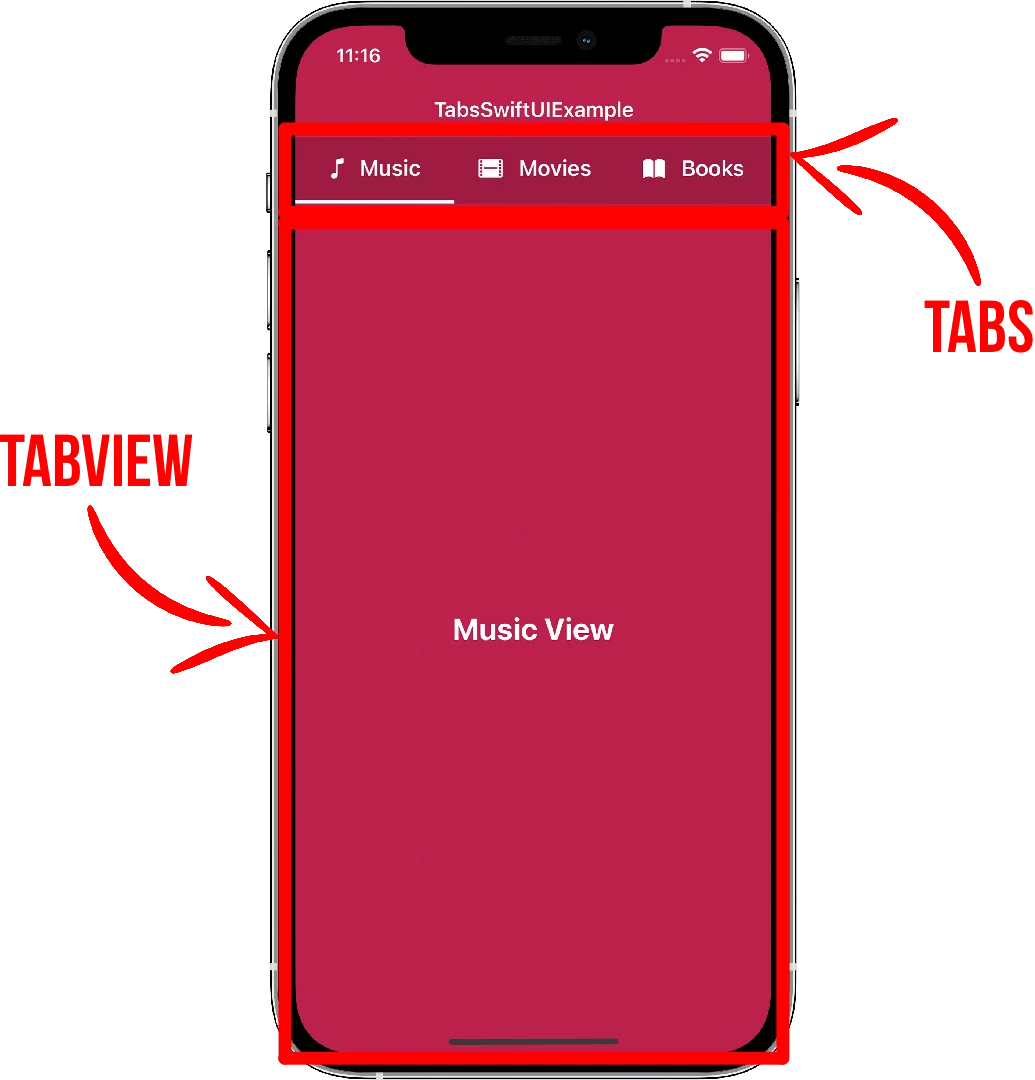
To create Tabs in SwiftUI, we’re going to use a TabView with a PageTabViewStyle, and at the top, we’re going to have a View (Tabs) that is a ScrollView with an array of buttons stacked horizontally (HStack)
Contents
Creating the Tabs
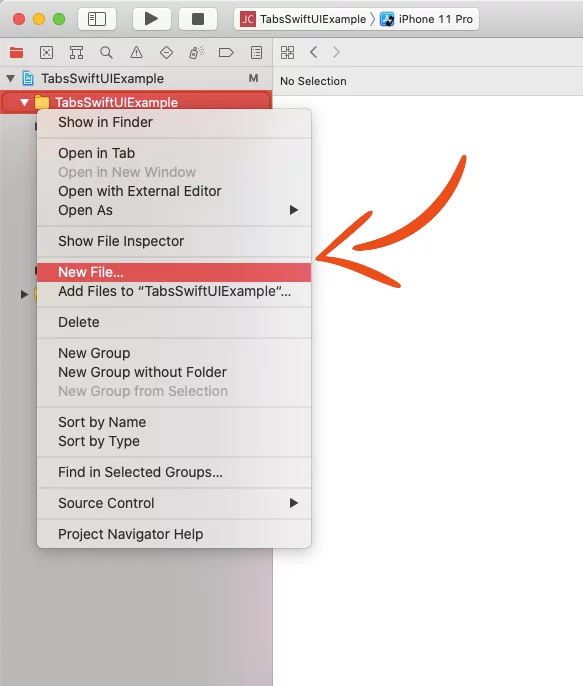
First, we’re going to create Tabs in a new SwiftUI View file
Go to your project folder, Right-Click > New File…
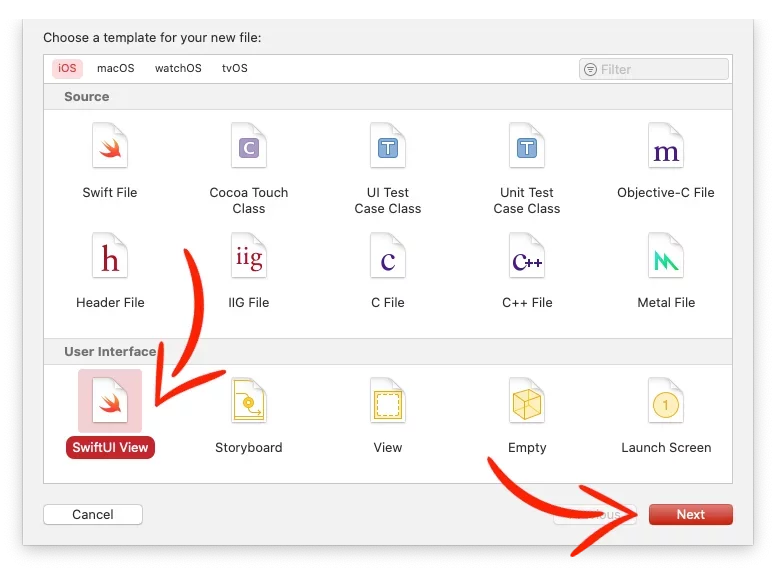
Select SwiftUI View, press Next, and name it Tabs.
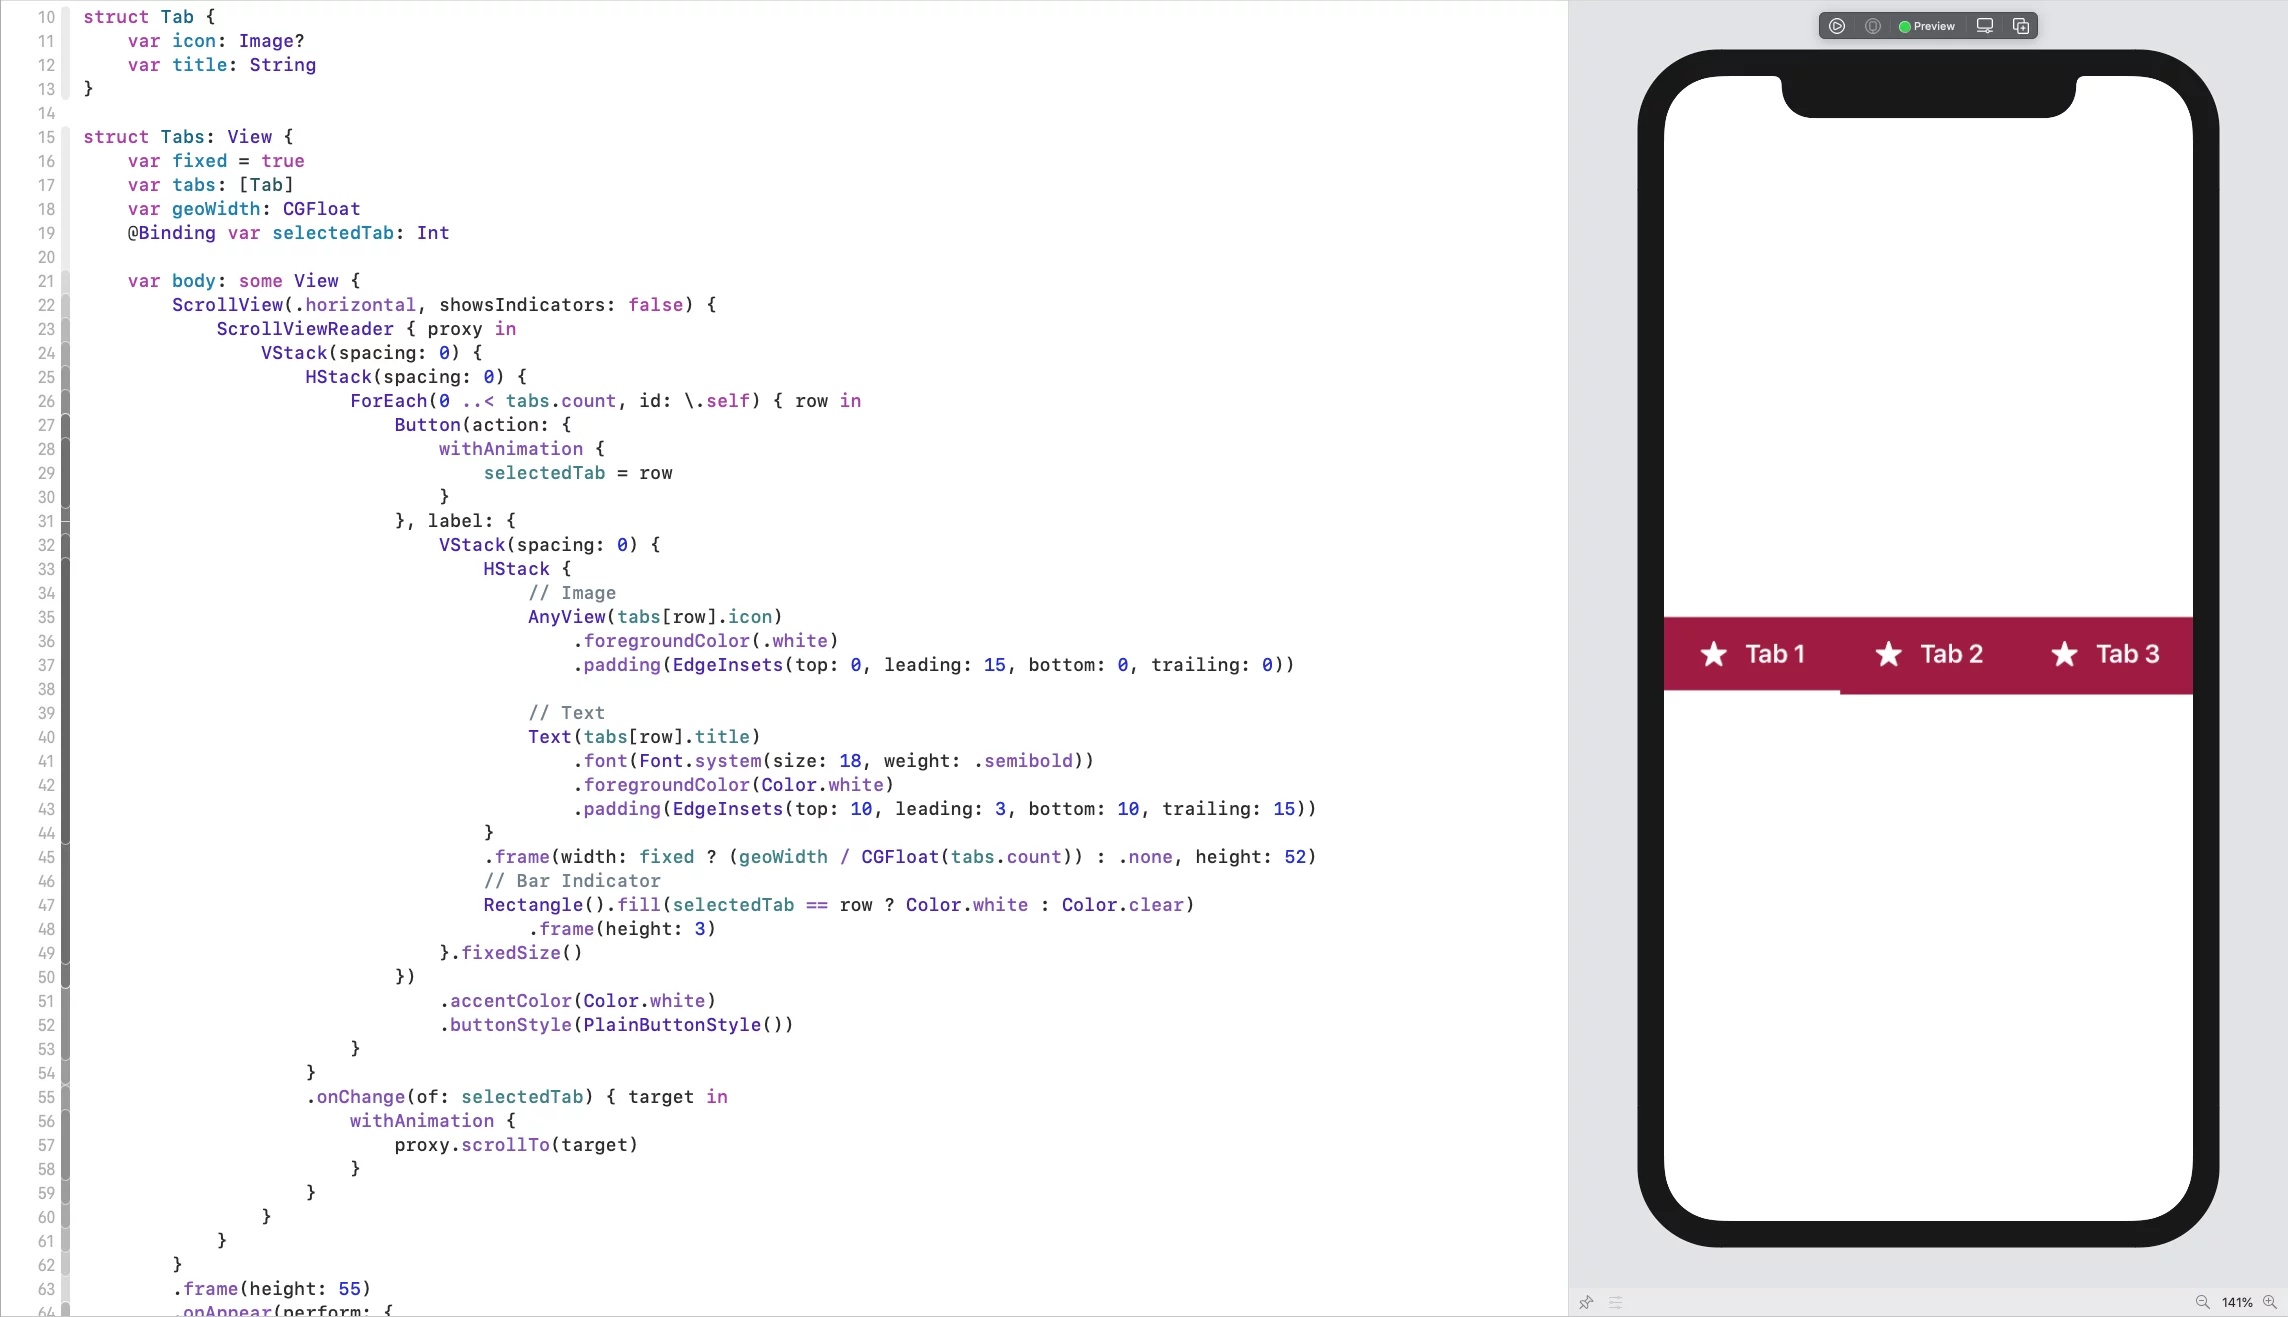
Inside the file, paste the following code:
struct Tab {
    var icon: Image?
    var title: String
}
struct Tabs: View {
    var fixed = true
    var tabs: [Tab]
    var geoWidth: CGFloat
    @Binding var selectedTab: Int
    var body: some View {
        ScrollView(.horizontal, showsIndicators: false) {
            ScrollViewReader { proxy in
                VStack(spacing: 0) {
                    HStack(spacing: 0) {
                        ForEach(0 ..< tabs.count, id: \.self) { row in
                            Button(action: {
                                withAnimation {
                                    selectedTab = row
                                }
                            }, label: {
                                VStack(spacing: 0) {
                                    HStack {
                                        // Image
                                        AnyView(tabs[row].icon)
                                            .foregroundColor(.white)
                                            .padding(EdgeInsets(top: 0, leading: 15, bottom: 0, trailing: 0))
                                        // Text
                                        Text(tabs[row].title)
                                            .font(Font.system(size: 18, weight: .semibold))
                                            .foregroundColor(Color.white)
                                            .padding(EdgeInsets(top: 10, leading: 3, bottom: 10, trailing: 15))
                                    }
                                    .frame(width: fixed ? (geoWidth / CGFloat(tabs.count)) : .none, height: 52)
                                    // Bar Indicator
                                    Rectangle().fill(selectedTab == row ? Color.white : Color.clear)
                                        .frame(height: 3)
                                }.fixedSize()
                            })
                                .accentColor(Color.white)
                                .buttonStyle(PlainButtonStyle())
                        }
                    }
                    .onChange(of: selectedTab) { target in
                        withAnimation {
                            proxy.scrollTo(target)
                        }
                    }
                }
            }
        }
        .frame(height: 55)
        .onAppear(perform: {
            UIScrollView.appearance().backgroundColor = UIColor(#colorLiteral(red: 0.6196078431, green: 0.1098039216, blue: 0.2509803922, alpha: 1))
            UIScrollView.appearance().bounces = fixed ? false : true
        })
        .onDisappear(perform: {
            UIScrollView.appearance().bounces = true
        })
    }
}
struct Tabs_Previews: PreviewProvider {
    static var previews: some View {
        Tabs(fixed: true,
             tabs: [.init(icon: Image(systemName: "star.fill"), title: "Tab 1"),
                    .init(icon: Image(systemName: "star.fill"), title: "Tab 2"),
                    .init(icon: Image(systemName: "star.fill"), title: "Tab 3")],
             geoWidth: 375,
             selectedTab: .constant(0))
    }
}
Code language: Swift (swift)
At the top of the file, we have the model for each Tab, which has an icon (optional) and a title
If you have more than three tabs, set the fixed mode to false so you can scroll through all the tabs.
The ScrollViewReader changes the tabs automatically when you’re swiping between the Views.
Creating the TabView
In our main View (ContentView), create an integer @State variable with the name selectedTab and set an array of tabs.
struct ContentView: View {
    @State private var selectedTab: Int = 0
    let tabs: [Tab] = [
        .init(icon: Image(systemName: "music.note"), title: "Music"),
        .init(icon: Image(systemName: "film.fill"), title: "Movies"),
        .init(icon: Image(systemName: "book.fill"), title: "Books")
    ]
    var body: some View {
        // ...
    }
}
struct ContentView_Previews: PreviewProvider {
    static var previews: some View {
        ContentView()
    }
}Code language: Swift (swift)
Next, in the body, use the GeometryReader to measure the screen’s width.
In fixed mode, we take the screen width and divide it by the number of tabs to make them with equal widths.
struct ContentView: View {
    // ...
    var body: some View {
        NavigationView {
            GeometryReader { geo in
                // ...
            }
        }
    }
}Code language: Swift (swift)
Next, add in a VStack the Tabs and the TabView with a PageTabViewStyle.
struct ContentView: View {
    // ...
    var body: some View {
        NavigationView {
            // ...
            VStack(spacing: 0) {
                // Tabs
                Tabs(tabs: tabs, geoWidth: geo.size.width, selectedTab: $selectedTab)
                // Views
                TabView(selection: $selectedTab,
                        content: {
                            Demo1View()
                                .tag(0)
                            Demo2View()
                                .tag(1)
                            Demo3View()
                                .tag(2)
                        })
                    .tabViewStyle(PageTabViewStyle(indexDisplayMode: .never))
            }
        }
    }
}Code language: Swift (swift)
So, at the end (with all the styles, colors, e.t.c), it will look like this:
struct ContentView: View {
    @State private var selectedTab: Int = 0

    let tabs: [Tab] = [
        .init(icon: Image(systemName: "music.note"), title: "Music"),
        .init(icon: Image(systemName: "film.fill"), title: "Movies"),
        .init(icon: Image(systemName: "book.fill"), title: "Books")
    ]

    init() {
        let appearance = UINavigationBarAppearance()
        appearance.configureWithOpaqueBackground()
        appearance.backgroundColor = UIColor(#colorLiteral(red: 0.737254902, green: 0.1294117647, blue: 0.2941176471, alpha: 1))
        UINavigationBar.appearance().standardAppearance = appearance
        UINavigationBar.appearance().scrollEdgeAppearance = appearance
        UINavigationBar.appearance().titleTextAttributes = [.foregroundColor: UIColor.white]
        UINavigationBar.appearance().isTranslucent = false
    }

    var body: some View {
        NavigationView {
            GeometryReader { geo in
                VStack(spacing: 0) {
                    // Tabs
                    Tabs(tabs: tabs, geoWidth: geo.size.width, selectedTab: $selectedTab)

                    // Views
                    TabView(selection: $selectedTab,
                            content: {
                                Demo1View()
                                    .tag(0)
                                Demo2View()
                                    .tag(1)
                                Demo3View()
                                    .tag(2)
                            })
                        .tabViewStyle(PageTabViewStyle(indexDisplayMode: .never))
                }
                .foregroundColor(Color(#colorLiteral(red: 0.737254902, green: 0.1294117647, blue: 0.2941176471, alpha: 1)))
                .navigationBarTitleDisplayMode(.inline)
                .navigationTitle("TabsSwiftUIExample")
                .ignoresSafeArea()
            }
        }
    }
}

struct ContentView_Previews: PreviewProvider {
    static var previews: some View {
        ContentView()
    }
}Code language: Swift (swift)
You can find the final project here
If you have any questions, please feel free to leave a comment below