
Last updated on: February 17, 2024
Contents
Creating the Top Bar
Go to your compose activity (e.g., MainActivity.kt), and outside the class, add the following composable function to create a Top Bar
@Composable
fun TopBar() {
    TopAppBar(
        title = { Text(text = stringResource(R.string.app_name), fontSize = 18.sp) },
        backgroundColor = colorResource(id = R.color.colorPrimary),
        contentColor = Color.White
    )
}

@Preview(showBackground = true)
@Composable
fun TopBarPreview() {
    TopBar()
}Code language: Kotlin (kotlin)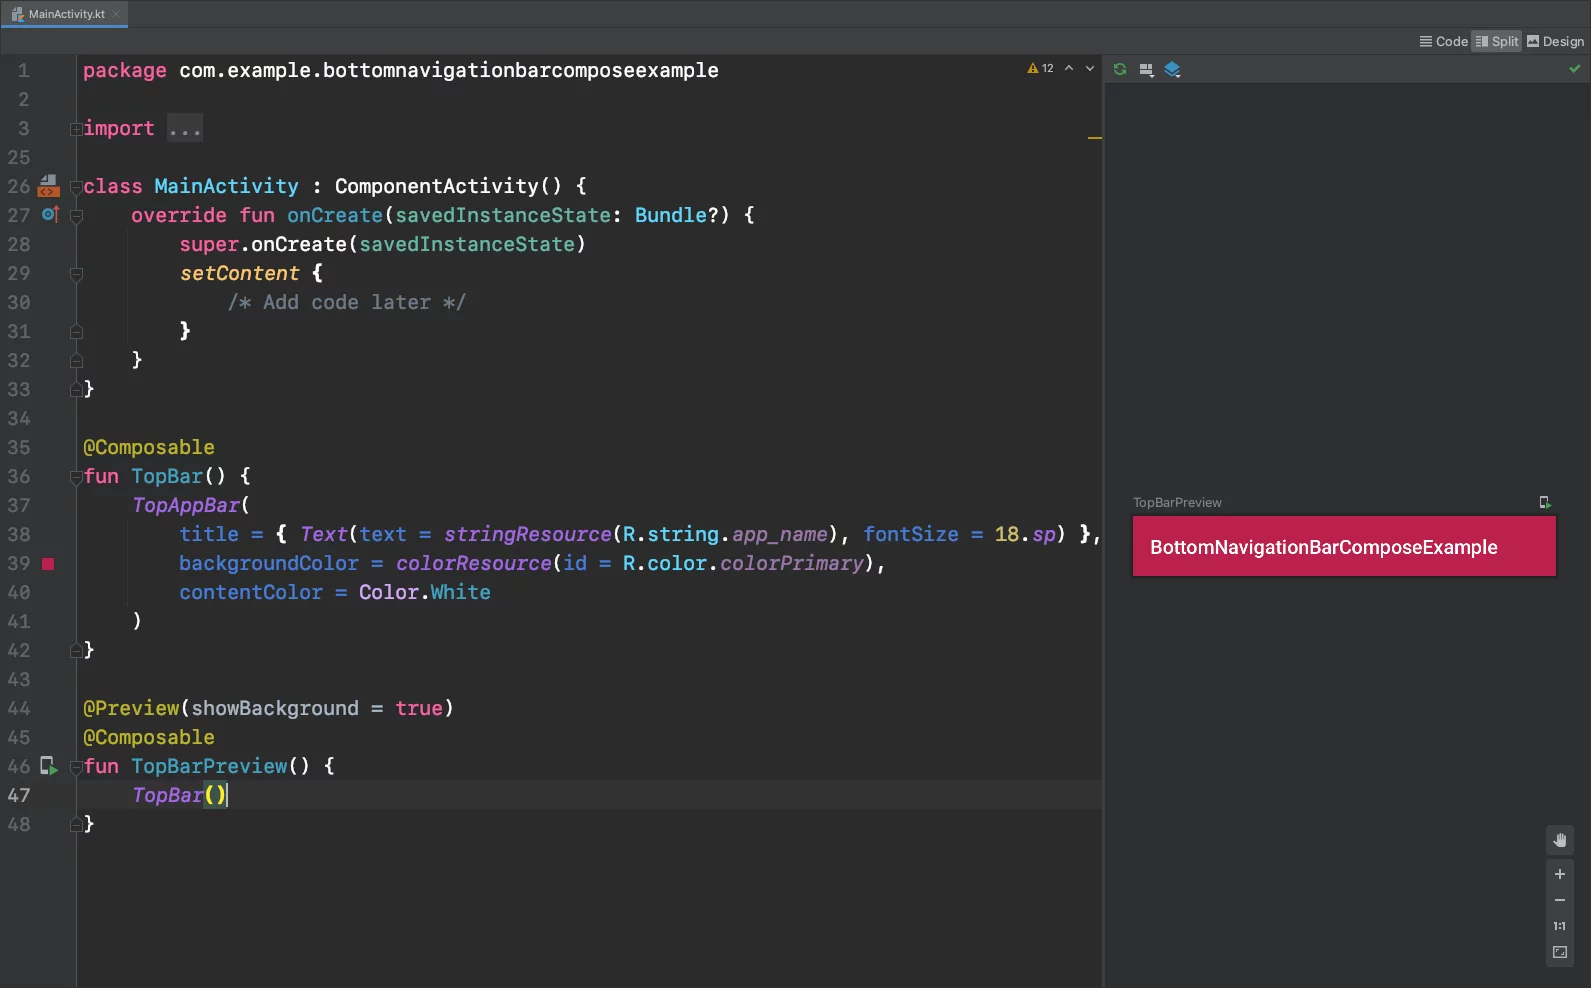
Creating the Bottom Navigation Bar
Now it’s time to create the Bottom Navigation Bar, but before we do that, we have to prepare the bar items.
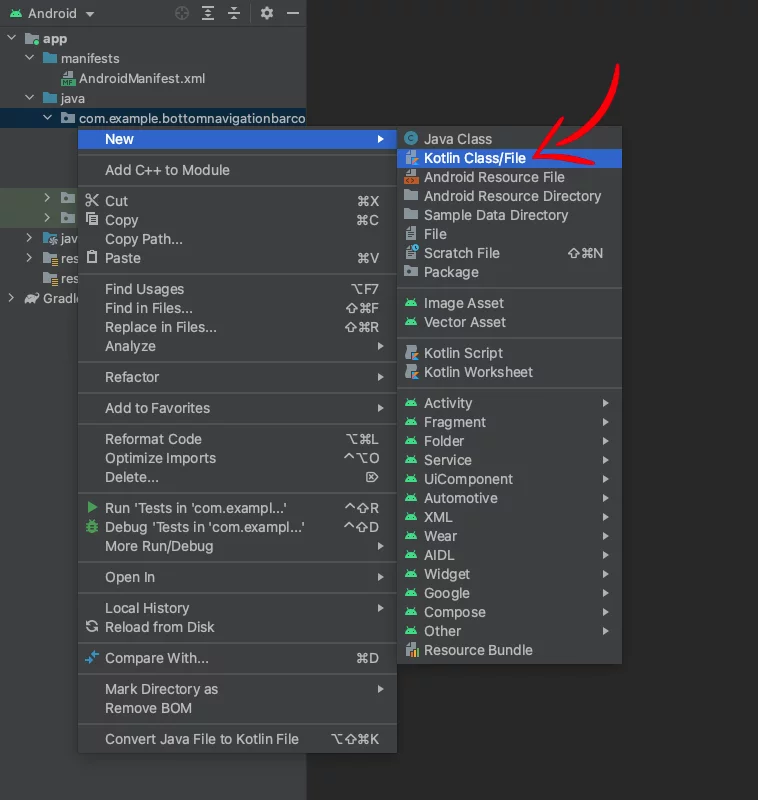
Create a new sealed class file by going to your project folder > Right-click > New > Kotlin Class/File
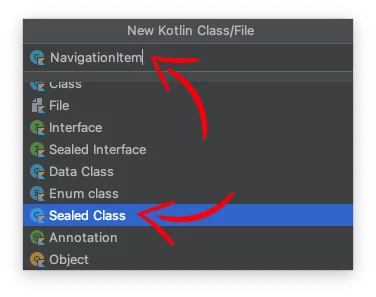
On the new window, select Sealed Class and give NavigationItem as a name
And create a model for each bar item with the parameters:
- route: It’s a string that works as a key (Like the key in SharedPrefernces) and has to be unique. This defines the path to the composable. This will help us navigate to the Views from the Bottom Navigation Bar (More details about that in the tutorial How to Navigate & Pass Data between Views with Jetpack Compose that will write in the next few days)
- icon: The icon of the bar item
- title: The name of the bar item
Paste the following code inside(You can get the icons from the demo app at the bottom of this article):
sealed class NavigationItem(var route: String, var icon: Int, var title: String) {
    data object Home : NavigationItem("home", R.drawable.ic_home, "Home")
    data object Music : NavigationItem("music", R.drawable.ic_music, "Music")
    data object Movies : NavigationItem("movies", R.drawable.ic_movie, "Movies")
    data object Books : NavigationItem("books", R.drawable.ic_book, "Books")
    data object Profile : NavigationItem("profile", R.drawable.ic_profile, "Profile")
}Code language: Kotlin (kotlin)
Now let’s do the Bottom Navigation Bar.
We’re going to create a list with all the menu items. Then in the BottomNavigation, we’re going to loop all these items and create a BottomNavigationItem for every item and set the icon and title.
Again, in the MainActivity.kt, add the following composable function:
@Composable
fun BottomNavigationBar() {
    val items = listOf(
        NavigationItem.Home,
        NavigationItem.Music,
        NavigationItem.Movies,
        NavigationItem.Books,
        NavigationItem.Profile
    )
    BottomNavigation(
        backgroundColor = colorResource(id = R.color.colorPrimary),
        contentColor = Color.White
    ) {
        items.forEach { item ->
            BottomNavigationItem(
                icon = { Icon(painterResource(id = item.icon), contentDescription = item.title) },
                label = { Text(text = item.title) },
                selectedContentColor = Color.White,
                unselectedContentColor = Color.White.copy(0.4f),
                alwaysShowLabel = true,
                selected = false,
                onClick = {
                    /* Add code later */
                }
            )
        }
    }
}

@Preview(showBackground = true)
@Composable
fun BottomNavigationBarPreview() {
    BottomNavigationBar()
}Code language: Kotlin (kotlin)
Creating the View that contains Top Bar and Bottom Navigation Bar
Now that we have created the Top Bar and the Bottom Navigation Bar, let’s put them together.
For this job, we’re going to use Scaffold.
A Scaffold is a layout in Jetpack Compose (like a RelativeLayout or LinearLayout in XML) with ‘areas’ for Top Bar, Bottom Bar, FAB button, Navigation Drawer e.t.c.
Create a new composable function with the name MainScreen() that has a Scaffold layout inside, and add the TopBar() and the BottomNavigationBar() we created before:
class MainActivity : ComponentActivity() {
    override fun onCreate(savedInstanceState: Bundle?) {
        super.onCreate(savedInstanceState)
        setContent {
            MainScreen()
        }
    }
}

@Composable
fun MainScreen() {
    Scaffold(
        topBar = { TopBar() },
        bottomBar = { BottomNavigationBar() },
        content = { padding -> // We have to pass the scaffold inner padding to our content. That's why we use Box.
            Box(modifier = Modifier.padding(padding)) {
                /* Add code later */
            }
        },
        backgroundColor = colorResource(R.color.colorPrimaryDark) // Set background color to avoid the white flashing when you switch between screens
    )
}

@Preview(showBackground = true)
@Composable
fun MainScreenPreview() {
    MainScreen()
}Code language: Kotlin (kotlin)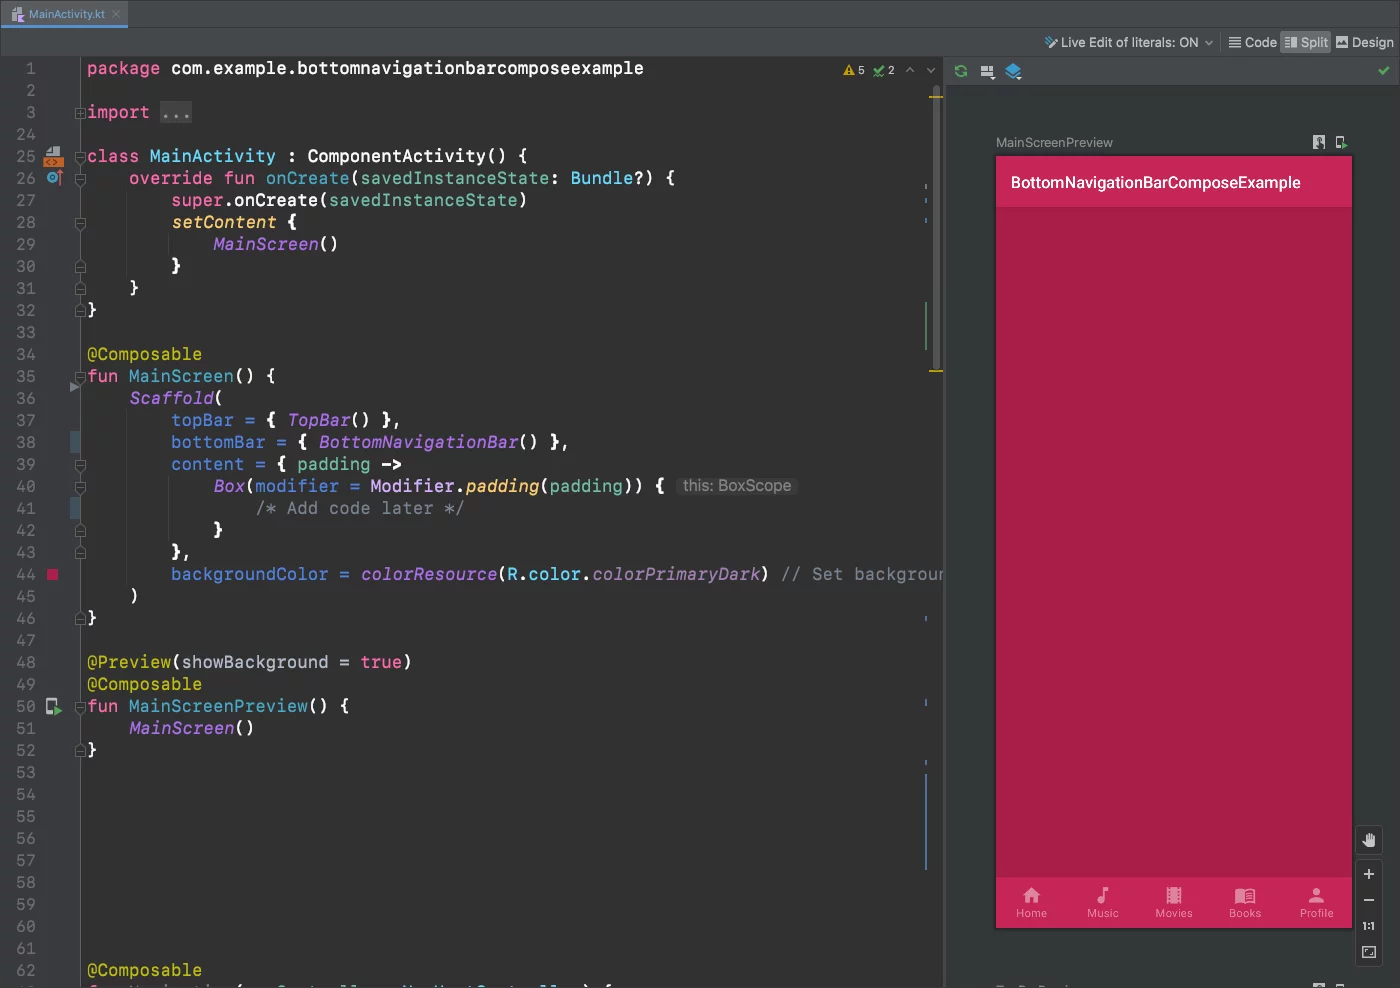
Connecting the Bar Items with Views (Navigation)
Before we connect the bar items with the Views, we need to create the Views first.
In this example, I have created a Kotlin file named ContentScreens, and added 5 different views (composable functions) that show the name of the view in Text in the middle of the screen.
@Composable
fun HomeScreen() {
    Column(
        modifier = Modifier
            .fillMaxSize()
            .background(colorResource(id = R.color.colorPrimaryDark))
            .wrapContentSize(Alignment.Center)
    ) {
        Text(
            text = "Home View",
            fontWeight = FontWeight.Bold,
            color = Color.White,
            modifier = Modifier.align(Alignment.CenterHorizontally),
            textAlign = TextAlign.Center,
            fontSize = 25.sp
        )
    }
}

@Preview(showBackground = true)
@Composable
fun HomeScreenPreview() {
    HomeScreen()
}

@Composable
fun MusicScreen() {
    Column(
        modifier = Modifier
            .fillMaxSize()
            .background(colorResource(id = R.color.colorPrimaryDark))
            .wrapContentSize(Alignment.Center)
    ) {
        Text(
            text = "Music View",
            fontWeight = FontWeight.Bold,
            color = Color.White,
            modifier = Modifier.align(Alignment.CenterHorizontally),
            textAlign = TextAlign.Center,
            fontSize = 25.sp
        )
    }
}

@Preview(showBackground = true)
@Composable
fun MusicScreenPreview() {
    MusicScreen()
}

@Composable
fun MoviesScreen() {
    Column(
        modifier = Modifier
            .fillMaxSize()
            .background(colorResource(id = R.color.colorPrimaryDark))
            .wrapContentSize(Alignment.Center)
    ) {
        Text(
            text = "Movies View",
            fontWeight = FontWeight.Bold,
            color = Color.White,
            modifier = Modifier.align(Alignment.CenterHorizontally),
            textAlign = TextAlign.Center,
            fontSize = 25.sp
        )
    }
}

@Preview(showBackground = true)
@Composable
fun MoviesScreenPreview() {
    MoviesScreen()
}


@Composable
fun BooksScreen() {
    Column(
        modifier = Modifier
            .fillMaxSize()
            .background(colorResource(id = R.color.colorPrimaryDark))
            .wrapContentSize(Alignment.Center)
    ) {
        Text(
            text = "Books View",
            fontWeight = FontWeight.Bold,
            color = Color.White,
            modifier = Modifier.align(Alignment.CenterHorizontally),
            textAlign = TextAlign.Center,
            fontSize = 25.sp
        )
    }
}

@Preview(showBackground = true)
@Composable
fun BooksScreenPreview() {
    BooksScreen()
}

@Composable
fun ProfileScreen() {
    Column(
        modifier = Modifier
            .fillMaxSize()
            .background(colorResource(id = R.color.colorPrimaryDark))
            .wrapContentSize(Alignment.Center)
    ) {
        Text(
            text = "Profile View",
            fontWeight = FontWeight.Bold,
            color = Color.White,
            modifier = Modifier.align(Alignment.CenterHorizontally),
            textAlign = TextAlign.Center,
            fontSize = 25.sp
        )
    }
}

@Preview(showBackground = true)
@Composable
fun ProfileScreenPreview() {
    ProfileScreen()
}Code language: Kotlin (kotlin)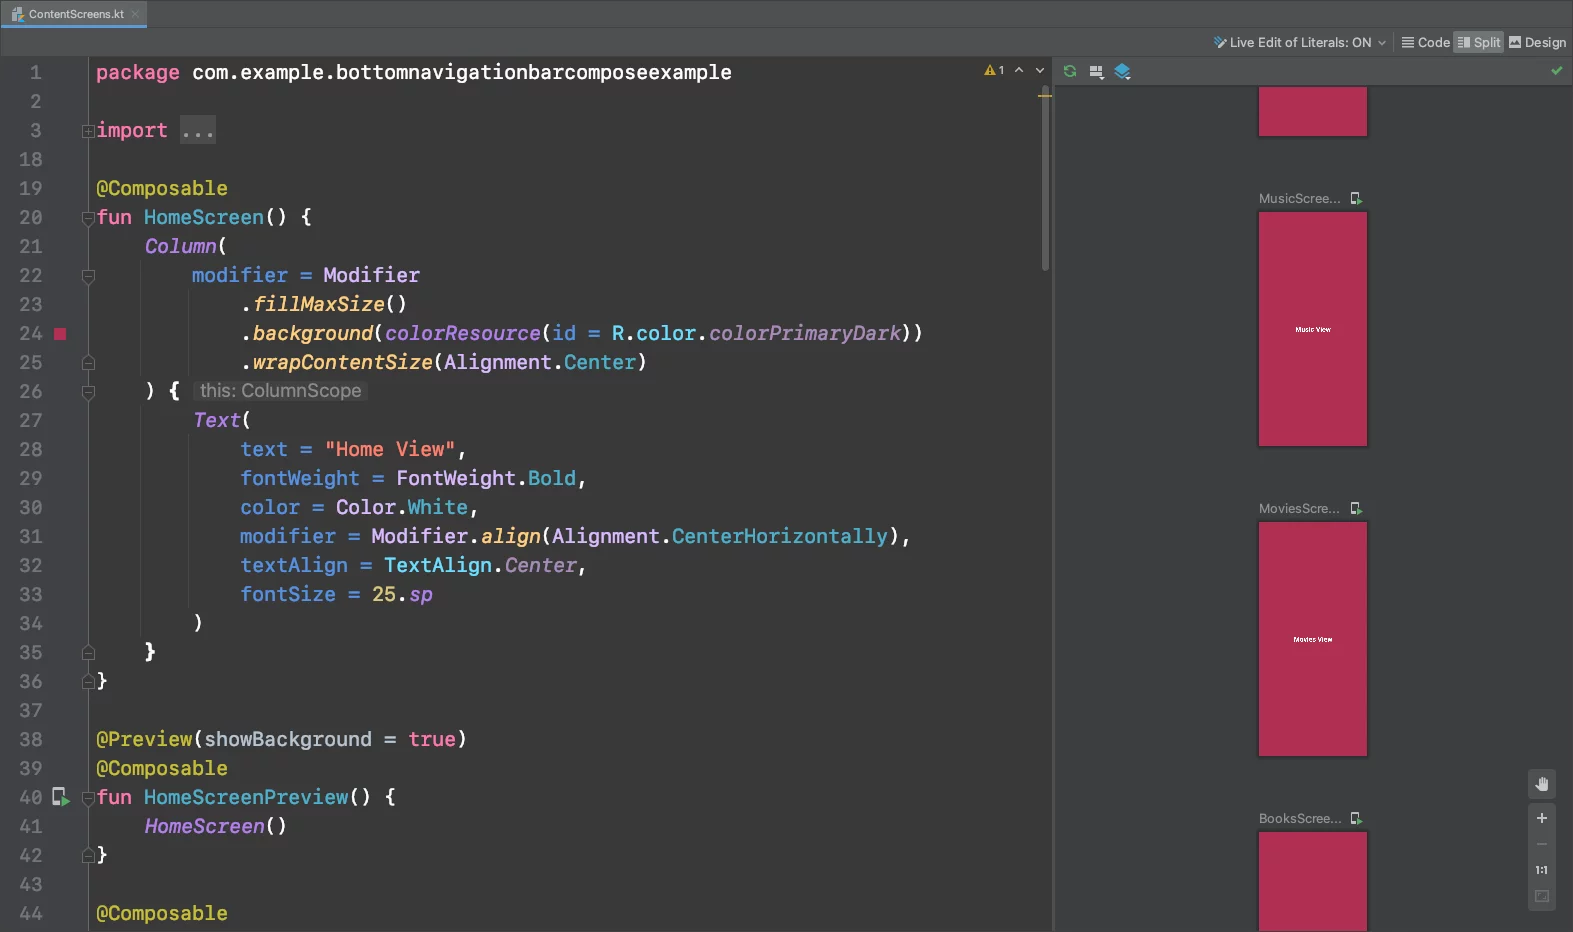
Back in the MainActivity.kt, in the MainScreen(), we create the Navigation Controller, and we’re passing it to the BottomNavigationBar and Navigation(We’re going to create that later)
@Composable
fun MainScreen() {
    val navController = rememberNavController()
    Scaffold(
        topBar = { TopBar() },
        bottomBar = { BottomNavigationBar(navController) },
        content = { padding -> // We have to pass the scaffold inner padding to our content. That's why we use Box.
            Box(modifier = Modifier.padding(padding)) {
                Navigation(navController = navController)
            }
        },
        backgroundColor = colorResource(R.color.colorPrimaryDark) // Set background color to avoid the white flashing when you switch between screens
    )
}Code language: Kotlin (kotlin)
Next, in the BottomNavigationBar, add the parameter navController, and create the navBackStackEntry and the currentRoute.
Using the currentRoute, we check if we have to highlight the bar item or not, and we navigate to the view using the navigate() method
@Composable
fun BottomNavigationBar(navController: NavController) {
    val items = listOf(
        NavigationItem.Home,
        NavigationItem.Music,
        NavigationItem.Movies,
        NavigationItem.Books,
        NavigationItem.Profile
    )
    BottomNavigation(
        backgroundColor = colorResource(id = R.color.colorPrimary),
        contentColor = Color.White
    ) {
        val navBackStackEntry by navController.currentBackStackEntryAsState()
        val currentRoute = navBackStackEntry?.destination?.route
        items.forEach { item ->
            BottomNavigationItem(
                icon = { Icon(painterResource(id = item.icon), contentDescription = item.title) },
                label = { Text(text = item.title) },
                selectedContentColor = Color.White,
                unselectedContentColor = Color.White.copy(0.4f),
                alwaysShowLabel = true,
                selected = currentRoute == item.route,
                onClick = {
                    navController.navigate(item.route) {
                        // Pop up to the start destination of the graph to
                        // avoid building up a large stack of destinations
                        // on the back stack as users select items
                        navController.graph.startDestinationRoute?.let { route ->
                            popUpTo(route) {
                                saveState = true
                            }
                        }
                        // Avoid multiple copies of the same destination when
                        // reselecting the same item
                        launchSingleTop = true
                        // Restore state when reselecting a previously selected item
                        restoreState = true
                    }
                }
            )
        }
    }
}

@Preview(showBackground = true)
@Composable
fun BottomNavigationBarPreview() {
    // BottomNavigationBar()
}Code language: Kotlin (kotlin)
Lastly, create a new composable function and name it Navigation() with a parameter navController which is NavHostController type.
Here, we create a NavHost, and we set the Home view as a startDestination, and we set each View with its route inside a composable.
@Composable
fun Navigation(navController: NavHostController) {
    NavHost(navController, startDestination = NavigationItem.Home.route) {
        composable(NavigationItem.Home.route) {
            HomeScreen()
        }
        composable(NavigationItem.Music.route) {
            MusicScreen()
        }
        composable(NavigationItem.Movies.route) {
            MoviesScreen()
        }
        composable(NavigationItem.Books.route) {
            BooksScreen()
        }
        composable(NavigationItem.Profile.route) {
            ProfileScreen()
        }
    }
}Code language: Kotlin (kotlin)
You can find the final project here
If you have any questions, please feel free to leave a comment below