
Last updated on: November 7, 2023
Room is a database layer on top of an SQLite database that handles many tasks to make developers’ life easier.
The equivalent of Room in iOS is CoreData.
In this tutorial, I will show you how to insert, read, update and delete data using Room through a simple notes app.
Contents
About the Note App
You can find the starter project here
As I said, the app is very simple. You tap on the + button and type the note you wanna add. After you save it, it appears at the top of the list.
The list is a RecyclerView with a ListAdapter because updates only the item that has changed which makes it have better performance.
This is very important when you use it to show data from the Room database.
To edit it, you tap on it, edit the text, and save it again.
You can also delete the note by tapping the “x” on the top right corner.
How it works under the hood
Before start saving data to the database, I want you to understand how the app works.
When we tap the “+” button to add a new note, the AddNoteActivity appears.
After we type the text and press the Add/Update Note button, it triggers the following code inside the AddNoteActivity
val addNoteButton = findViewById<Button>(R.id.add_note_button)
addNoteButton.setOnClickListener {
    // Return note text to the NotesActivity
    val data = Intent()
    data.putExtra("note_date_added", noteDateAdded)
    data.putExtra("note_text", addNoteText.text.toString())
    setResult(Activity.RESULT_OK, data)
    // Close current window
    onBackPressed()
}Code language: Kotlin (kotlin)
This code returns the data to NotesActivity. We’re taking the new note, and we’re adding it to the list, which we get from the adapter.
// ...

private val newNoteResultLauncher =
    registerForActivityResult(ActivityResultContracts.StartActivityForResult()) { result ->
        if (result.resultCode == Activity.RESULT_OK) {
            // Get the list of notes
            val notes = adapter.currentList.toMutableList()
            // Get the new note from the AddNoteActivity
            val noteDateAdded = Date()
            val noteText = result.data?.getStringExtra("note_text")
            // Add the new note at the top of the list
            val newNote = Note(noteDateAdded, noteText ?: "")
            notes.add(newNote)
            // Update RecyclerView
            adapter.submitList(notes)
        }
    }

Code language: Kotlin (kotlin)
data class Note(
val dateAdded: Date,
var noteText: String
)Code language: Kotlin (kotlin)After that, we update the RecyclerView using ListAdapter‘s submitList().
In the RecyclerView we have two listeners, the onItemClick, which is for editing the note, and the onItemRemoveClick, for deleting it.
When we want to edit a note, we pass the note’s dateAdded and noteText variables to the AddNoteActivity (We’re using the same Activity to create the new note and edit it), and after we edited it, we return it to the NotesActivity.
When we receive the edited note in the NotesActivity, we’re for looping the notes list to find the note that has the same dateAdded.
When we find it, we replace the noteText with the edited note, and we update the ListAdapter.
private val editNoteResultLauncher =
    registerForActivityResult(ActivityResultContracts.StartActivityForResult()) { result ->
        if (result.resultCode == Activity.RESULT_OK) {
            // Get the list of notes
            val notes = adapter.currentList.toMutableList()
            // Get the edited note from the AddNoteActivity
            val noteDateAdded = result.data?.getSerializableExtra("note_date_added") as Date
            val editedNoteText = result.data?.getStringExtra("note_text")
            // Find the note in the list with the same date and replace the note text with the edited
            for (note in notes) {
                if (note.dateAdded == noteDateAdded) {
                    note.noteText = editedNoteText ?: ""
                }
            }
            // Update RecyclerView
            adapter.submitList(notes)
            adapter.notifyDataSetChanged()
        }
    }Code language: Kotlin (kotlin)
Finally, when we delete a note, the onItemRemoveClick listener is called, and we delete the note from the list using the position from the NotesRVAdapter.
After the note has been deleted, we call submitList to update the ListAdapter.
adapter.setItemListener(object : RecyclerClickListener {

    // Tap the 'X' to delete the note.
    override fun onItemRemoveClick(position: Int) {
        // Get the list of notes
        val notes = adapter.currentList.toMutableList()
        notes.removeAt(position)
        // Update RecyclerView
        adapter.submitList(notes)
    }

    // ...

})Code language: Kotlin (kotlin)
Adding the Room Library
Download the starter project and go to the app-level build.gradle file of the project and add the following dependencies:
dependencies {

     // ...

    // Room
    implementation 'androidx.room:room-runtime:2.4.2'
    kapt 'androidx.room:room-compiler:2.4.2'
    implementation 'androidx.room:room-ktx:2.4.2' // Kotlin Extensions and Coroutines support for Room
    implementation 'androidx.lifecycle:lifecycle-runtime-ktx:2.4.1' // LifecycleScope

    // ...

}Code language: Kotlin (kotlin)
Since the 2.0.1 version, Room has added support for Kotlin Coroutines. Coroutines will help us make all the calls (inserting, reading, deleting, and updating data) in the background thread because Room doesn’t allow us to do them in the main thread to avoid poor UI performance.
In the same file, inside the plugins brackets add:
plugins {
    // ...
    id 'kotlin-kapt'
}

// OR

apply plugin: 'kotlin-kapt'Code language: Kotlin (kotlin)
And inside the android set the folder where the database will get stored:
android {
    // ...

    kapt {
        arguments {
            arg("room.schemaLocation", "$projectDir/schemas")
        }
    }

    // ...
}Code language: Kotlin (kotlin)
Creating the Database Schema
First, we have to create the database schema.
The starter project that you downloaded uses a model for the notes list called Note, we’re going to add a code to this file to change it into a database schema for the Room database.
In the Note file, add the annotation @Entity(tableName = "notes") above the data class Note( line and also add the annotation @PrimaryKey above the dateAdded variable, and @ColumnInfo(name = "GIVE_COLUMN_NAME") above each data class member. And also make every var to val (if any). So, the file at the end will look like this:
@Entity(tableName = "notes")
data class Note(
    @PrimaryKey
    @ColumnInfo(name = "dateAdded")
    val dateAdded: Date,
    @ColumnInfo(name = "noteText")
    val noteText: String
)Code language: Kotlin (kotlin)
IMPORTANT! You always have to set a primary key (@PrimaryKey) in the database schema.
If you’re familiar with SQL, Entity it’s like tables.
Tip: You can totally remove the
@ColumnInfo(name = "")and they’ll named after the variables name)
Note: You can add an autogenerated id to your database schema like
val id: Intwith the annotation@PrimaryKey(autoGenerate = true). And when you add data to the database you set theidto0and Room will add an autogenerated number later.
Creating DAO
DAO, or Data Access Objects, refers to the file that houses the code responsible for interacting with the database to perform actions such as inserting, reading, updating, and deleting data
Create a new interface file and name it NoteDao

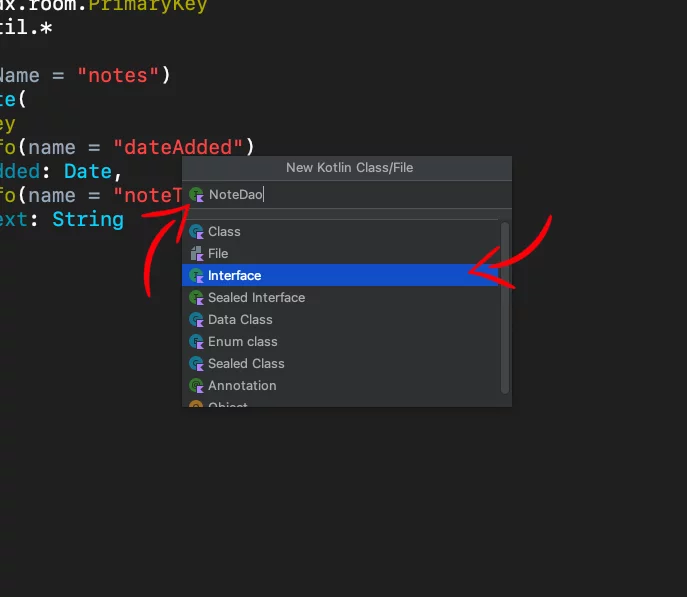
Inside the file, paste the following code:
@Dao
interface NoteDao {

    @Insert(onConflict = OnConflictStrategy.IGNORE)
    suspend fun addNote(note: Note)

    @Query("SELECT * FROM notes ORDER BY dateAdded DESC")
   fun getNotes(): Flow<List<Note>>

    @Update
    suspend fun updateNote(note: Note)

    @Delete
    suspend fun deleteNote(note: Note)

}Code language: Kotlin (kotlin)
As you see, we added the annotation @Dao above the interface NoteDao { line and we also added four functions, the addNote, getNotes, updateNote, and deleteNote.
These are the function we’ll be calling later to do what their names say.
The Room library already has code written for inserting, updating, and deleting data from the database. That’s why we’re using the annotations @Insert, @Update, and @Delete respectively.
But it doesn’t have for getting the data the way we want, so we have to write it using the annotation @Query("").
Last thing, (onConflict = OnConflictStrategy.IGNORE) in the @Insert annotation is to ignore any new note that is exactly the same as one already in the list.
We’re also added suspend in each function, except the getNotes(), to use them inside a coroutine later on.
Room also supports Kotlin Flow, which can update the UI automatically every time we make a change to the list. In other words, we observe the changes.
We’re using it here by wrapping the List of Note, like that: Flow<List<Note>>.
Setting up the database
Now, it’s time to set up the database.
Create a new file and name it NoteDatabase
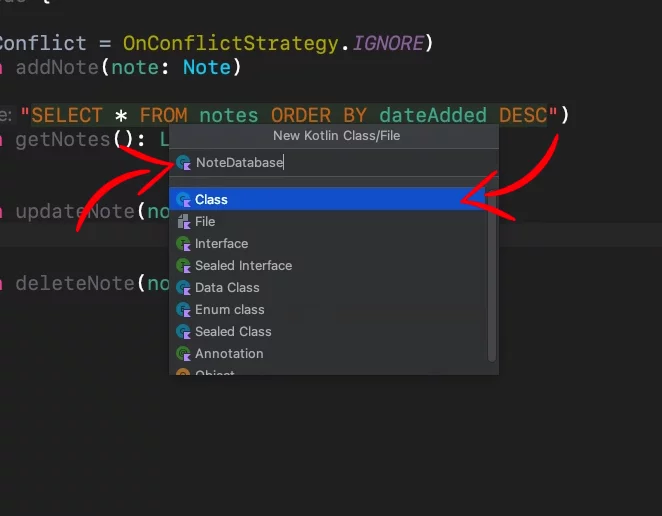
Inside the NoteDatabase, paste the following code:
@Database(
    entities = [Note::class],
    version = 1,
    exportSchema = true
)
abstract class NoteDatabase : RoomDatabase() {

    abstract fun noteDao(): NoteDao

    companion object {

        @Volatile
        private var INSTANCE: NoteDatabase? = null

        fun getDatabase(context: Context): NoteDatabase {
            // if the INSTANCE is not null, then return it,
            // if it is, then create the database
            if (INSTANCE == null) {
                synchronized(this) {
                    // Pass the database to the INSTANCE
                    INSTANCE = buildDatabase(context)
                }
            }
            // Return database.
            return INSTANCE!!
        }

        private fun buildDatabase(context: Context): NoteDatabase {
            return Room.databaseBuilder(
                context.applicationContext,
                NoteDatabase::class.java,
                "notes_database"
            )
                .build()
        }
    }
}Code language: Kotlin (kotlin)
What we do here is, above the abstract class NoteDatabase : RoomDatabase() { we’re adding the database by setting the entity Note inside an array (you can add multiple entities), the number of the version (You have to increase the number when you do changes to the database schema on your next app update) and the exportSchema set to true.
Note: You need to have
exportSchemeset totrueto be able to use automated migration in the future updates.
Inside the abstract class we create an instance of the NoteDatabase, and we set it as volatile using the annotation @Volatile, which means the results will be visible to other threads.
Inside the method getDatabase we check if the database has been created. If not, we call the buildDatabase method to build the database using the databaseBuilder from Room.
We set the database class (NotesDatabase) and we give the name notes_database for our database, and we pass the database to the INSTANCE property, and return it.
Note: Usually, you need only one
RoomDatabase()class for the whole app.
Now, inside the NotesActivity, paste the following:
class NotesActivity : AppCompatActivity() {

    // ...

    private val noteDatabase by lazy { NoteDatabase.getDatabase(this).noteDao() }

    override fun onCreate(savedInstanceState: Bundle?) {
    super.onCreate(savedInstanceState)

        // ...

    }

}Code language: Kotlin (kotlin)
As you see, we call the getDatabase using lazy, which means the database won’t be created until we call it.
Creating Converters
Go back to the Note file. Did you notice that the dateAdded variable is a Date type?
The database does not support this type, so we have to convert it to a timestamp, like 1647375406045, and when we read the value from the database, we will convert the timestamp back to Date type.
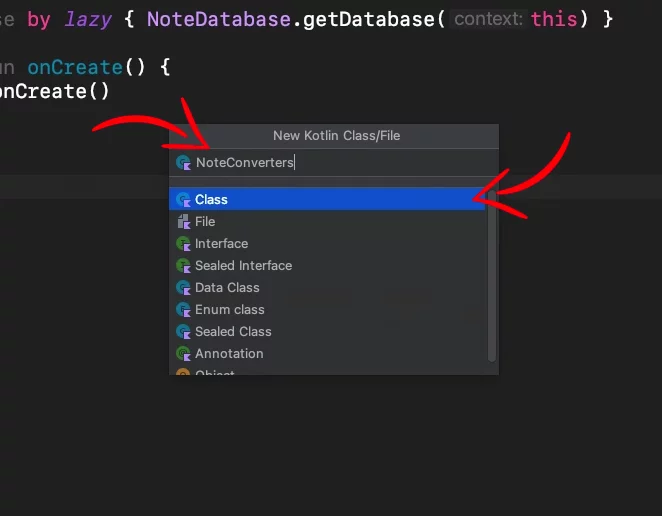
Create a new file, name it NoteConverters, and paste the following code:
class NoteConverters {
    @TypeConverter
    fun fromTimestamp(value: Long?): Date? {
        return value?.let { Date(it) }
    }

    @TypeConverter
    fun dateToTimestamp(date: Date?): Long? {
        return date?.time
    }
}Code language: Kotlin (kotlin)
Now let’s set this converter to our database. Go to NoteDatabase and add the annotation @TypeConverters(NoteConverters::class) after the @Database annotation and before the abstract class NoteDatabase : RoomDatabase() {, like that:
@Database(
    entities = [Note::class],
    version = 1,
    exportSchema = true
)
@TypeConverters(NoteConverters::class)
abstract class NoteDatabase : RoomDatabase() {

       // ...

}Code language: Kotlin (kotlin)
Now, every time we interact with the database, the converter will do the conversion automatically. The magic of Room ✨
Inserting Data
Now that we have set up our database and the coroutines, let’s start saving notes.
Go to the NotesActivity, and in the newNoteLauncher add the following code:
private val newNoteResultLauncher =
    registerForActivityResult(ActivityResultContracts.StartActivityForResult()) { result ->
        if (result.resultCode == Activity.RESULT_OK) {
            // Get the new note from the AddNoteActivity
            val noteDateAdded = Date()
            val noteText = result.data?.getStringExtra("note_text")
            // Add the new note at the top of the list
            val newNote = Note(noteDateAdded, noteText ?: "")
            lifecycleScope.launch {
                noteDatabase.addNote(newNote)
            }
        }
    }Code language: Kotlin (kotlin)
Here we get the note text from the AddNoteActivity and the current time using Date(), we create a new Note object, and we save it to the database using the addNote.
Reading Data
Now, let’s show the saved notes on the list.
In the same file, create a new method called observeNotes(), and inside there, we’re going to call the getNotes and observe the changes by using Flow’s collect function.
Now, every time we change an item in the list, the code inside the brackets will execute, and we don’t have to call it manually every time.
private fun observeNotes() {
    lifecycleScope.launch {
        noteDatabase.getNotes().collect { notesList ->
            if (notesList.isNotEmpty()) {
                adapter.submitList(notesList)
            }
        }
    }
}Code language: Kotlin (kotlin)
Next, we’ll call the observeNotes() method from the onCreateView, so every time we open the app, the saved notes will appear on the list.
override fun onCreate(savedInstanceState: Bundle?) {
    super.onCreate(savedInstanceState)
    setContentView(R.layout.activity_notes)

    // ...

    observeNotes()
}Code language: Kotlin (kotlin)
Updating Data
Now, let’s update the note in the database after editing it.
Inside the editNoteLauncher, add the following code.
val editNoteResultLauncher =
    registerForActivityResult(ActivityResultContracts.StartActivityForResult()) { result ->
        if (result.resultCode == Activity.RESULT_OK) {
            // Get the edited note from the AddNoteActivity
            val noteDateAdded = result.data?.getSerializableExtra("note_date_added") as Date
            val noteText = result.data?.getStringExtra("note_text")
            // Update the note in the list
            val editedNote = Note(noteDateAdded, noteText ?: "")
            lifecycleScope.launch {
                noteDatabase.updateNote(editedNote)
            }
        }
    }
Code language: Kotlin (kotlin)
After we edit the note, we return the note’s dateAdded and the new note text, we create a Note object and we update the note using the updateNote.
As you see here, we’re not looping the notes list to find the row with the same dateAdded value as we had before, but we’re using only the updateNote. This is happening because we have set the dateAdded as a @PrimaryKey, and Room will find the dateAdded with the same timestamp and automatically replace the note text.
Deleting Data
To delete a note from the database, we’re using the deleteNote inside the onItemRemoveClick listener.
adapter.setItemListener(object : RecyclerClickListener {

    // Tap the 'X' to delete the note.
    override fun onItemRemoveClick(position: Int) {
        val notesList = adapter.currentList.toMutableList()
        val noteText = notesList[position].noteText
        val noteDateAdded = notesList[position].dateAdded
        val removeNote = Note(noteDateAdded, noteText)
        notesList.removeAt(position)
        adapter.submitList(notesList)
        lifecycleScope.launch {
            noteDatabase.deleteNote(removeNote)
        }
    }

    // ...

})
Code language: Kotlin (kotlin)
You can find the final project here
Extra: Migrating Databases
Let’s say your app is using a Room database to store data.
In the next update of your app, you decide to change the database schema and add one more column (e.g., add lastUpdate column).
@Entity(tableName = "notes")
data class Note(
    @PrimaryKey
    @ColumnInfo(name = "dateAdded")
    val dateAdded: Date,
    @ColumnInfo(name = "noteText")
    val noteText: String,
    @ColumnInfo(name = "lastUpdate", defaultValue = "0")
    val lastUpdate: Int
)Code language: Kotlin (kotlin)
Before you release your update, you have to plan how to migrate those changes to the users that already using the previous version of your app.
There are two ways to do it, automatically or manually.
Migrating Automatically
Since version 2.4.0-alpha01, Room supports automated migration.
To add automated migration, go to the file that has the abstract class RoomDatabase() (e.g, NoteDatabase), and inside the @Database change:
// BEFORE

@Database(
    entities = [Note::class],
    version = 1,
    exportSchema = true
)

// AFTER

@Database(
    entities = [Note::class],
    autoMigrations = [
        AutoMigration (from = 1, to = 2)
    ],
    version = 2,
    exportSchema = true
)Code language: Kotlin (kotlin)
As you see, we added the parameter autoMigrations and we set to migrate from the database schema version 1 to version 2.
We also changed the version for the updated database schema to version = 2
And that’s it! After we run the updated app version on our device, will automatically merge the changes to the database.
Migrating Manually
After we do the changes to the entity (e.g., add the column lastUpdate), we have to change the version of the database to version = 2, and add the following Migration object inside the RoomDatabase() (e.g NoteDatabase) file and call it when you build the database using .addMigrations().
@Database(
    entities = [Note::class],
    version = 2,
    exportSchema = false
)
@TypeConverters(NoteConverters::class)
abstract class NoteDatabase : RoomDatabase() {

    // ...

    companion object {

        // ...

        private val MIGRATION_1_2: Migration = object : Migration(1, 2) {
            override fun migrate(database: SupportSQLiteDatabase) {
                // The following query will add a new column called lastUpdate to the notes database
                database.execSQL("ALTER TABLE notes ADD COLUMN lastUpdate INTEGER NOT NULL DEFAULT 0")
            }
        }

        private fun buildDatabase(context: Context): NoteDatabase {
            return Room.databaseBuilder(
                context.applicationContext,
                NoteDatabase::class.java,
                "notes_database"
            )
                .addMigrations(MIGRATION_1_2)
                .build()
        }
    }
}Code language: Kotlin (kotlin)
Extra: Debugging Database
Sometimes, when working with databases, you want to see what is stored to help debug.
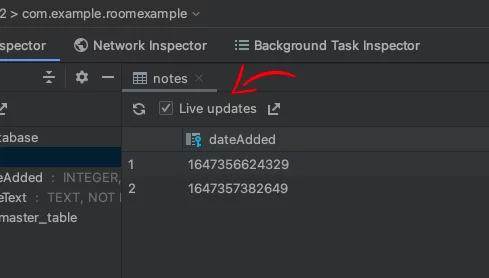
In Android Studio 4.1 and higher, there’s a feature called Database Inspector that lets you see the stored data in the database!
Go to View > Tools > App Inspection, select your app from the list, and double-click the notes database.
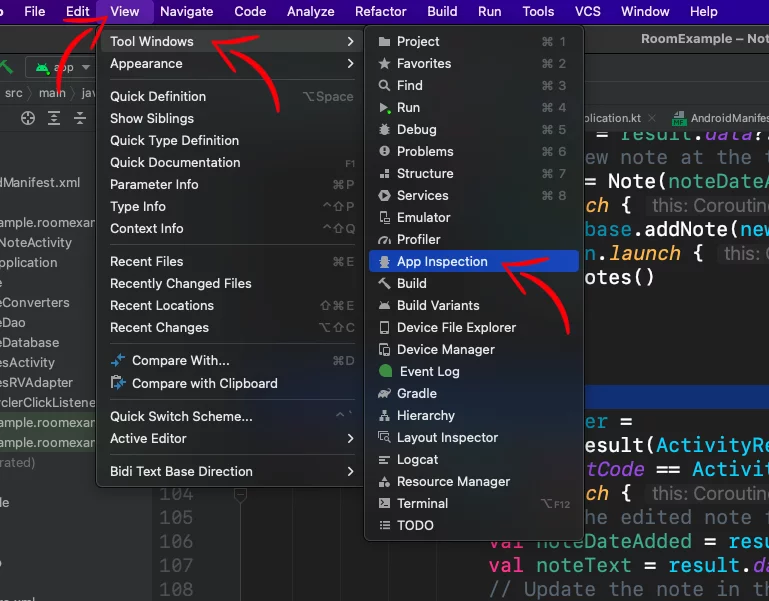

You can also see the changes live while running the app by checking the checkbox Live updates.
If you have any questions, please feel free to leave a comment below