Last updated on: February 25, 2021
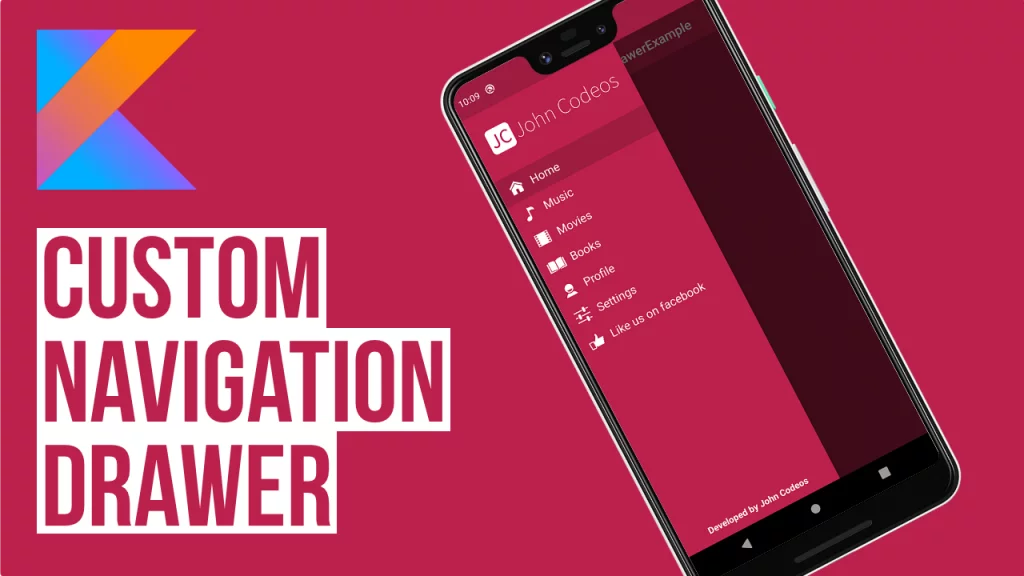
In this tutorial, I’m going to show you how to implement a custom navigation drawer in your android app
Making a Custom Navigation Drawer gives you the freedom to make the slide menu however you like, add an image as a header, or not, add social icons at the bottom of the drawer e.t.c.
Contents
Adding dependencies
Go to the app-level build.gradle and add the two following dependencies:
dependencies {

    // ...

    implementation 'com.google.android.material:material:1.2.1'
    implementation 'androidx.recyclerview:recyclerview:1.1.0'

    // ...

}
Code language: Kotlin (kotlin)
Creating the Custom Navigation Drawer Layout
Go to the MainActivity’s layout (activity_main.xml) and add the DrawerLayout with a RecyclerView
<?xml version="1.0" encoding="utf-8"?>
<androidx.drawerlayout.widget.DrawerLayout xmlns:android="http://schemas.android.com/apk/res/android"
    xmlns:app="http://schemas.android.com/apk/res-auto"
    xmlns:tools="http://schemas.android.com/tools"
    android:id="@+id/drawer_layout"
    android:layout_width="match_parent"
    android:layout_height="match_parent"
    tools:openDrawer="start">

    <!-- Main Activity -->
    <LinearLayout
        android:id="@+id/main_activity_content_id"
        android:layout_width="match_parent"
        android:layout_height="match_parent"
        android:fitsSystemWindows="true"
        android:orientation="vertical"
        tools:context=".MainActivity">

        <com.google.android.material.appbar.AppBarLayout
            android:id="@+id/activity_main_appbarlayout"
            android:layout_width="match_parent"
            android:layout_height="wrap_content"
            android:theme="@style/ThemeOverlay.AppCompat.Dark.ActionBar">

            <androidx.appcompat.widget.Toolbar
                android:id="@+id/activity_main_toolbar"
                android:layout_width="match_parent"
                android:layout_height="?attr/actionBarSize"
                android:background="?attr/colorPrimary"
                android:weightSum="1"
                app:contentInsetStart="0dp"
                app:popupTheme="@style/ThemeOverlay.AppCompat.Light">

                <TextView
                    android:id="@+id/activity_main_toolbar_title"
                    android:layout_width="wrap_content"
                    android:layout_height="wrap_content"
                    android:layout_gravity="center"
                    android:ellipsize="marquee"
                    android:fadingEdge="horizontal"
                    android:focusable="true"
                    android:focusableInTouchMode="true"
                    android:marqueeRepeatLimit="marquee_forever"
                    android:scrollHorizontally="true"
                    android:singleLine="true"
                    android:textColor="#ff4500"
                    android:textSize="30sp" />

            </androidx.appcompat.widget.Toolbar>

        </com.google.android.material.appbar.AppBarLayout>

        <RelativeLayout
            android:id="@+id/activity_main_content_id"
            android:layout_width="match_parent"
            android:layout_height="match_parent"
            android:background="@color/colorPrimaryDark"
            android:clipToPadding="false" />

    </LinearLayout>
    <!-- Main Activity End -->


    <!-- Custom Navigation Drawer Start -->
    <LinearLayout
        android:id="@+id/navigation_layout"
        android:layout_width="@dimen/navigation_drawer_width"
        android:layout_height="match_parent"
        android:layout_gravity="start"
        android:background="@color/colorPrimary"
        android:orientation="vertical">

        <ImageView
            android:id="@+id/navigation_header_img"
            android:layout_width="match_parent"
            android:layout_height="@dimen/nav_header_height"
            android:layout_marginStart="3dp"
            android:layout_marginLeft="3dp"
            android:layout_marginEnd="3dp"
            android:layout_marginRight="3dp"
            android:layout_marginBottom="5dp"
            android:padding="10dp"
            android:scaleType="fitCenter"
            android:src="@drawable/logo"
            tools:ignore="ContentDescription" />

        <androidx.recyclerview.widget.RecyclerView
            android:id="@+id/navigation_rv"
            android:layout_width="@dimen/navigation_drawer_width"
            android:layout_height="0dp"
            android:layout_weight="1"
            android:scrollbarThumbHorizontal="@null"
            android:scrollbarThumbVertical="@null">

        </androidx.recyclerview.widget.RecyclerView>


        <TextView
            android:layout_width="match_parent"
            android:layout_height="wrap_content"
            android:layout_gravity="center_horizontal"
            android:layout_margin="12sp"
            android:text="Developed by John Codeos"
            android:textAlignment="center"
            android:textColor="@android:color/white"
            android:textStyle="bold" />

    </LinearLayout>
    <!-- Custom Navigation Drawer End -->

</androidx.drawerlayout.widget.DrawerLayout>Code language: HTML, XML (xml)
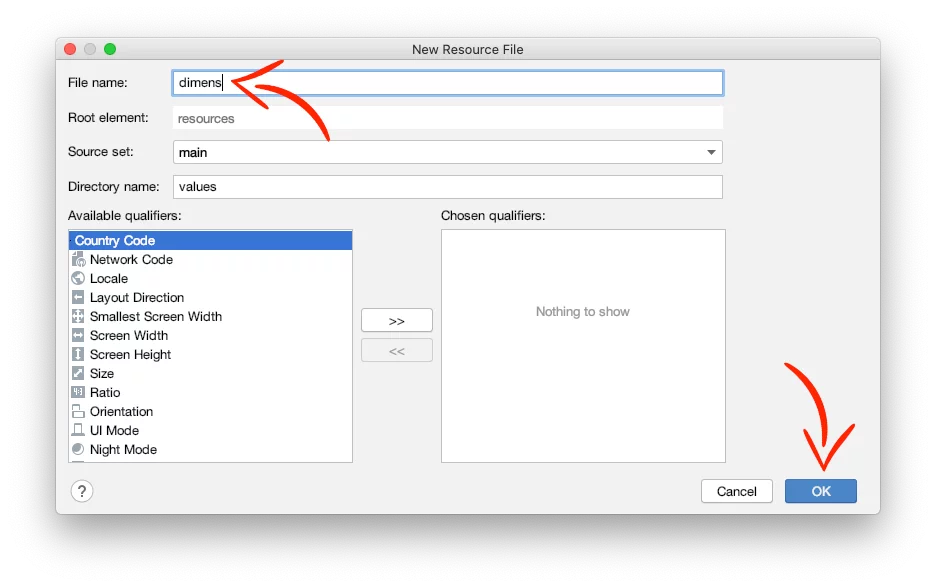
Drawer’s width changes according to the screen width of the device the app is running.
For tablets the Drawer’s width is 240dp, and 260dp for phones
Go to res > press right-click on values folder > New > Values Resource File

For phones, give dimens as a name and press OK
And paste inside:
<?xml version="1.0" encoding="utf-8"?>
<resources>
<dimen name="nav_header_height">100dp</dimen>
<!-- Per the design guidelines, navigation drawers should be between 240dp and 320dp:
https://developer.android.com/design/patterns/navigation-drawer.html -->
<dimen name="navigation_drawer_width">260dp</dimen>
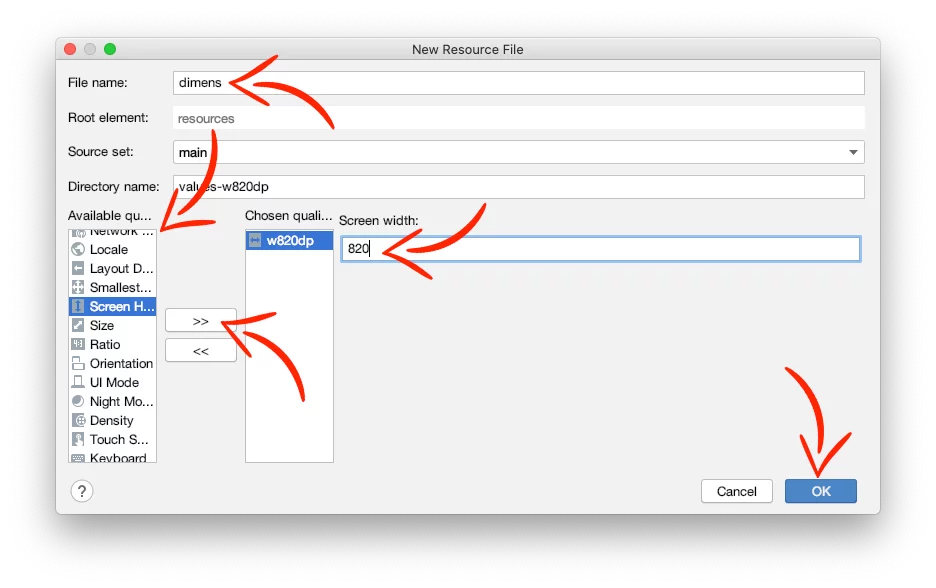
</resources>Code language: HTML, XML (xml)For tablets, give the name dimens, select Screen Width from the list, press >> and give the value 820
And paste inside:
<?xml version="1.0" encoding="utf-8"?>
<resources>
    <!-- Per the design guidelines, navigation drawers should be between 240dp and 320dp:
     https://developer.android.com/design/patterns/navigation-drawer.html -->
    <dimen name="navigation_drawer_width">240dp</dimen>
</resources>Code language: HTML, XML (xml)
Create a new XML file (Right-click on layout folder > New > Values Resource File) for RecyclerView’s row layout (row_nav_drawer.xml)
<?xml version="1.0" encoding="utf-8"?>
<LinearLayout xmlns:android="http://schemas.android.com/apk/res/android"
    xmlns:tools="http://schemas.android.com/tools"
    android:layout_width="match_parent"
    android:layout_height="44dp"
    android:orientation="horizontal"
    android:padding="3sp"
    android:paddingStart="10dp"
    android:paddingEnd="0dp">

    <ImageView
        android:id="@+id/navigation_icon"
        android:layout_width="35sp"
        android:layout_height="35sp"
        android:layout_gravity="center_vertical"
        android:scaleType="centerInside"
        android:src="@android:drawable/btn_star_big_on"
        tools:ignore="ContentDescription" />

    <TextView
        android:id="@+id/navigation_title"
        android:layout_width="match_parent"
        android:layout_height="35sp"
        android:layout_gravity="center_vertical"
        android:layout_marginStart="7sp"
        android:gravity="center_vertical"
        android:text="Custom Navigation Drawer Row"
        android:textSize="18sp" />

</LinearLayout>Code language: HTML, XML (xml)
Now, we have to create a new theme.
In this theme, we set the color of the Drawer Toggle (hamburger menu icon)

Go to res > values > styles.xml and paste the following theme inside:
<resources>

    <!-- Other themes -->

    <style name="AppTheme.NoActionBar">
        <item name="windowActionBar">false</item>
        <item name="windowNoTitle">true</item>
        <item name="android:actionMenuTextColor">@android:color/white</item>
        <item name="drawerArrowStyle">@style/DrawerArrowStyle</item>
    </style>

    <style name="DrawerArrowStyle" parent="@style/Widget.AppCompat.DrawerArrowToggle">
        <item name="spinBars">true</item>
        <item name="color">@android:color/white</item>
    </style>

</resources>Code language: HTML, XML (xml)
Replace the <application> theme, in the AndroidManifest.xml (manifests > AndroidManifest.xml), with the new theme
<?xml version="1.0" encoding="utf-8"?>
<manifest xmlns:android="http://schemas.android.com/apk/res/android"
    package="com.example.customnavigationdrawerexample">

    <application
        android:allowBackup="true"
        android:icon="@mipmap/ic_launcher"
        android:label="@string/app_name"
        android:roundIcon="@mipmap/ic_launcher_round"
        android:supportsRtl="true"
        android:theme="@style/AppTheme.NoActionBar">
        <activity android:name=".MainActivity">
            <intent-filter>
                <action android:name="android.intent.action.MAIN" />

                <category android:name="android.intent.category.LAUNCHER" />
            </intent-filter>
        </activity>
    </application>

</manifest>Code language: HTML, XML (xml)
Creating the RecyclerView’s Listener
Create a new Kotlin file and name it RecyclerTouchListerner
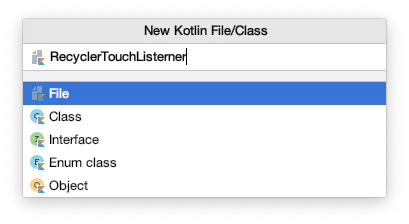
We’re going to use this class to detect which row of the RecyclerView is selected.
class RecyclerTouchListener internal constructor(
    context: Context,
    private val clickListener: ClickListener?
) : RecyclerView.OnItemTouchListener {

    private val gestureDetector: GestureDetector =
        GestureDetector(context, object : GestureDetector.SimpleOnGestureListener() {
            override fun onSingleTapUp(e: MotionEvent): Boolean {
                return true
            }
        })

    override fun onInterceptTouchEvent(rv: RecyclerView, e: MotionEvent): Boolean {
        val child = rv.findChildViewUnder(e.x, e.y)
        if (child != null && clickListener != null && gestureDetector.onTouchEvent(e)) {
            clickListener.onClick(child, rv.getChildAdapterPosition(child))
        }
        return false
    }

    override fun onTouchEvent(rv: RecyclerView, e: MotionEvent) {

    }

    override fun onRequestDisallowInterceptTouchEvent(disallowIntercept: Boolean) {

    }

}

internal interface ClickListener {
    fun onClick(view: View, position: Int)
}Code language: Kotlin (kotlin)
Creating Custom Drawer’s Model
Create a new Kotlin file, give that name NavigationItemModel.kt and paste inside:

data class NavigationItemModel(var icon: Int, var title: String)Code language: Kotlin (kotlin)Creating Drawer’s RecyclerView Adapter
Create a new Kotlin file with a name NavigationRVAdapter.kt and parameters an ArrayList of the menu items and the current position of pressed item
class NavigationRVAdapter(private var items: ArrayList<NavigationItemModel>, private var currentPos: Int) :RecyclerView.Adapter<NavigationRVAdapter.NavigationItemViewHolder>() {

    // ...

}Code language: Kotlin (kotlin)
Declare context at the beginning of the class
Create the ViewHolder
Set the number of items for the ReyclerView
And pass the data to the views (navigation icon and title)
class NavigationRVAdapter(private var items: ArrayList<NavigationItemModel>, private var currentPos: Int) :RecyclerView.Adapter<NavigationRVAdapter.NavigationItemViewHolder>() {

    private lateinit var context: Context

    class NavigationItemViewHolder(itemView: View) : RecyclerView.ViewHolder(itemView)

    override fun onCreateViewHolder(parent: ViewGroup, viewType: Int): NavigationItemViewHolder {
        context = parent.context
        val navItem = LayoutInflater.from(parent.context).inflate(R.layout.row_nav_drawer, parent, false)
        return NavigationItemViewHolder(navItem)
    }

    override fun getItemCount(): Int {
        return items.count()
    }

    override fun onBindViewHolder(holder: NavigationItemViewHolder, position: Int) {
        // To highlight the selected item, show different background color
        if (position == currentPos) {
            holder.itemView.setBackgroundColor(ContextCompat.getColor(context, R.color.colorPrimaryDark))
        } else {
            holder.itemView.setBackgroundColor(ContextCompat.getColor(context, android.R.color.transparent))
        }
        holder.itemView.navigation_icon.setColorFilter(Color.WHITE, PorterDuff.Mode.SRC_ATOP)
        holder.itemView.navigation_title.setTextColor(Color.WHITE)
        //val font = ResourcesCompat.getFont(context, R.font.mycustomfont)
        //holder.itemView.navigation_text.typeface = font
        //holder.itemView.navigation_text.setTextSize(TypedValue.COMPLEX_UNIT_SP, 20.toFloat())

        holder.itemView.navigation_title.text = items[position].title

        holder.itemView.navigation_icon.setImageResource(items[position].icon)
    }

}Code language: Kotlin (kotlin)
Setting up the Drawer
In the MainActivity.kt, declare the DrawerLayout, the RecyclerView’s adapter and create an ArrayList of the menu items with the NavigationItemModel we made earlier
class MainActivity : AppCompatActivity() {

    lateinit var drawerLayout: DrawerLayout
    private lateinit var adapter: NavigationRVAdapter

    private var items = arrayListOf(
        NavigationItemModel(R.drawable.ic_home, "Home"),
        NavigationItemModel(R.drawable.ic_music, "Music"),
        NavigationItemModel(R.drawable.ic_movie, "Movies"),
        NavigationItemModel(R.drawable.ic_book, "Books"),
        NavigationItemModel(R.drawable.ic_profile, "Profile"),
        NavigationItemModel(R.drawable.ic_settings, "Settings"),
        NavigationItemModel(R.drawable.ic_social, "Like us on facebook")
    )

    override fun onCreate(savedInstanceState: Bundle?) {
        super.onCreate(savedInstanceState)
        setContentView(R.layout.activity_main)

        // ...

    }

}Code language: Kotlin (kotlin)
Set the toolbar, the recycler layout, and add the listener
class MainActivity : AppCompatActivity() {

    // ...

    override fun onCreate(savedInstanceState: Bundle?) {
        super.onCreate(savedInstanceState)
        setContentView(R.layout.activity_main)

        drawerLayout = findViewById(R.id.drawer_layout)

        // Set the toolbar
        setSupportActionBar(activity_main_toolbar)

        // Setup Recyclerview's Layout
        navigation_rv.layoutManager = LinearLayoutManager(this)
        navigation_rv.setHasFixedSize(true)

        // Add Item Touch Listener
        navigation_rv.addOnItemTouchListener(RecyclerTouchListener(this, object : ClickListener {
            override fun onClick(view: View, position: Int) {
                when (position) {
                    0 -> {
                        // # Home Fragment
                        val homeFragment = DemoFragment()
                        supportFragmentManager.beginTransaction()
                            .replace(R.id.activity_main_content_id, homeFragment).commit()
                    }
                    1 -> {
                        // # Music Fragment
                        val musicFragment = DemoFragment()
                        supportFragmentManager.beginTransaction()
                            .replace(R.id.activity_main_content_id, musicFragment).commit()
                    }
                    2 -> {
                        // # Movies Fragment
                        val moviesFragment = DemoFragment()
                        supportFragmentManager.beginTransaction()
                            .replace(R.id.activity_main_content_id, moviesFragment).commit()
                    }
                    3 -> {
                        // # Books Fragment
                        val booksFragment = DemoFragment()
                        supportFragmentManager.beginTransaction()
                            .replace(R.id.activity_main_content_id, booksFragment).commit()
                    }
                    4 -> {
                        // # Profile Activity
                        val intent = Intent(this@MainActivity, DemoActivity::class.java)
                        startActivity(intent)
                    }
                    5 -> {
                        // # Settings Fragment
                        val settingsFragment = DemoFragment()
                        supportFragmentManager.beginTransaction()
                            .replace(R.id.activity_main_content_id, settingsFragment).commit()
                    }
                    6 -> {
                        // # Open URL in browser
                        val uri: Uri = Uri.parse("https://johnc.co/fb")
                        val intent = Intent(Intent.ACTION_VIEW, uri)
                        startActivity(intent)
                    }
                }
                // Don't highlight the 'Profile' and 'Like us on Facebook' item row
                if (position != 6 && position != 4) {
                    updateAdapter(position)
                }
                Handler().postDelayed({
                    drawerLayout.closeDrawer(GravityCompat.START)
                }, 200)
            }
        }))
    }

    private fun updateAdapter(highlightItemPos: Int) {
        adapter = NavigationRVAdapter(items, highlightItemPos)
        navigation_rv.adapter = adapter
        adapter.notifyDataSetChanged()
    }

}


Code language: Kotlin (kotlin)
If you notice, after we select an item from the menu, we close the Drawer after 200 milliseconds. This delay helps to have a smooth close animation if the Fragment or Activity you chose loads a lot of data.
Now, add the default menu item. This menu item will be selected the first you’ll see when the app starts.
In this example, the default menu item is the ‘Home’ Fragment. So, we highlight the item, which is in position 0, and we replace the Activity’s content layout with the fragment.
class MainActivity : AppCompatActivity() {

    // ...

    override fun onCreate(savedInstanceState: Bundle?) {
        super.onCreate(savedInstanceState)
        setContentView(R.layout.activity_main)

        // ...

        // Update Adapter with item data and highlight the default menu item ('Home' Fragment)
        updateAdapter(0)

        // Set 'Home' as the default fragment when the app starts
        val homeFragment = DemoFragment()
        supportFragmentManager.beginTransaction()
            .replace(R.id.activity_main_content_id, homeFragment).commit()

        // ...

    }
}Code language: Kotlin (kotlin)
If your Fragment or Activity uses the keyboard, add the following code to close the keyboard when you open/close the Drawer
class MainActivity : AppCompatActivity() {

    // ...

    override fun onCreate(savedInstanceState: Bundle?) {
        super.onCreate(savedInstanceState)
        setContentView(R.layout.activity_main)

        // ...

        // Close the soft keyboard when you open or close the Drawer
        val toggle: ActionBarDrawerToggle = object : ActionBarDrawerToggle(this, drawerLayout, activity_main_toolbar, R.string.navigation_drawer_open, R.string.navigation_drawer_close) {
            override fun onDrawerClosed(drawerView: View) {
                // Triggered once the drawer closes
                super.onDrawerClosed(drawerView)
                try {
                    val inputMethodManager =
                        getSystemService(Context.INPUT_METHOD_SERVICE) as InputMethodManager
                    inputMethodManager.hideSoftInputFromWindow(currentFocus?.windowToken, 0)
                } catch (e: Exception) {
                    e.stackTrace
                }
            }

            override fun onDrawerOpened(drawerView: View) {
                // Triggered once the drawer opens
                super.onDrawerOpened(drawerView)
                try {
                    val inputMethodManager =
                        getSystemService(Context.INPUT_METHOD_SERVICE) as InputMethodManager
                    inputMethodManager.hideSoftInputFromWindow(currentFocus!!.windowToken, 0)
                } catch (e: Exception) {
                    e.stackTrace
                }
            }
        }
        drawerLayout.addDrawerListener(toggle)

        toggle.syncState()

        // ...

    }
}Code language: Kotlin (kotlin)
And add the following lines inside the strings.xml (res > values > strings.xml)
<resources>
    <!-- Other strings -->

    <string name="navigation_drawer_open">Open navigation drawer</string>
    <string name="navigation_drawer_close">Close navigation drawer</string>

</resources>Code language: HTML, XML (xml)
Back to the MainActivity, add the following lines to set a header image and background on the Drawer
class MainActivity : AppCompatActivity() {

    // ...

    override fun onCreate(savedInstanceState: Bundle?) {
        super.onCreate(savedInstanceState)
        setContentView(R.layout.activity_main)

        // ...

        // Set Header Image
        navigation_header_img.setImageResource(R.drawable.logo)

        // Set background of Drawer
        navigation_layout.setBackgroundColor(ContextCompat.getColor(this, R.color.colorPrimary))
    }

}Code language: Kotlin (kotlin)
Lastly, when you press the back button on the device, check if the Drawer is open or not, and the number of fragments in your Back Stack
class MainActivity : AppCompatActivity() {

    // ...

    override fun onCreate(savedInstanceState: Bundle?) {
        super.onCreate(savedInstanceState)
        setContentView(R.layout.activity_main)

        // ...

    }

    // ...

    override fun onBackPressed() {
        if (drawerLayout.isDrawerOpen(GravityCompat.START)) {
            drawerLayout.closeDrawer(GravityCompat.START)
        } else {
            // Checking for fragment count on back stack
            if (supportFragmentManager.backStackEntryCount > 0) {
                // Go to the previous fragment
                supportFragmentManager.popBackStack()
            } else {
                // Exit the app
                super.onBackPressed()
            }
        }
    }

}Code language: Kotlin (kotlin)
You can find the final project here
If you have any questions, please feel free to leave a comment below