
Last updated on: May 27, 2023
In this tutorial, I’m going to show you how to create a carousel (+ zoom-in effect) using the newer ViewPager library the ViewPager2.
Contents
Adding library
Go to your app-level gradle.build file, and add the following dependency:
dependencies {
    // ...

    implementation 'androidx.viewpager2:viewpager2:1.0.0'

   // ...
}Code language: Kotlin (kotlin)
Adding Carousel in XML
In the main_activity.xml file, we add a ViewPager2 and set its parent view to have android:clipChildren="false" and android:clipToPadding="false" so that we can see the left and right carousel items outside the bounds of the viewpager.
<?xml version="1.0" encoding="utf-8"?>
<androidx.constraintlayout.widget.ConstraintLayout xmlns:android="http://schemas.android.com/apk/res/android"
    <!-- ... -->
    android:clipChildren="false"
    android:clipToPadding="false">

    <!-- Toolbar...-->

    <androidx.viewpager2.widget.ViewPager2
        android:id="@+id/view_pager"
        android:layout_width="280dp"
        android:layout_height="260dp"
        <!--Layout Constraints...-->
     />


</androidx.constraintlayout.widget.ConstraintLayout>Code language: Swift (swift)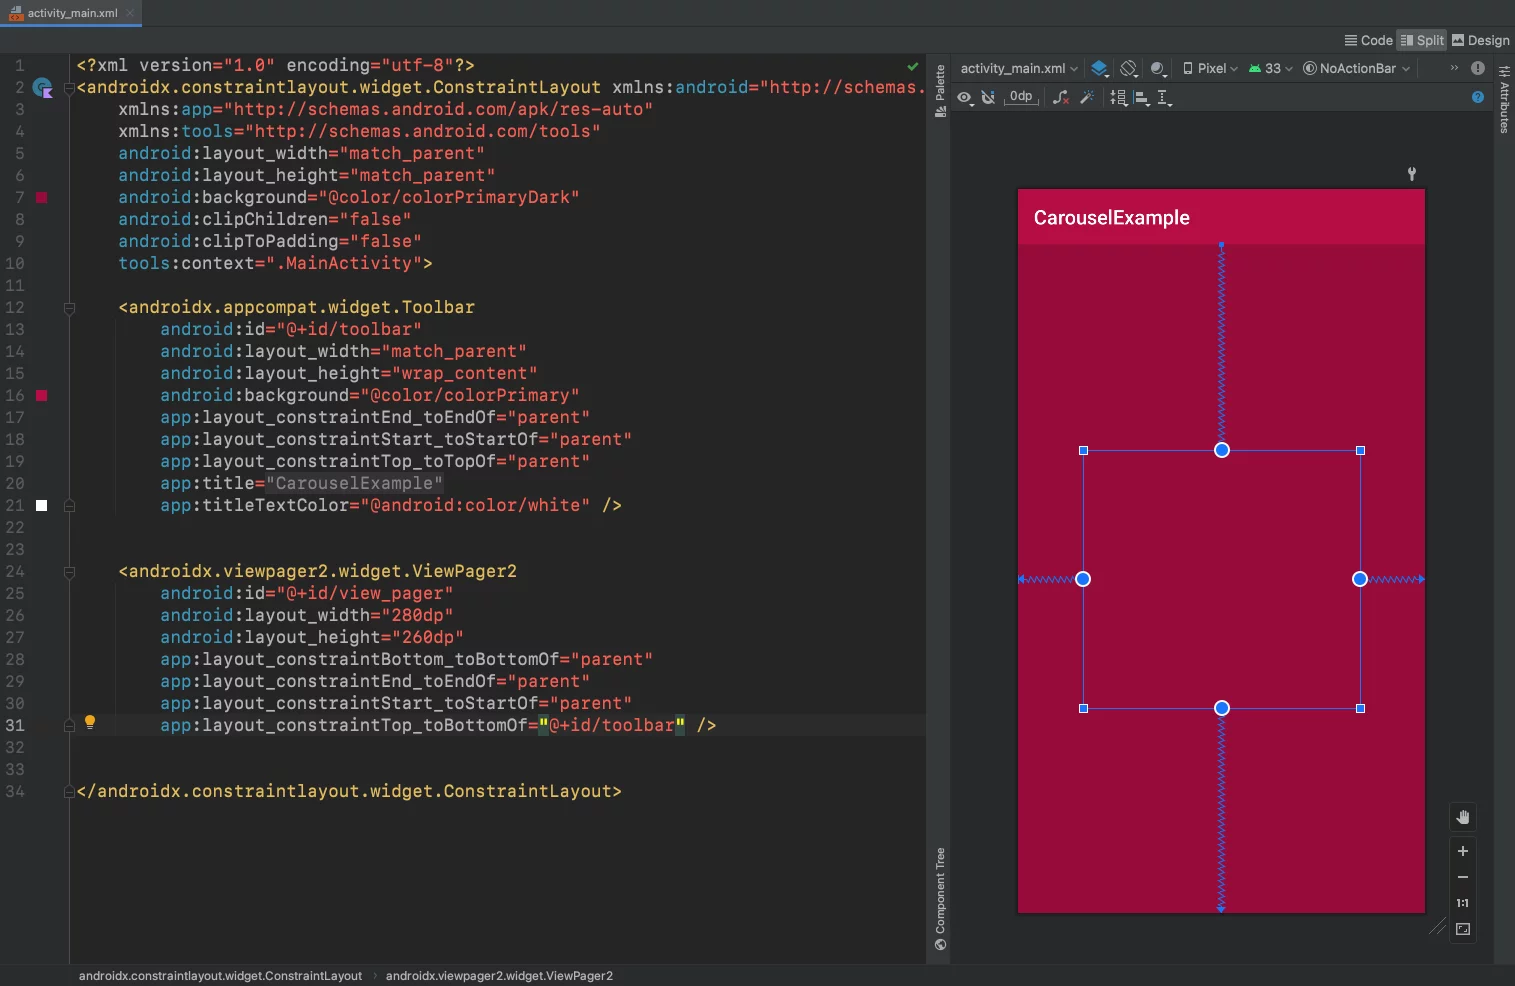
Creating Carousel Item in XML
Now, it’s time to create the carousel item.
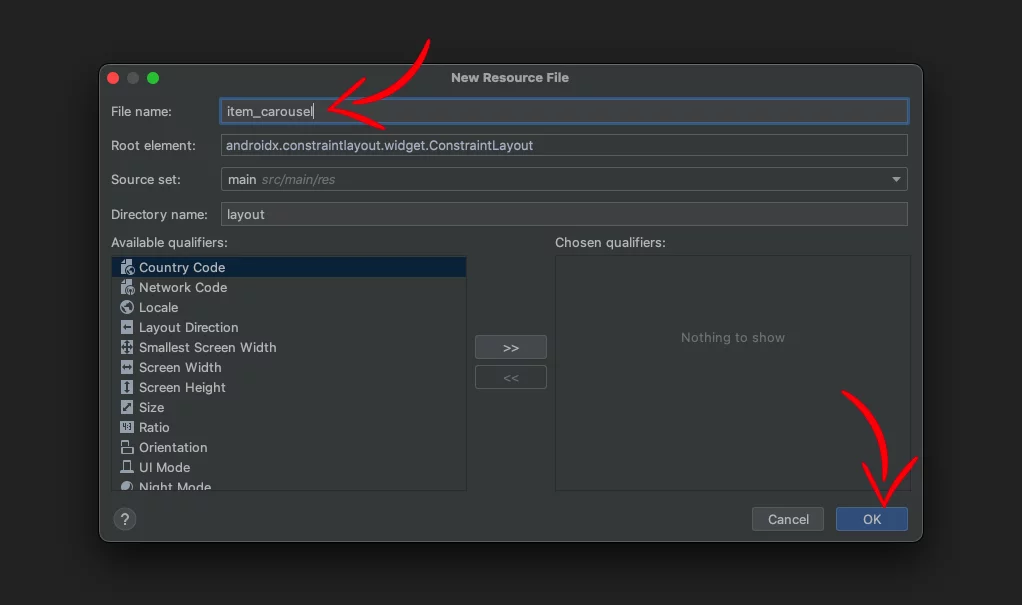
We create a new Layout Resource File by going right-click on the layout folder > New > Layout Resource File
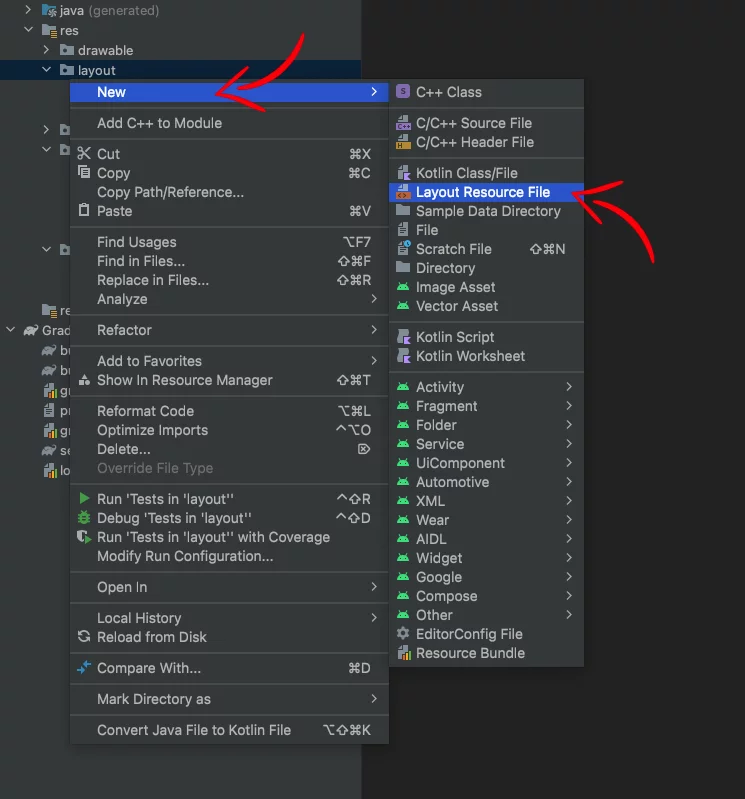
We give the name item_carousel and press OK
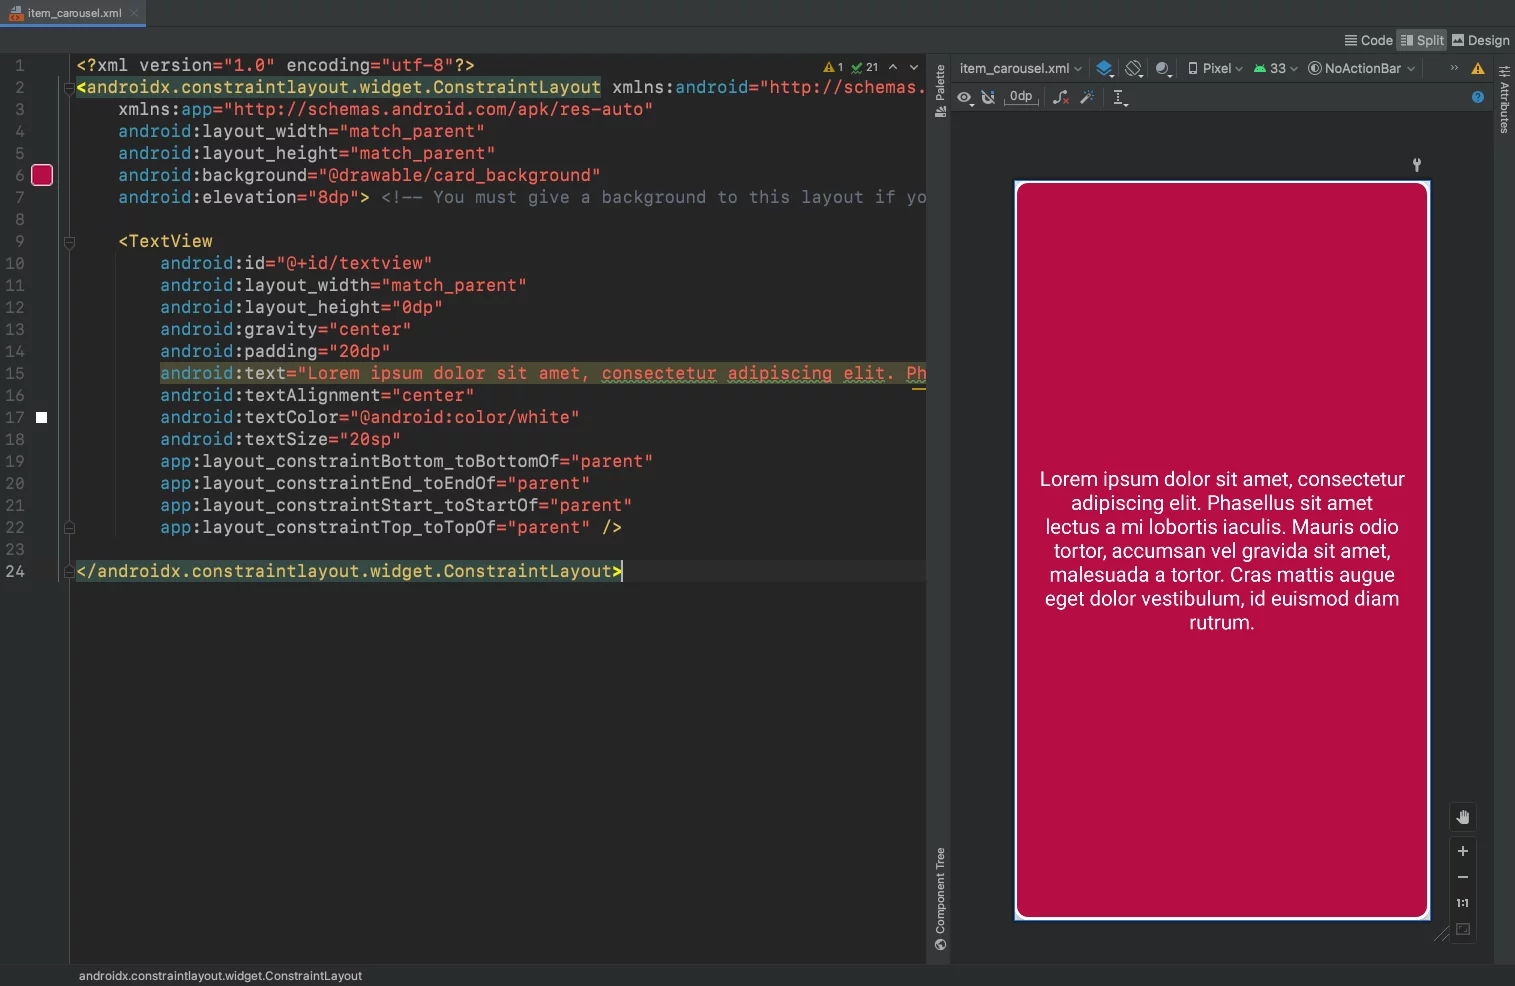
And we add the following code inside:
<?xml version="1.0" encoding="utf-8"?>
<androidx.constraintlayout.widget.ConstraintLayout xmlns:android="http://schemas.android.com/apk/res/android"
    xmlns:app="http://schemas.android.com/apk/res-auto"
    android:layout_width="match_parent"
    android:layout_height="match_parent"
    android:background="@drawable/card_background"
    android:elevation="8dp"> <!-- You must give a background to this layout if you want the shadow to work -->

    <TextView
        android:id="@+id/textview"
        android:layout_width="match_parent"
        android:layout_height="0dp"
        android:gravity="center"
        android:padding="20dp"
        android:text="Lorem ipsum dolor sit amet, consectetur adipiscing elit. Phasellus sit amet lectus a mi lobortis iaculis. Mauris odio tortor, accumsan vel gravida sit amet, malesuada a tortor. Cras mattis augue eget dolor vestibulum, id euismod diam rutrum."
        android:textAlignment="center"
        android:textColor="@android:color/white"
        android:textSize="20sp"
        app:layout_constraintBottom_toBottomOf="parent"
        app:layout_constraintEnd_toEndOf="parent"
        app:layout_constraintStart_toStartOf="parent"
        app:layout_constraintTop_toTopOf="parent" />

</androidx.constraintlayout.widget.ConstraintLayout>Code language: HTML, XML (xml)
Note: We use
match_parentforlayout_widthandlayout_heightbecauseViewPager2doesn’t allow the viewpager items to have a certain width and height. That’s why we set a width and height to theViewPager2at the main_activity.xml
Creating the Adapter
ViewPager2 is using a RecyclerView adapter, so it’s the same as when we use one in a RecyclerView.
Because of that, we’re not going to explain what we have in the adapter. We’re only going to create the file and paste the code inside.
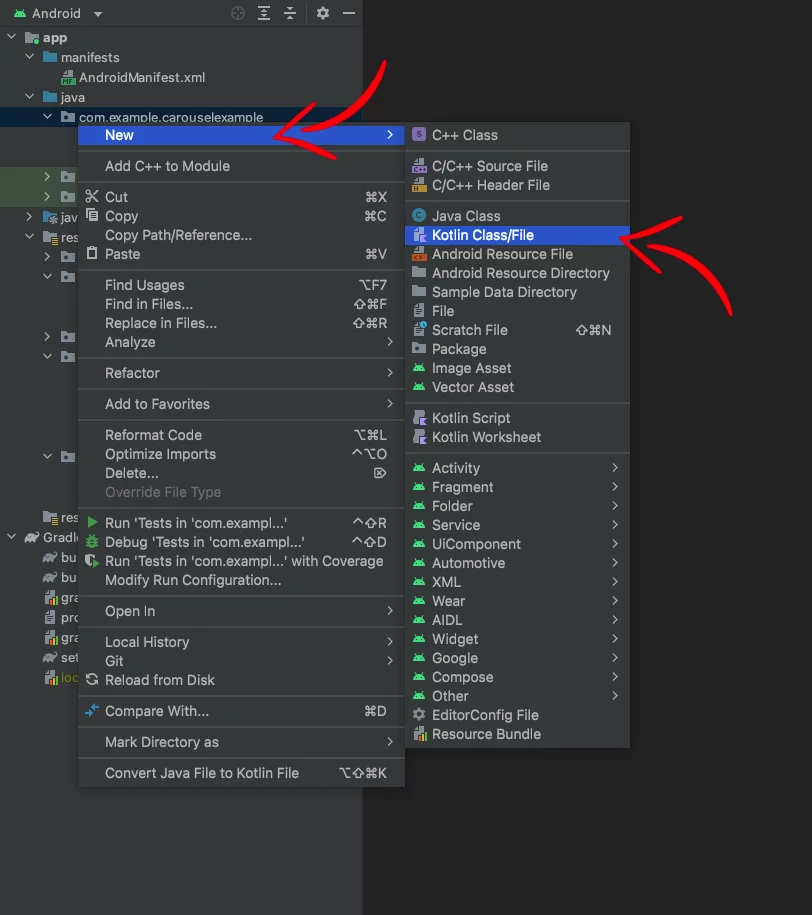
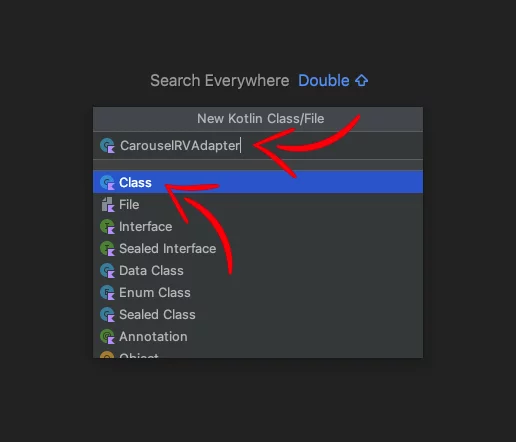
We right-click on the project folder > New > Kotlin Class/File, we select Class and we give the name CarouselRVAdapter
And inside the file we paste:
class CarouselRVAdapter(private val carouselDataList: ArrayList<String>) :
    RecyclerView.Adapter<CarouselRVAdapter.CarouselItemViewHolder>() {

    class CarouselItemViewHolder(view: View) : RecyclerView.ViewHolder(view)

    override fun onCreateViewHolder(parent: ViewGroup, viewType: Int): CarouselItemViewHolder {
        val viewHolder = LayoutInflater.from(parent.context).inflate(R.layout.item_carousel, parent, false)
        return CarouselItemViewHolder(viewHolder)
    }

    override fun onBindViewHolder(holder: CarouselItemViewHolder, position: Int) {
        val textView = holder.itemView.findViewById<TextView>(R.id.textview)
        textView.text = carouselDataList[position]
    }

    override fun getItemCount(): Int {
        return carouselDataList.size
    }

}Code language: Kotlin (kotlin)
Creating Carousel
Now, we go to the MainActivity.kt file, and apply these steps to the viewPager:
1) Don’t clip items left and right.
2) Don’t clip the padding to allow full width.
3) Render the left and right items.
4) Remove the effect when you’re scrolling to the edge.
class MainActivity : AppCompatActivity() {

    override fun onCreate(savedInstanceState: Bundle?) {
        super.onCreate(savedInstanceState)
        setContentView(R.layout.activity_main)

        val viewPager = findViewById<ViewPager2>(R.id.view_pager)

        viewPager.apply {
            clipChildren = false  // No clipping the left and right items
            clipToPadding = false  // Show the viewpager in full width without clipping the padding
            offscreenPageLimit = 3  // Render the left and right items
            (getChildAt(0) as RecyclerView).overScrollMode =
                RecyclerView.OVER_SCROLL_NEVER // Remove the scroll effect
        }

        // ...

    }
}Code language: Kotlin (kotlin)
After that, we create and pass the data to the adapter
class MainActivity : AppCompatActivity() {

    override fun onCreate(savedInstanceState: Bundle?) {
        super.onCreate(savedInstanceState)
        setContentView(R.layout.activity_main)

        val viewPager = findViewById<ViewPager2>(R.id.view_pager)

        // ...

        val demoData = arrayListOf(
            "Curabitur sit amet rutrum enim, sit amet commodo urna. Nullam nec nisl eget purus vulputate ultrices nec sit amet est. Sed sodales maximus risus sit amet placerat.",
            "Lorem ipsum dolor sit amet, consectetur adipiscing elit. Phasellus sit amet lectus a mi lobortis iaculis. Mauris odio tortor, accumsan vel gravida sit amet, malesuada a tortor.",
            "Praesent efficitur eleifend eros quis elementum. Vivamus eget nunc ante. Sed sed sodales libero. Nam ipsum lorem, consequat at ipsum sit amet, tempor vulputate nibh.",
            "Aliquam sodales imperdiet augue at consectetur. Suspendisse dui mauris, tincidunt non auctor quis, facilisis et tellus.",
            "Ut non tincidunt neque, et sodales ligula. Quisque interdum in dui sit amet sagittis. Curabitur erat magna, maximus quis libero quis, dapibus eleifend orci."
        )

        viewPager.adapter = CarouselRVAdapter(demoData)

        // ...

    }
}Code language: Kotlin (kotlin)
Adding Spacing
We use the MarginPageTransformer() class to add some space between the carousel items.
In this example we use 40dp.
Note: Because MarginPageTransformer uses pixels as a input value, we put the value in dp and multiply it by the display’s density to convert it into pixels.
class MainActivity : AppCompatActivity() {

    override fun onCreate(savedInstanceState: Bundle?) {
        super.onCreate(savedInstanceState)
        setContentView(R.layout.activity_main)

        val viewPager = findViewById<ViewPager2>(R.id.view_pager)

        //...

        val compositePageTransformer = CompositePageTransformer()
        compositePageTransformer.addTransformer(MarginPageTransformer((40 * Resources.getSystem().displayMetrics.density).toInt()))
        viewPager.setPageTransformer(compositePageTransformer)
    }
}Code language: Kotlin (kotlin)
Adding Scaling (Zoom-in) Effect
If you want the carousel item that you see in the center to zoom in, or scale up, add this transformer before setting the PageTransformer:
class MainActivity : AppCompatActivity() {

    override fun onCreate(savedInstanceState: Bundle?) {
        super.onCreate(savedInstanceState)
        setContentView(R.layout.activity_main)

        val viewPager = findViewById<ViewPager2>(R.id.view_pager)

        // ...

        val compositePageTransformer = CompositePageTransformer()
        compositePageTransformer.addTransformer(MarginPageTransformer((40 * Resources.getSystem().displayMetrics.density).toInt()))
        compositePageTransformer.addTransformer { page, position ->
            val r = 1 - abs(position)
            page.scaleY = (0.80f + r * 0.20f)
        }
        viewPager.setPageTransformer(compositePageTransformer)
    }
}Code language: Kotlin (kotlin)
You can find the final project here
If you have any questions, please feel free to leave a comment below