
Last updated on: May 27, 2023
Today I’m going to show you how to change the name of the Xcode project (even if you’re using tests, and Cocoapods), and also how to change the Bundle ID of your app.
Contents
Change the Project Name
Open your Xcode project, choose your project from the left side and then on the right side, under the Identity and Type, change the Name to your new project name and press Enter.

On the new window, press Rename.

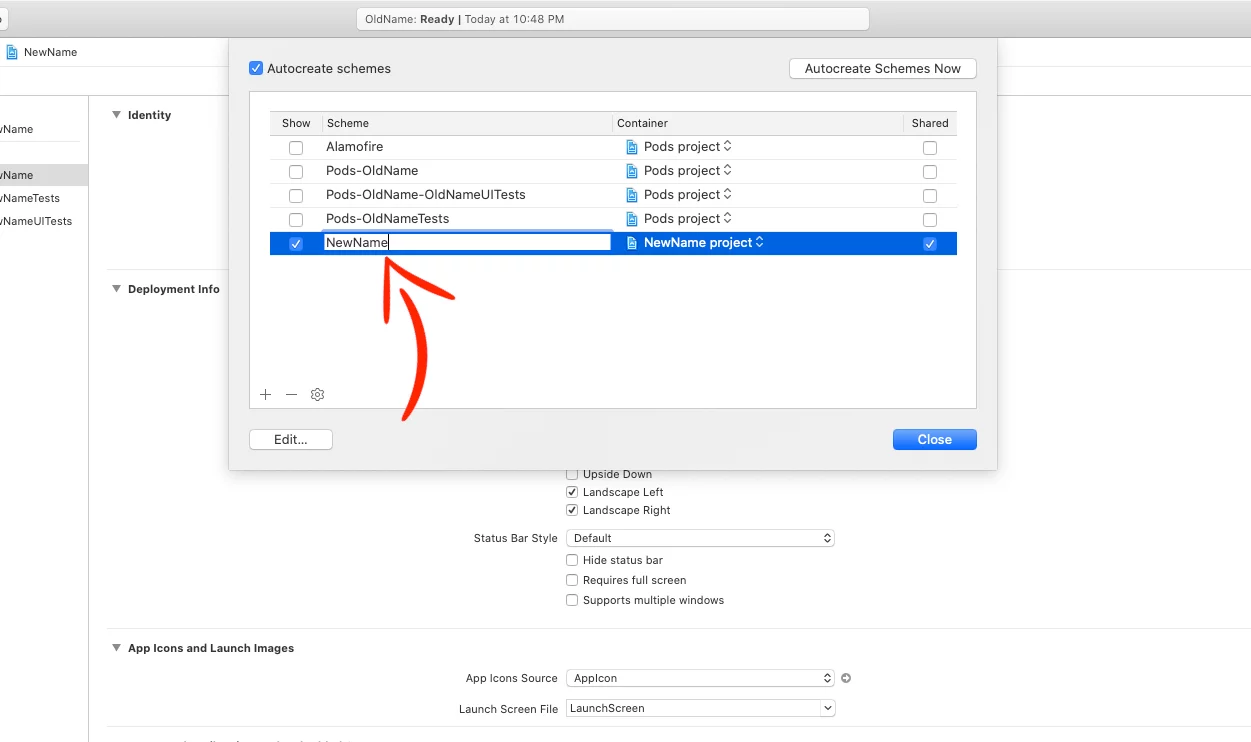
Now press on your project’s scheme (Next to simulator’s stop button) and choose Manage Schemes…

On the new window, press once on your project’s scheme to choose it and then press again to change the name. Don’t forget to press Enter after you do the change.
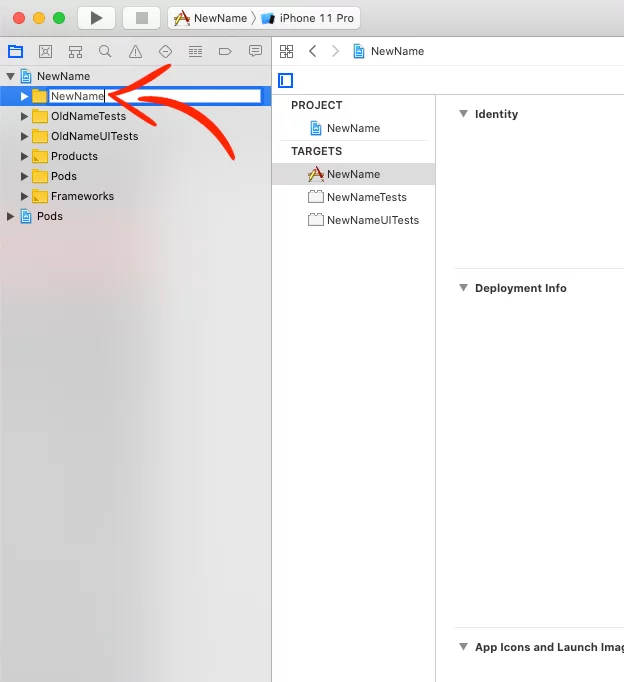
After you close the window, go to your project’s folder. Press once to choose the folder and then press again to rename it and press Enter.
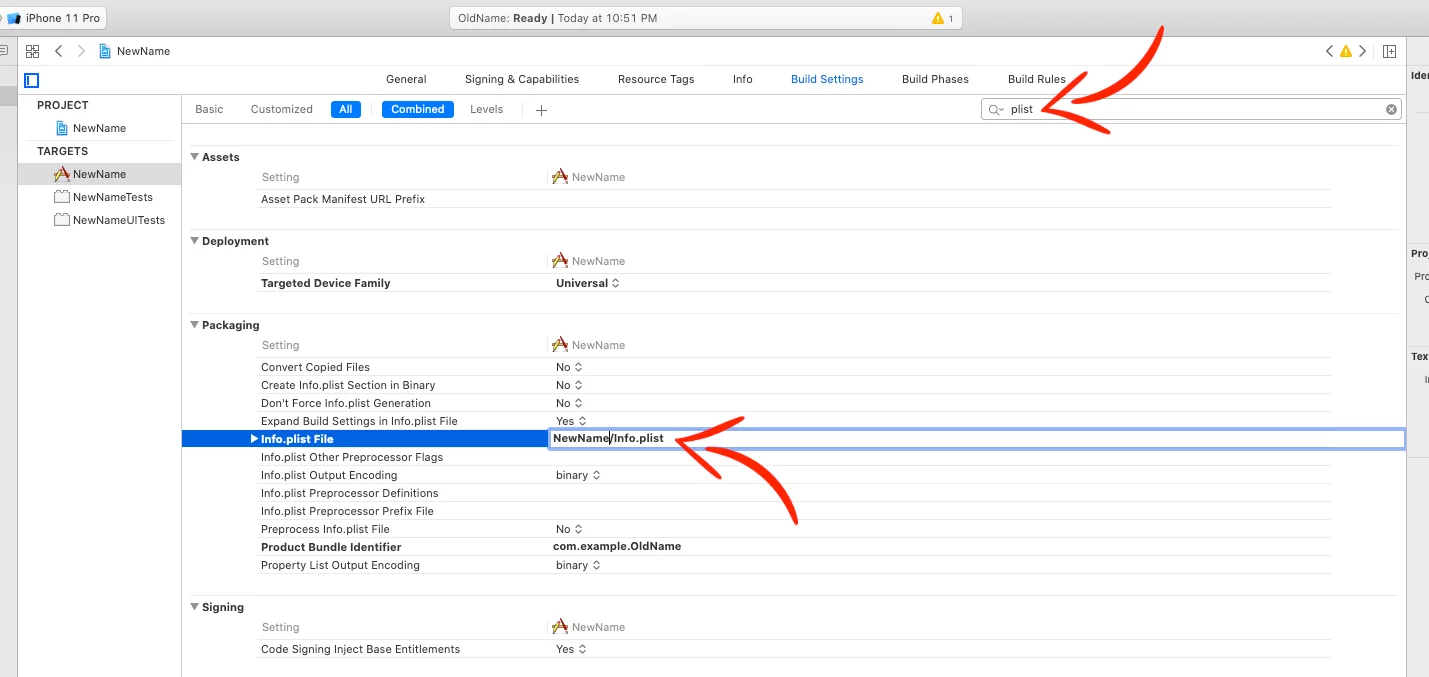
Choose your project on the left side, as you did at the beginning of this article. Choose your app from the TARGETS, go to Build Settings and search the word plist.
Under the Packaging section, you’ll find the Info.plist File. Change the path to the new project name.
Close the Xcode project and rename your folder to the new name.

For Tests
If you’re using testing, you need to make some additional steps.
Open your Xcode project and go to your app’s test folders on the left side. Press once to choose the folder and then press again to rename it.

Under the MyNewProjectNameTests choose the .swift file and rename the @testable import to the new project name. Then, right click on the name of the class > Refactor > Rename… and change it.

Do the same for MyNewProjectNameUITests.

Additional Steps For Cocoapods
If you’re using Cocoapods in your project, do these steps too.
After you did all the changes and renamed the folder of your project, open the folder and delete the following:
- MyOldProjectName.workspace
- Podfile.lock
- Pods

After you done that, open the Podfile file with a text editor (like VSCode), rename all the target names and save it.

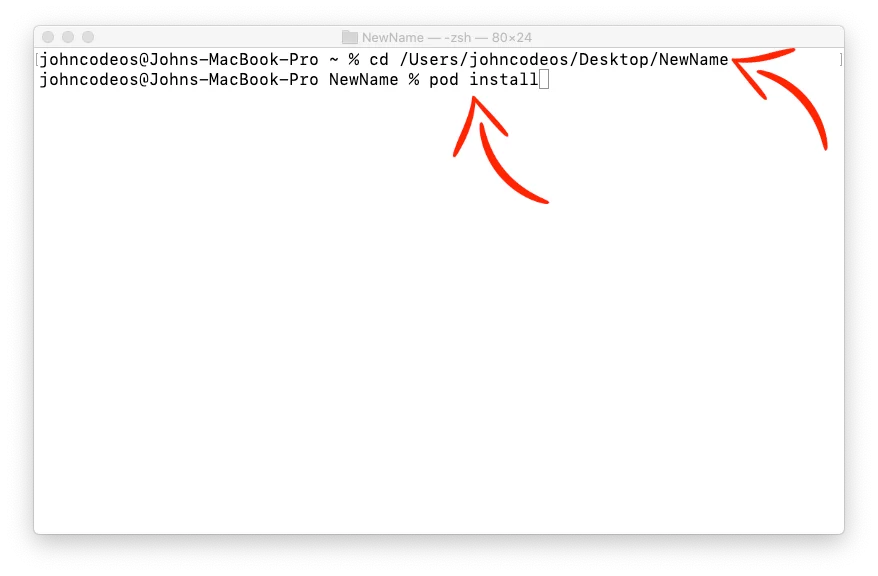
Open your terminal, cd to your project’s path and run pod install and you’re good to go!!
Change the Bundle ID
Choose your project from the left side, then your app target under TARGETS, select the General tab and rename the Bundle Identifier.

That’s it!!
If you have any questions, please feel free to leave a comment below