
Last updated on: May 27, 2023
In this tutorial, I will show you how to filter data in a List while typing in a TextField (SearchView) and passing the selected item’s data to a new view (Details Screen).
Contents
Creating the Top Bar
Go to your compose activity (e.g., MainActivity.kt), and outside the class, add the following composable function to create a Top Bar
@Composable
fun TopBar() {
    TopAppBar(
        title = { Text(text = stringResource(R.string.app_name), fontSize = 18.sp) },
        backgroundColor = colorResource(id = R.color.colorPrimary),
        contentColor = Color.White
    )
}

@Preview(showBackground = true)
@Composable
fun TopBarPreview() {
    TopBar()
}Code language: Kotlin (kotlin)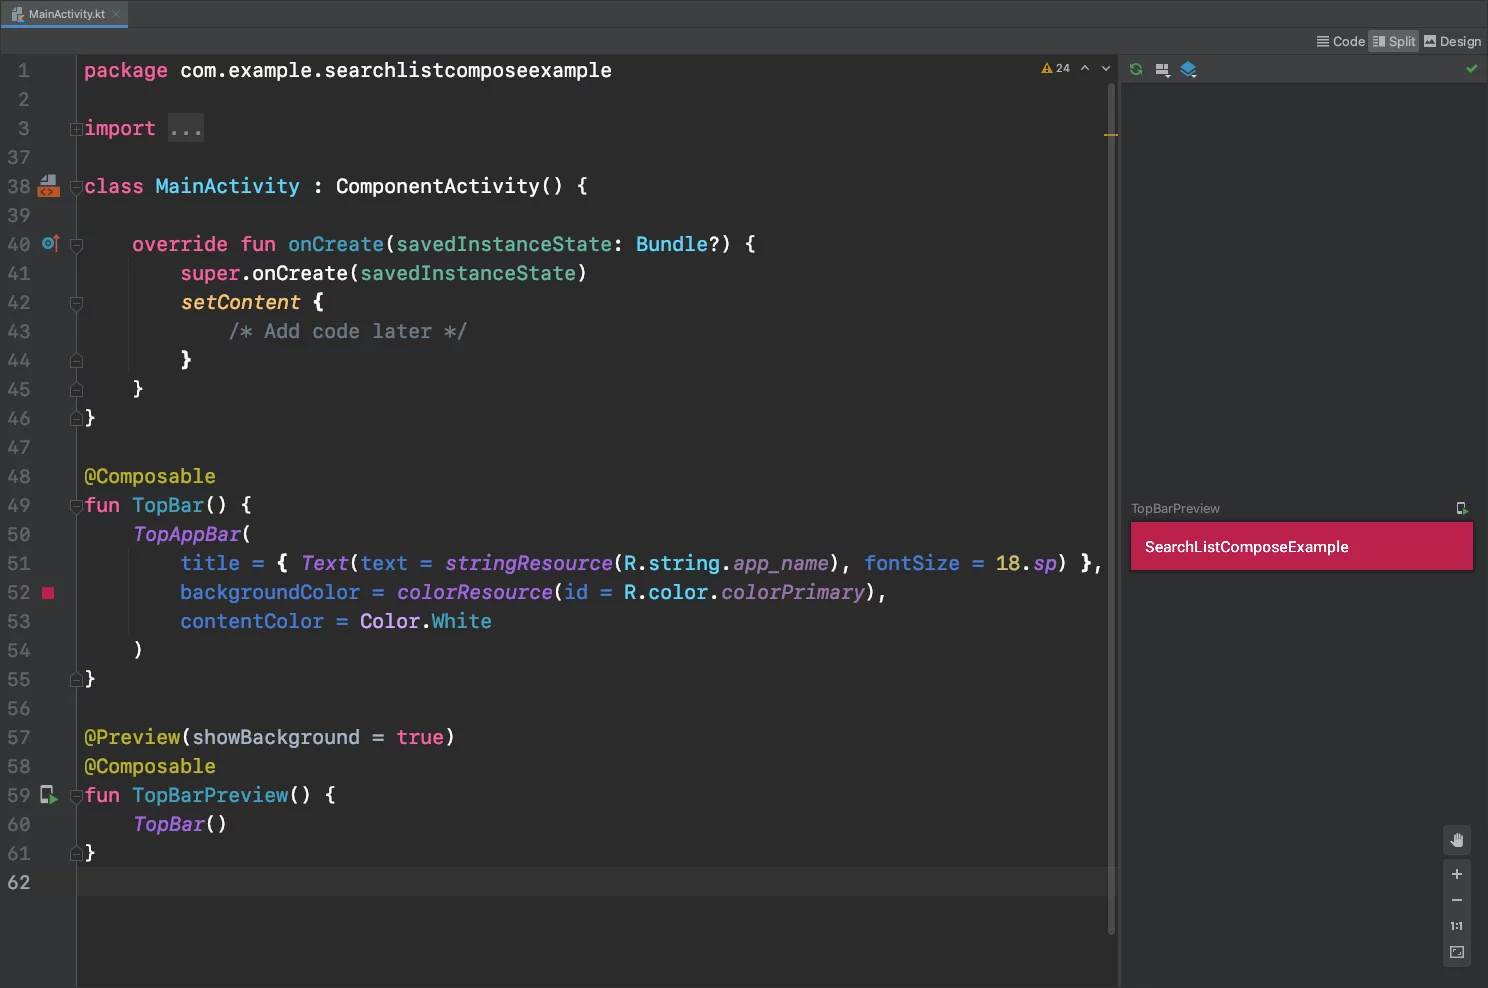
Adding Top Bar to the Layout
Now, let’s add Top Bar to the Scaffold layout. (I can’t show you the Preview because we’re adding it directly into the onCreate method)
Note: Scaffold is a layout in Jetpack Compose (like a RelativeLayout or LinearLayout in XML) with ‘areas’ for Top Bar, Bottom Bar, FAB button, Navigation Drawer e.t.c.
class MainActivity : ComponentActivity() {

    override fun onCreate(savedInstanceState: Bundle?) {
        super.onCreate(savedInstanceState)
        setContent {
            Scaffold(
                topBar = { TopBar() },
                backgroundColor = colorResource(id = R.color.colorPrimaryDark)
            ) {padding -> // We need to pass scaffold's inner padding to content. That's why we use Box.
                Box(modifier = Modifier.padding(padding)) {
                    /* Add code later */
                }
            }
        }
    }

}Code language: Kotlin (kotlin)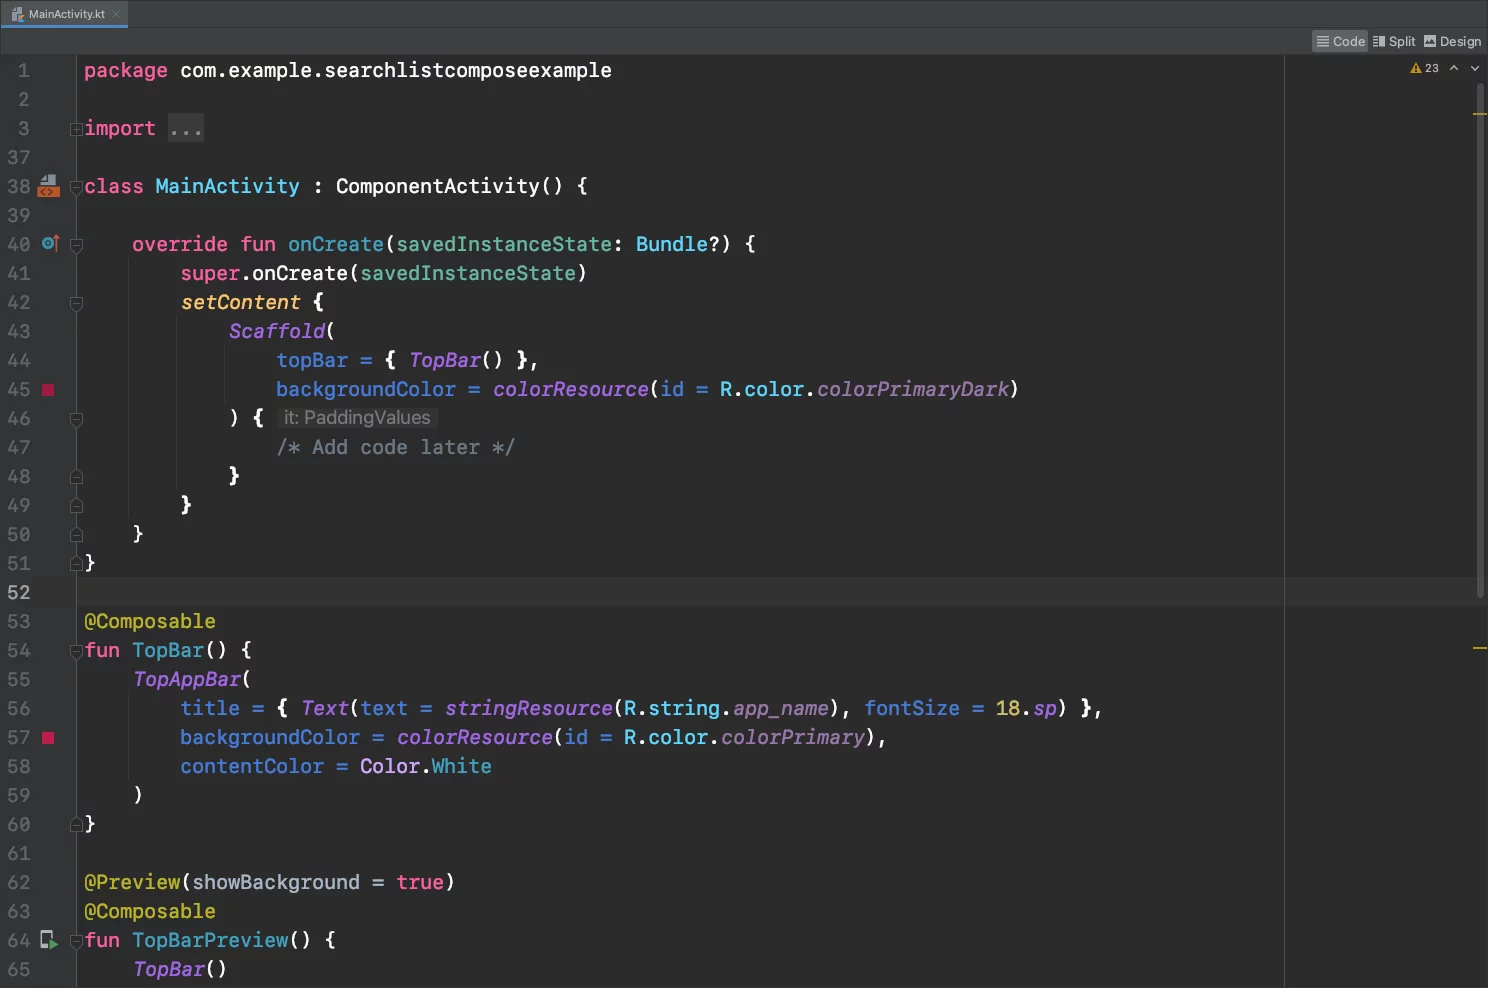
Creating the SearchView
Because in Jetpack Compose there’s no SearchView like in XML, we’re going to create our own ‘SearchView’, with a TextField, a magnifying glass icon at the beginning, and an X icon at the end.
The X icon will show up only when we’re typing to the TextField.
@Composable
fun SearchView(state: MutableState<TextFieldValue>) {
    TextField(
        value = state.value,
        onValueChange = { value ->
            state.value = value
        },
        modifier = Modifier
            .fillMaxWidth(),
        textStyle = TextStyle(color = Color.White, fontSize = 18.sp),
        leadingIcon = {
            Icon(
                Icons.Default.Search,
                contentDescription = "",
                modifier = Modifier
                    .padding(15.dp)
                    .size(24.dp)
            )
        },
        trailingIcon = {
            if (state.value != TextFieldValue("")) {
                IconButton(
                    onClick = {
                        state.value =
                            TextFieldValue("") // Remove text from TextField when you press the 'X' icon
                    }
                ) {
                    Icon(
                        Icons.Default.Close,
                        contentDescription = "",
                        modifier = Modifier
                            .padding(15.dp)
                            .size(24.dp)
                    )
                }
            }
        },
        singleLine = true,
        shape = RectangleShape, // The TextFiled has rounded corners top left and right by default
        colors = TextFieldDefaults.textFieldColors(
            textColor = Color.White,
            cursorColor = Color.White,
            leadingIconColor = Color.White,
            trailingIconColor = Color.White,
            backgroundColor = colorResource(id = R.color.colorPrimary),
            focusedIndicatorColor = Color.Transparent,
            unfocusedIndicatorColor = Color.Transparent,
            disabledIndicatorColor = Color.Transparent
        )
    )
}

@Preview(showBackground = true)
@Composable
fun SearchViewPreview() {
    val textState = remember { mutableStateOf(TextFieldValue("")) }
    SearchView(textState)
}Code language: Kotlin (kotlin)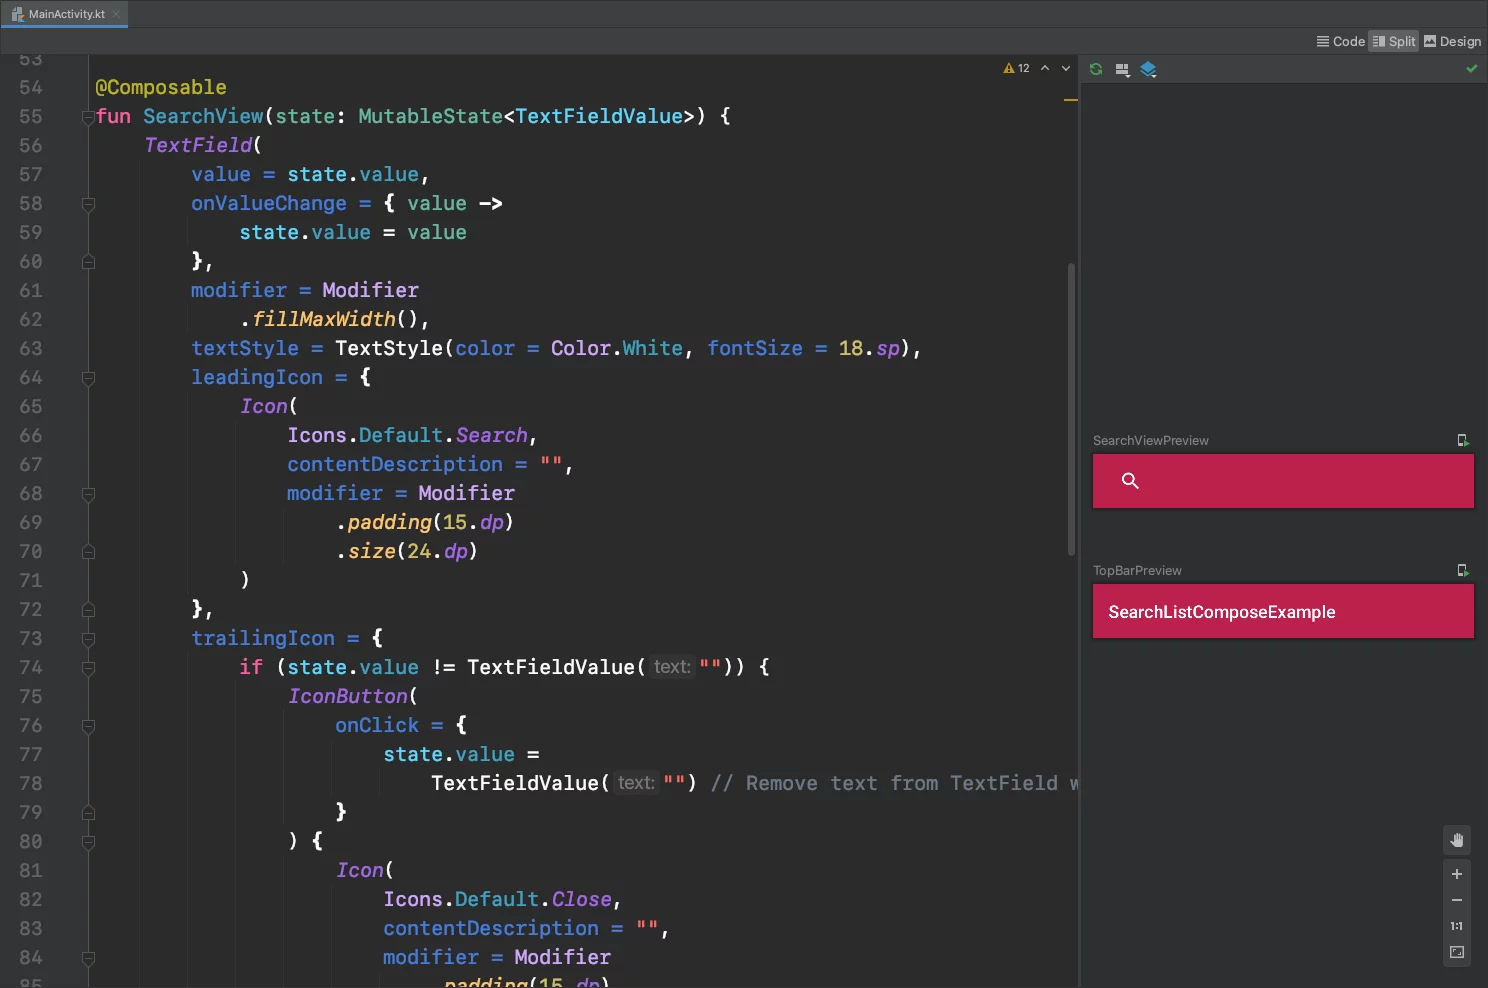
Creating the List and the List Item
Before we create the List, we have to create the List Item
List Item
This list item is simple, it contains a Text inside a Row, and when we click the Row, it will pass the country’s name (countryText), using the onItemClick closure, to the Details Screen that we’re going to create later.
@Composable
fun CountryListItem(countryText: String, onItemClick: (String) -> Unit) {
    Row(
        modifier = Modifier
            .clickable(onClick = { onItemClick(countryText) })
            .background(colorResource(id = R.color.colorPrimaryDark))
            .height(57.dp)
            .fillMaxWidth()
            .padding(PaddingValues(8.dp, 16.dp))
    ) {
        Text(text = countryText, fontSize = 18.sp, color = Color.White)
    }
}

@Preview(showBackground = true)
@Composable
fun CountryListItemPreview() {
    CountryListItem(countryText = "United States 🇺🇸", onItemClick = { })
}Code language: Kotlin (kotlin)
List
In this example, we’re getting a list of countries from getListOfCountries(), and we filter the data that matches the text we’re typing in the SearchView, and we save the results in the filteredCountries array.
When the text in the SearchView is empty, we show all the countries from the array countries, and when we’re typing, we show the filtered data from the filteredCountries array.
@Composable
fun CountryList(navController: NavController, state: MutableState<TextFieldValue>) {
    val countries = getListOfCountries()
    var filteredCountries: ArrayList<String>
    LazyColumn(modifier = Modifier.fillMaxWidth()) {
        val searchedText = state.value.text
        filteredCountries = if (searchedText.isEmpty()) {
            countries
        } else {
            val resultList = ArrayList<String>()
            for (country in countries) {
                if (country.lowercase(Locale.getDefault())
                        .contains(searchedText.lowercase(Locale.getDefault()))
                ) {
                    resultList.add(country)
                }
            }
            resultList
        }
        items(filteredCountries) { filteredCountry ->
            CountryListItem(
                countryText = filteredCountry,
                onItemClick = { selectedCountry ->
                    /* Add code later */
                }
            )
        }
    }
}

@Preview(showBackground = true)
@Composable
fun CountryListPreview() {
    val navController = rememberNavController()
    val textState = remember { mutableStateOf(TextFieldValue("")) }
    CountryList(navController = navController, state = textState)
}

fun getListOfCountries(): ArrayList<String> {
    val isoCountryCodes = Locale.getISOCountries()
    val countryListWithEmojis = ArrayList<String>()
    for (countryCode in isoCountryCodes) {
        val locale = Locale("", countryCode)
        val countryName = locale.displayCountry
        val flagOffset = 0x1F1E6
        val asciiOffset = 0x41
        val firstChar = Character.codePointAt(countryCode, 0) - asciiOffset + flagOffset
        val secondChar = Character.codePointAt(countryCode, 1) - asciiOffset + flagOffset
        val flag =
            (String(Character.toChars(firstChar)) + String(Character.toChars(secondChar)))
        countryListWithEmojis.add("$countryName $flag")
    }
    return countryListWithEmojis
}Code language: Kotlin (kotlin)
Adding SearchView and List together
Now that we have created the SearchView and the List, it’s time to put them together.
Create a new compose function, name it MainScreen with a parameter navController (We’re going to talk about navigation later). Inside there, we’re going to ‘save’ the state of the text we’re typing in the TextField, and add the SearchView and the List in a Column.
@Composable
fun MainScreen(navController: NavController) {
    val textState = remember { mutableStateOf(TextFieldValue("")) }
    Column {
        SearchView(textState)
        CountryList(navController = navController, state = textState)
    }
}

@Preview(showBackground = true)
@Composable
fun MainScreenPreview() {
    val navController = rememberNavController()
    MainScreen(navController = navController)
}Code language: Kotlin (kotlin)
As you see, both share the textState value, so when we’re typing in the SearchView, the List (CountryList) is getting updated automatically.

Navigating to a new View when tapping an Item
Before we start with the navigation, let’s create the Details Screen.
Details Screen
Create a new Kotlin file and name it DetailsScreen.kt and paste the following code inside:
What we do here is we pass the country’s name from the previous view (the view that contains the SearchView and the List), and we display it in the middle of the screen.
@Composable
fun DetailsScreen(countryName: String) {
    Column(
        modifier = Modifier
            .fillMaxSize()
            .background(colorResource(id = R.color.colorPrimaryDark))
            .wrapContentSize(Alignment.Center)
    ) {
        Text(
            text = countryName,
            color = Color.White,
            modifier = Modifier.align(Alignment.CenterHorizontally),
            textAlign = TextAlign.Center,
            fontSize = 22.sp
        )
    }
}

@Preview(showBackground = true)
@Composable
fun DetailsScreenPreview() {
    DetailsScreen("United States 🇺🇸")
}Code language: Kotlin (kotlin)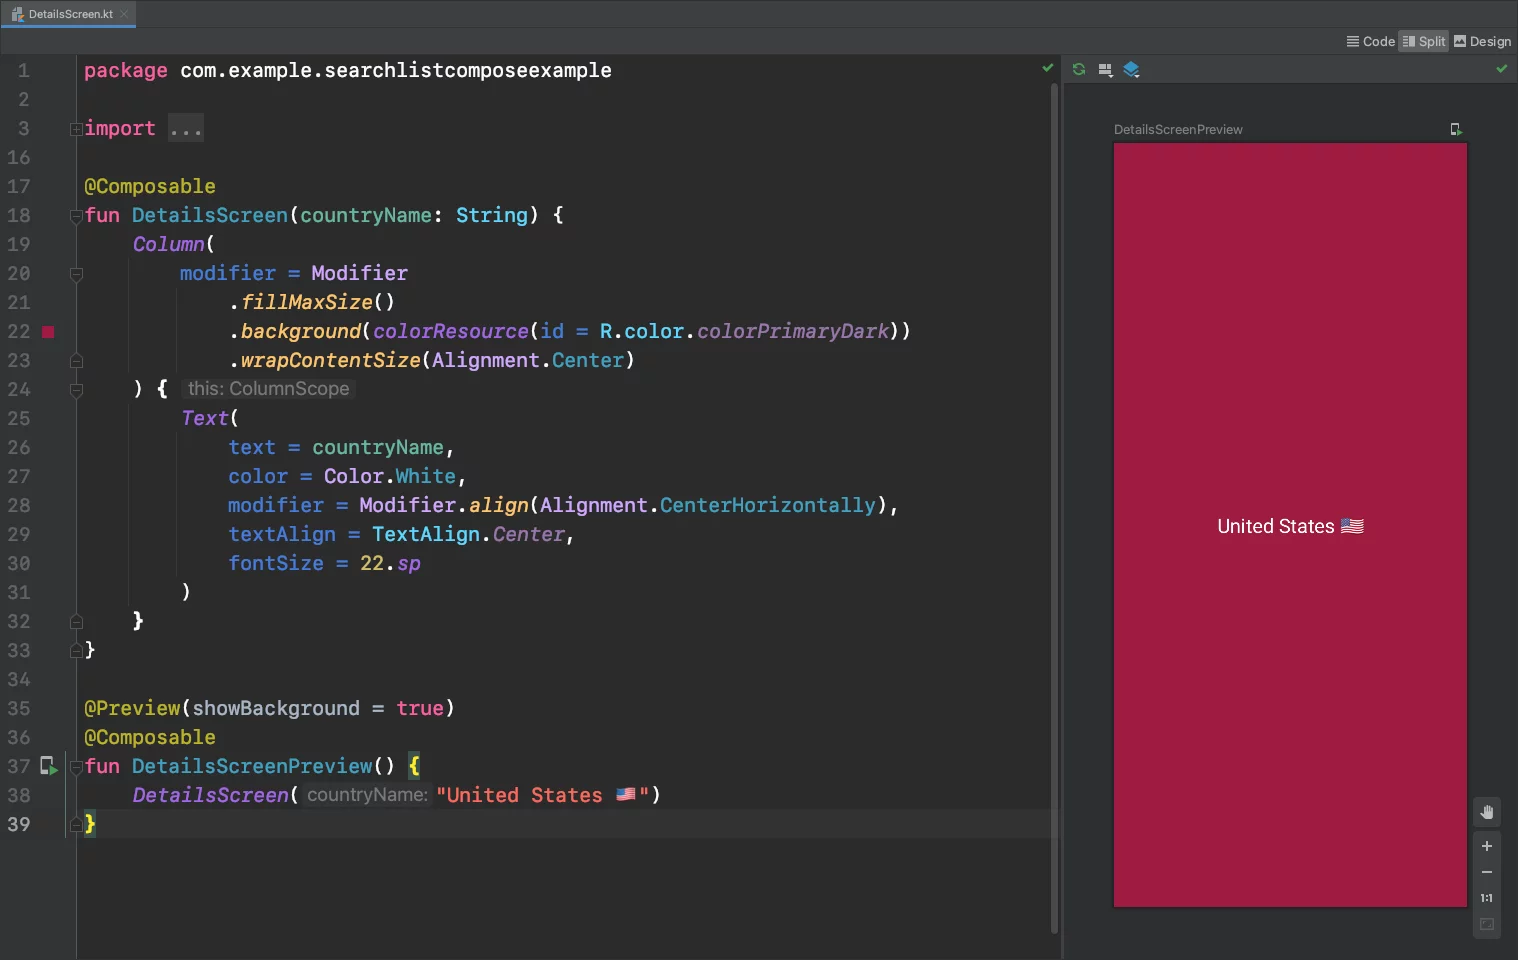
Navigation
Now back to the MainActivity.kt, create a new composable function named Navigation(). Inside this function, we create a NavHost, and we add the composable view HomeScreen and DetailsScreen(with the data we’re passing)
Then, call this Navigation() function from the Scaffold layout.
class MainActivity : ComponentActivity() {

    override fun onCreate(savedInstanceState: Bundle?) {
        super.onCreate(savedInstanceState)
        setContent {
            Scaffold(
                topBar = { TopBar() },
                backgroundColor = colorResource(id = R.color.colorPrimaryDark)
            ) { padding -> // We need to pass scaffold's inner padding to content. That's why we use Box.
                 Box(modifier = Modifier.padding(padding)) {
                     Navigation()
                }
            }
        }
    }
}

@Composable
fun Navigation() {
    val navController = rememberNavController()
    NavHost(navController = navController, startDestination = "main") {
        composable("main") {
            MainScreen(navController = navController)
        }
        composable(
            "details/{countryName}",
            arguments = listOf(navArgument("countryName") { type = NavType.StringType })
        ) { backStackEntry ->
            backStackEntry.arguments?.getString("countryName")?.let { countryName ->
                DetailsScreen(countryName = countryName)
            }
        }
    }
}Code language: Kotlin (kotlin)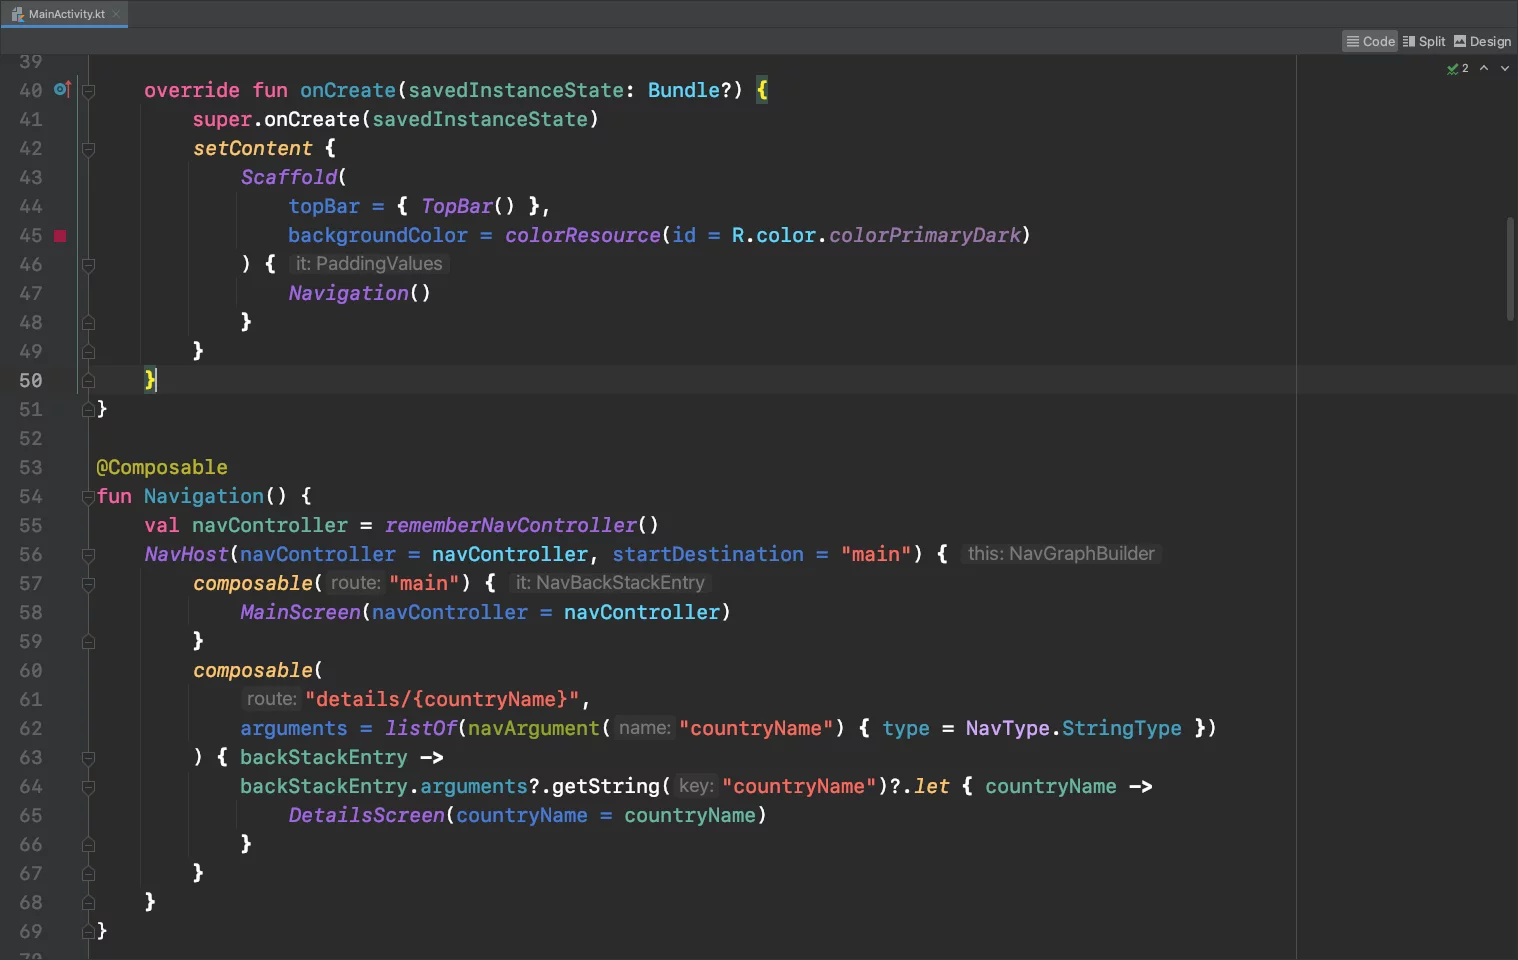
Lastly, in the List, add the following code inside the onItemClick closure to be able to navigate and pass the data to DetailsScreen() when you tap on an item.
// ...

items(filteredCountries) { filteredCountry ->
    CountryListItem(
        countryText = filteredCountry,
        onItemClick = { selectedCountry ->
            navController.navigate("details/$selectedCountry") {
                // Pop up to the start destination of the graph to
                // avoid building up a large stack of destinations
                // on the back stack as users select items
                popUpTo("main") {
                    saveState = true
                }
                // Avoid multiple copies of the same destination when
                // reselecting the same item
                launchSingleTop = true
                // Restore state when reselecting a previously selected item
                restoreState = true
            }
        }
    )
}

// ...Code language: Kotlin (kotlin)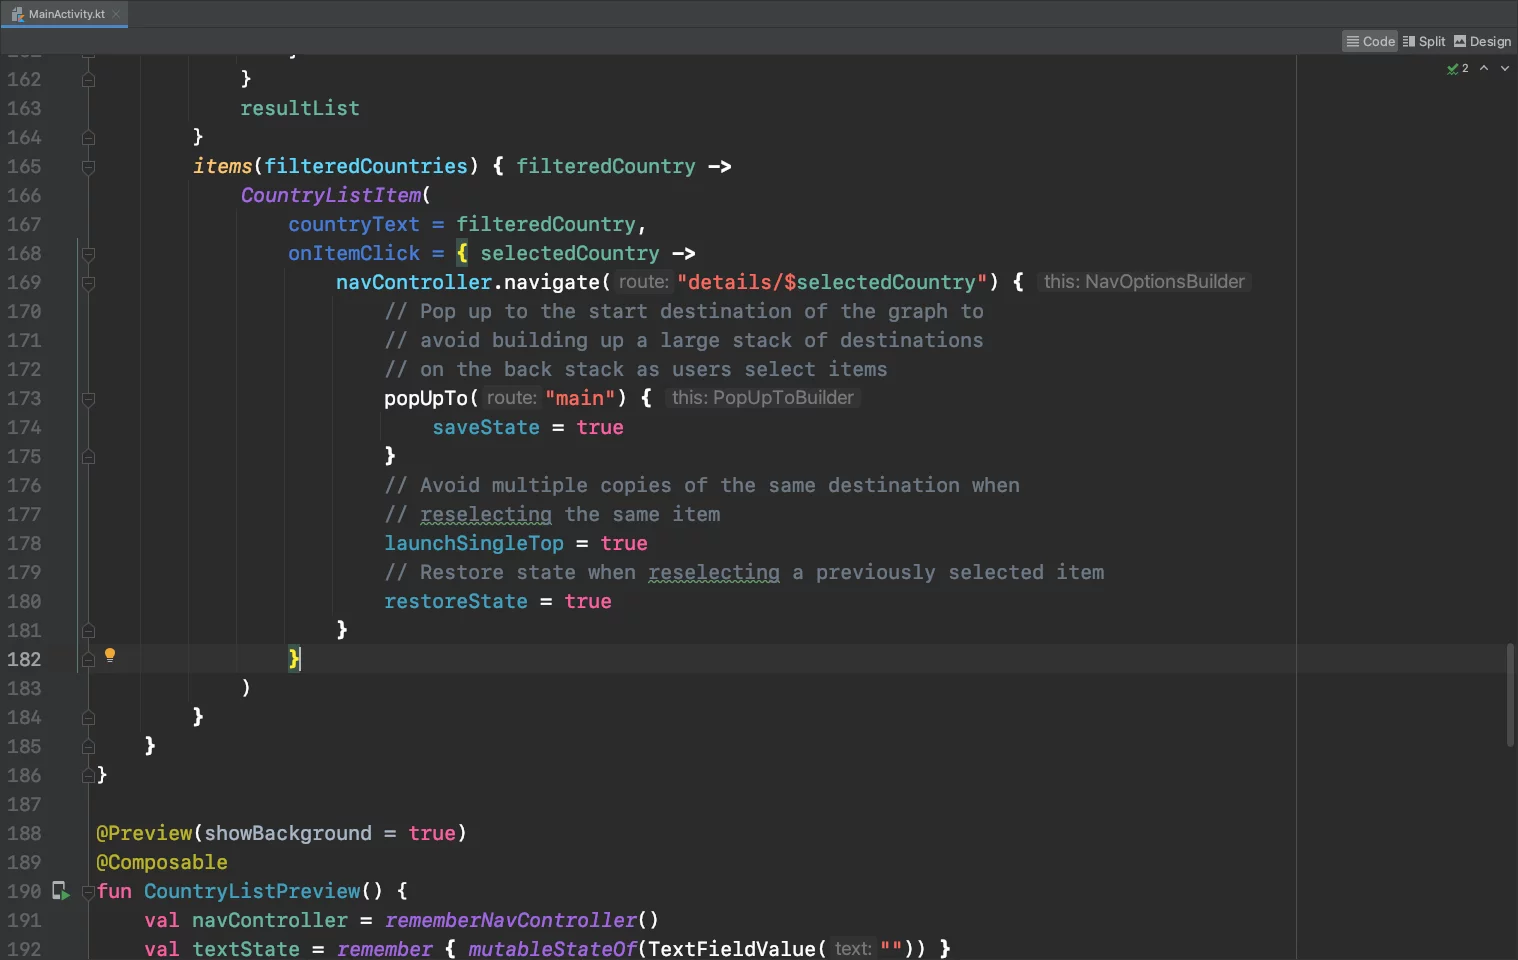
You can find the final project here
If you have any questions, please feel free to leave a comment below