
Last updated on: May 27, 2023
Today, I’m going to show you how to add custom fonts to your Android app easily.
In this example, we are going to add 3 fonts, Mallent (mallent_regular.ttf), Great Wishes (best.otf), and the popular Bebas Neue (bebas_neue) in different styles and weights (thin, regular, bold).
Contents
Adding Custom Fonts
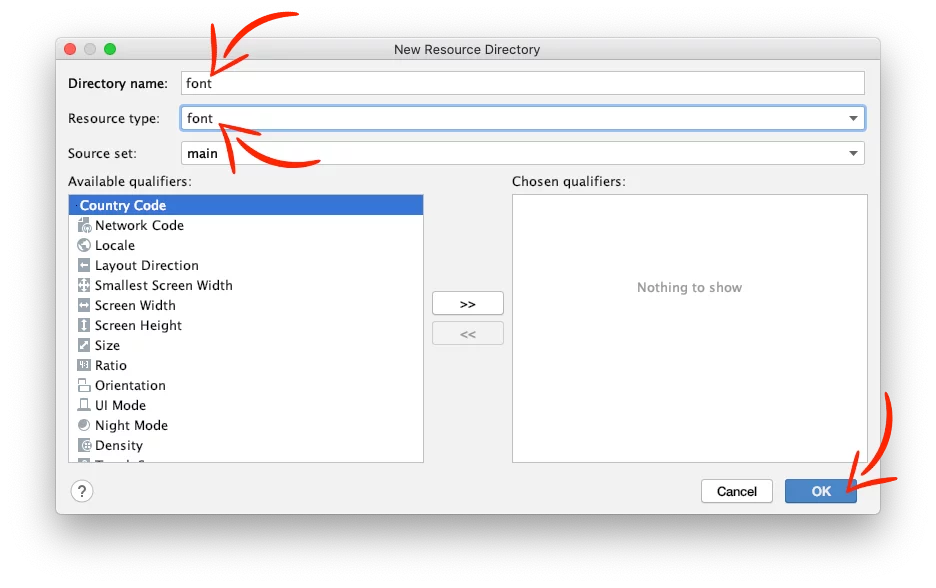
In your project, create a new folder font by going Right-Click on the res folder New > Android Resource Directory.

Give the name font as Directory name and Resource type, and press OK.
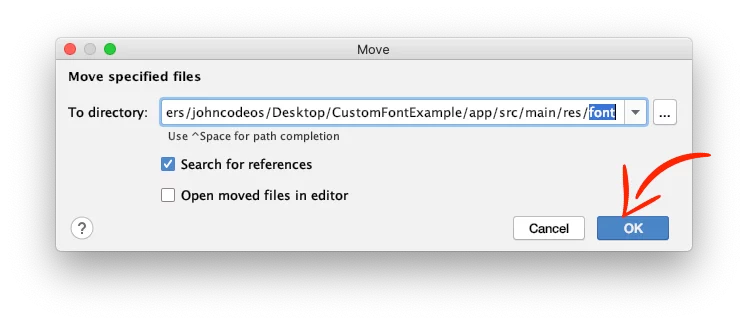
Drag and Drop your custom fonts inside the font folder and press OK on the new window.
Note: Don’t forget that font files name needs to be in lowercase and use underscore ( _ ) as a space.
After that, your font folder will look like this:

Using Custom Fonts
Go to your Activity‘s file and add your custom font like this:
class MainActivity: AppCompatActivity() {

    override fun onCreate(savedInstanceState: Bundle?) {
        super.onCreate(savedInstanceState)
        setContentView(R.layout.activity_main)

        findViewById<TextView>(R.id.my_text_view).typeface = ResourcesCompat.getFont(this, R.font.best)
        findViewById<TextView>(R.id.my_text_view).setTextSize(TypedValue.COMPLEX_UNIT_SP, 50.toFloat())

    }
}Code language: Kotlin (kotlin)
Creating a Custom Font family
If you have a font that differs from each other in style such as the weight (thin, regular, bold e.t.c), you can add them together in an XML file.
Right-Click on the font folder New > Font resource file

On the new window, give a name for your font family XML file, in this example called bebas_neue_font_family, and press OK.

In the XML file add your fonts like that:
<?xml version="1.0" encoding="utf-8"?>
<font-family xmlns:android="http://schemas.android.com/apk/res/android">

    <!-- fontWeight
   100 Thin
   200 Extra Light
   300 Light
   400 Normal
   500 Medium
   600 Semi Bold
   700 Bold
   800 Extra Bold
   900 Ultra Bold -->

    <font
        android:font="@font/bebas_neue_thin"
        android:fontStyle="normal"
        android:fontWeight="100" />

    <font
        android:font="@font/bebas_neue_regular"
        android:fontStyle="normal"
        android:fontWeight="400" />

    <font
        android:font="@font/bebas_neue_bold"
        android:fontStyle="normal"
        android:fontWeight="700" />


</font-family>Code language: HTML, XML (xml)
If you are using support library, change the android: to app:, like this:
<?xml version="1.0" encoding="utf-8"?>
<font-family xmlns:android="http://schemas.android.com/apk/res/android"
    xmlns:app="http://schemas.android.com/apk/res-auto">

    <!-- fontWeight
   100 Thin
   200 Extra Light
   300 Light
   400 Normal
   500 Medium
   600 Semi Bold
   700 Bold
   800 Extra Bold
   900 Ultra Bold -->

    <font
        app:font="@font/bebas_neue_thin"
        app:fontStyle="normal"
        app:fontWeight="100" />

    <font
        app:font="@font/bebas_neue_regular"
        app:fontStyle="normal"
        app:fontWeight="400" />

    <font
        app:font="@font/bebas_neue_bold"
        app:fontStyle="normal"
        app:fontWeight="700" />


</font-family>Code language: HTML, XML (xml)
Using a Custom Font Family
You can use the font family only on XML files, like Activity‘s XML and styles’ XML. You can’t use them programmatically.
Go to your TextView in your Activity‘s layout and add the attributes android:fontFamily and android:textFontWeight, like that:
<TextView
        android:id="@+id/my_text_view"
        android:layout_width="wrap_content"
        android:layout_height="wrap_content"
        android:textSize="50sp"
        android:textColor="@android:color/white"
        android:fontFamily="@font/bebas_neue_font_family"
        android:textFontWeight="900"
        android:text="Text"/>Code language: HTML, XML (xml)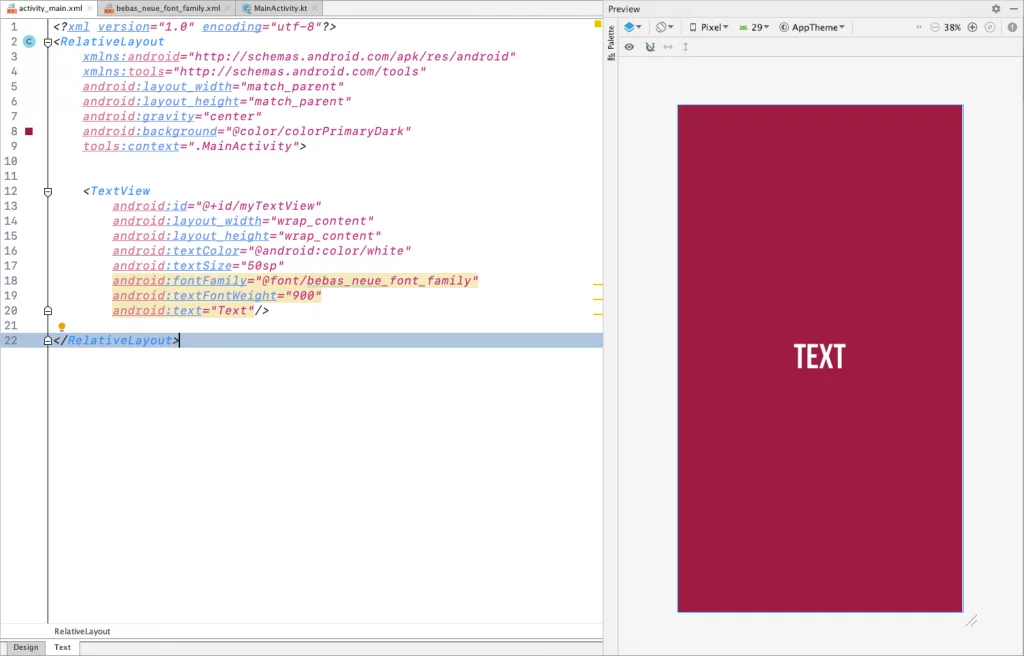
And again, if you are using support library, change it from android: to app: but textFontWeight only works for API 28 and above.
<TextView
        android:id="@+id/my_text_view"
        android:layout_width="wrap_content"
        android:layout_height="wrap_content"
        android:textSize="50sp"
        android:textColor="@android:color/white"
        app:fontFamily="@font/bebas_neue_font_family"
        android:textFontWeight="900"
        android:text="Text"/>Code language: HTML, XML (xml)
You can find the final project here
If you have any questions, please feel free to leave a comment below