Last updated on: April 12, 2021
There’re two ways to show an update inside your app:
• Flexible: A popup appears, asking the user if they want to update the app. They can accept or deny it. If they accept it, the update will download in the background. This can be used when your update has some minor UI changes or performance improvements.

• Immediate: This is a full-screen UX that requires the user to update the app to continue using it. This can be used when you have a critical update, like a security fix.

You can trigger the update with two signals:
• Priority: In each release, you define how important the update is by giving an integer that goes between 0 and 5 (5 being the highest priority). This will trigger the right update flow (Immediate or Flexible) to update the app.
• Staleness: Says how long the device has known about an update being available. This helps you to trigger the right flow. For example, if the user hasn’t updated the app in the last 30 days since the release of the update, then trigger the Flexible flow, and if it’s longer than 90 days, trigger the Immediate flow.
You can also combine both signals for a better user experience, and this is what we’re going to implement in this tutorial.
Contents
Adding library
Go to your module-level gradle.build file, and add the following dependencies:
dependencies {
    // ...

    implementation 'com.google.android.material:material:1.2.1'
    implementation 'com.google.android.play:core:1.9.0'

    // ...
}Code language: Kotlin (kotlin)
We need the material library to show a snackbar when the update has been completed when we’re using the flexible flow.

Implementing in-app update
To make it easier to implement, we’re going to add all the things we need in a different file, and then we’re going to call it from the Activity we want to check for the updates.
Create a new file, name it InAppUpdate, and paste the following code inside:
package com.example.inappupdatesexample

import android.app.Activity
import android.content.Intent
import android.graphics.Color
import android.util.Log
import androidx.appcompat.app.AppCompatActivity
import com.google.android.material.snackbar.Snackbar
import com.google.android.play.core.appupdate.AppUpdateInfo
import com.google.android.play.core.appupdate.AppUpdateManager
import com.google.android.play.core.appupdate.AppUpdateManagerFactory
import com.google.android.play.core.install.InstallState
import com.google.android.play.core.install.InstallStateUpdatedListener
import com.google.android.play.core.install.model.AppUpdateType
import com.google.android.play.core.install.model.InstallStatus
import com.google.android.play.core.install.model.UpdateAvailability

class InAppUpdate(activity: Activity) : InstallStateUpdatedListener {

    private var appUpdateManager: AppUpdateManager
    private val MY_REQUEST_CODE = 500
    private var parentActivity: Activity = activity

    private var currentType = AppUpdateType.FLEXIBLE

    init {
        appUpdateManager = AppUpdateManagerFactory.create(parentActivity)
        appUpdateManager.appUpdateInfo.addOnSuccessListener { info ->
            // Check if update is available
            if (info.updateAvailability() == UpdateAvailability.UPDATE_AVAILABLE) { // UPDATE IS AVAILABLE
                if (info.updatePriority() == 5) { // Priority: 5 (Immediate update flow)
                    if (info.isUpdateTypeAllowed(AppUpdateType.IMMEDIATE)) {
                        startUpdate(info, AppUpdateType.IMMEDIATE)
                    }
                } else if (info.updatePriority() == 4) { // Priority: 4
                    val clientVersionStalenessDays = info.clientVersionStalenessDays()
                    if (clientVersionStalenessDays != null && clientVersionStalenessDays >= 5 && info.isUpdateTypeAllowed(AppUpdateType.IMMEDIATE)) {
                        // Trigger IMMEDIATE flow
                        startUpdate(info, AppUpdateType.IMMEDIATE)
                    } else if (clientVersionStalenessDays != null && clientVersionStalenessDays >= 3 && info.isUpdateTypeAllowed(AppUpdateType.FLEXIBLE)) {
                        // Trigger FLEXIBLE flow
                        startUpdate(info, AppUpdateType.FLEXIBLE)
                    }
                } else if (info.updatePriority() == 3) { // Priority: 3
                    val clientVersionStalenessDays = info.clientVersionStalenessDays()
                    if (clientVersionStalenessDays != null && clientVersionStalenessDays >= 30 && info.isUpdateTypeAllowed(AppUpdateType.IMMEDIATE)) {
                        // Trigger IMMEDIATE flow
                        startUpdate(info, AppUpdateType.IMMEDIATE)
                    } else if (clientVersionStalenessDays != null && clientVersionStalenessDays >= 15 && info.isUpdateTypeAllowed(AppUpdateType.FLEXIBLE)) {
                        // Trigger FLEXIBLE flow
                        startUpdate(info, AppUpdateType.FLEXIBLE)
                    }
                } else if (info.updatePriority() == 2) { // Priority: 2
                    val clientVersionStalenessDays = info.clientVersionStalenessDays()
                    if (clientVersionStalenessDays != null && clientVersionStalenessDays >= 90 && info.isUpdateTypeAllowed(AppUpdateType.IMMEDIATE)) {
                        // Trigger IMMEDIATE flow
                        startUpdate(info, AppUpdateType.IMMEDIATE)
                    } else if (clientVersionStalenessDays != null && clientVersionStalenessDays >= 30 && info.isUpdateTypeAllowed(AppUpdateType.FLEXIBLE)) {
                        // Trigger FLEXIBLE flow
                        startUpdate(info, AppUpdateType.FLEXIBLE)
                    }
                } else if (info.updatePriority() == 1) { // Priority: 1
                    // Trigger FLEXIBLE flow
                    startUpdate(info, AppUpdateType.FLEXIBLE)
                } else { // Priority: 0
                    // Do not show in-app update
                }
            } else {
                // UPDATE IS NOT AVAILABLE
            }
        }
        appUpdateManager.registerListener(this)
    }


    private fun startUpdate(info: AppUpdateInfo, type: Int) {
        appUpdateManager.startUpdateFlowForResult(info, type, parentActivity, MY_REQUEST_CODE)
        currentType = type
    }

    fun onResume() {
        appUpdateManager.appUpdateInfo.addOnSuccessListener { info ->
            if (currentType == AppUpdateType.FLEXIBLE) {
                // If the update is downloaded but not installed, notify the user to complete the update.
                if (info.installStatus() == InstallStatus.DOWNLOADED)
                    flexibleUpdateDownloadCompleted()
            } else if (currentType == AppUpdateType.IMMEDIATE) {
                // for AppUpdateType.IMMEDIATE only, already executing updater
                if (info.updateAvailability() == UpdateAvailability.DEVELOPER_TRIGGERED_UPDATE_IN_PROGRESS) {
                    startUpdate(info, AppUpdateType.IMMEDIATE)
                }
            }
        }
    }

    fun onActivityResult(requestCode: Int, resultCode: Int, data: Intent?) {
        if (requestCode == MY_REQUEST_CODE) {
            if (resultCode != AppCompatActivity.RESULT_OK) {
                // If the update is cancelled or fails, you can request to start the update again.
                Log.e("ERROR", "Update flow failed! Result code: $resultCode")
            }
        }
    }

    private fun flexibleUpdateDownloadCompleted() {
        Snackbar.make(
                parentActivity.findViewById(R.id.activity_main_layout),
                "An update has just been downloaded.",
                Snackbar.LENGTH_INDEFINITE
        ).apply {
            setAction("RESTART") { appUpdateManager.completeUpdate() }
            setActionTextColor(Color.WHITE)
            show()
        }
    }

    fun onDestroy() {
        appUpdateManager.unregisterListener(this)
    }

    override fun onStateUpdate(state: InstallState) {
        if (state.installStatus() == InstallStatus.DOWNLOADED) {
            flexibleUpdateDownloadCompleted()
        }
    }

}Code language: Kotlin (kotlin)
In your Activity (usually is the MainActivity), initialize the InAppUpdate class, and add the methods onResume and onActivityResults:
class MainActivity : AppCompatActivity() {

    private lateinit var inAppUpdate: InAppUpdate

    override fun onCreate(savedInstanceState: Bundle?) {
        super.onCreate(savedInstanceState)
        setContentView(R.layout.activity_main)
        inAppUpdate = InAppUpdate(this)
    }

    override fun onActivityResult(requestCode: Int, resultCode: Int, data: Intent?) {
        super.onActivityResult(requestCode, resultCode, data)
        inAppUpdate.onActivityResult(requestCode,resultCode, data)
    }

    override fun onResume() {
        super.onResume()
        inAppUpdate.onResume()
    }

    override fun onDestroy() {
        super.onDestroy()
        inAppUpdate.onDestroy()
    }
}Code language: Kotlin (kotlin)
Using this code, when you set priority to:
5: Shows Immediate instantly (Recommended for critical updates)
4: Shows Flexible after 3 days and Immediate after 5 days
3: Shows Flexible after 15 days and Immediate after 30 days (Recommended for performance updates)
2: Shows Flexible after 30 days and Immediate after 90 days (Recommended for minor updates)
1: Shows Flexible forever
0: It doesn’t trigger any update flow
Of course, you can change the code the way you like to fit your needs.
To set the priority for the update, you need to do it through Google Play Developer API, and there’s no option to do it from the Google Play Console (yet).
Instead of using the Google Play Developer API, we’re going to use the Gradle Play Publisher. It’s a Gradle plugin that automates the process of publishing an app on the Google Play Store, and we can set the priority for our release from inside the Android Studio.
NOTE: The Gradle Play Publisher only works for apps that have already been published on the Google Play Store. If you haven’t published it yet. You have to do it through the Google Play Console and then use the Gradle Play Publisher for the next releases.
Before we start with this, we need to have a key(.json) file, that we’ll get after creating a Service account in Google Play Console, and the Keystore(.jks) file.
Creating a Service Account in Google Play Console
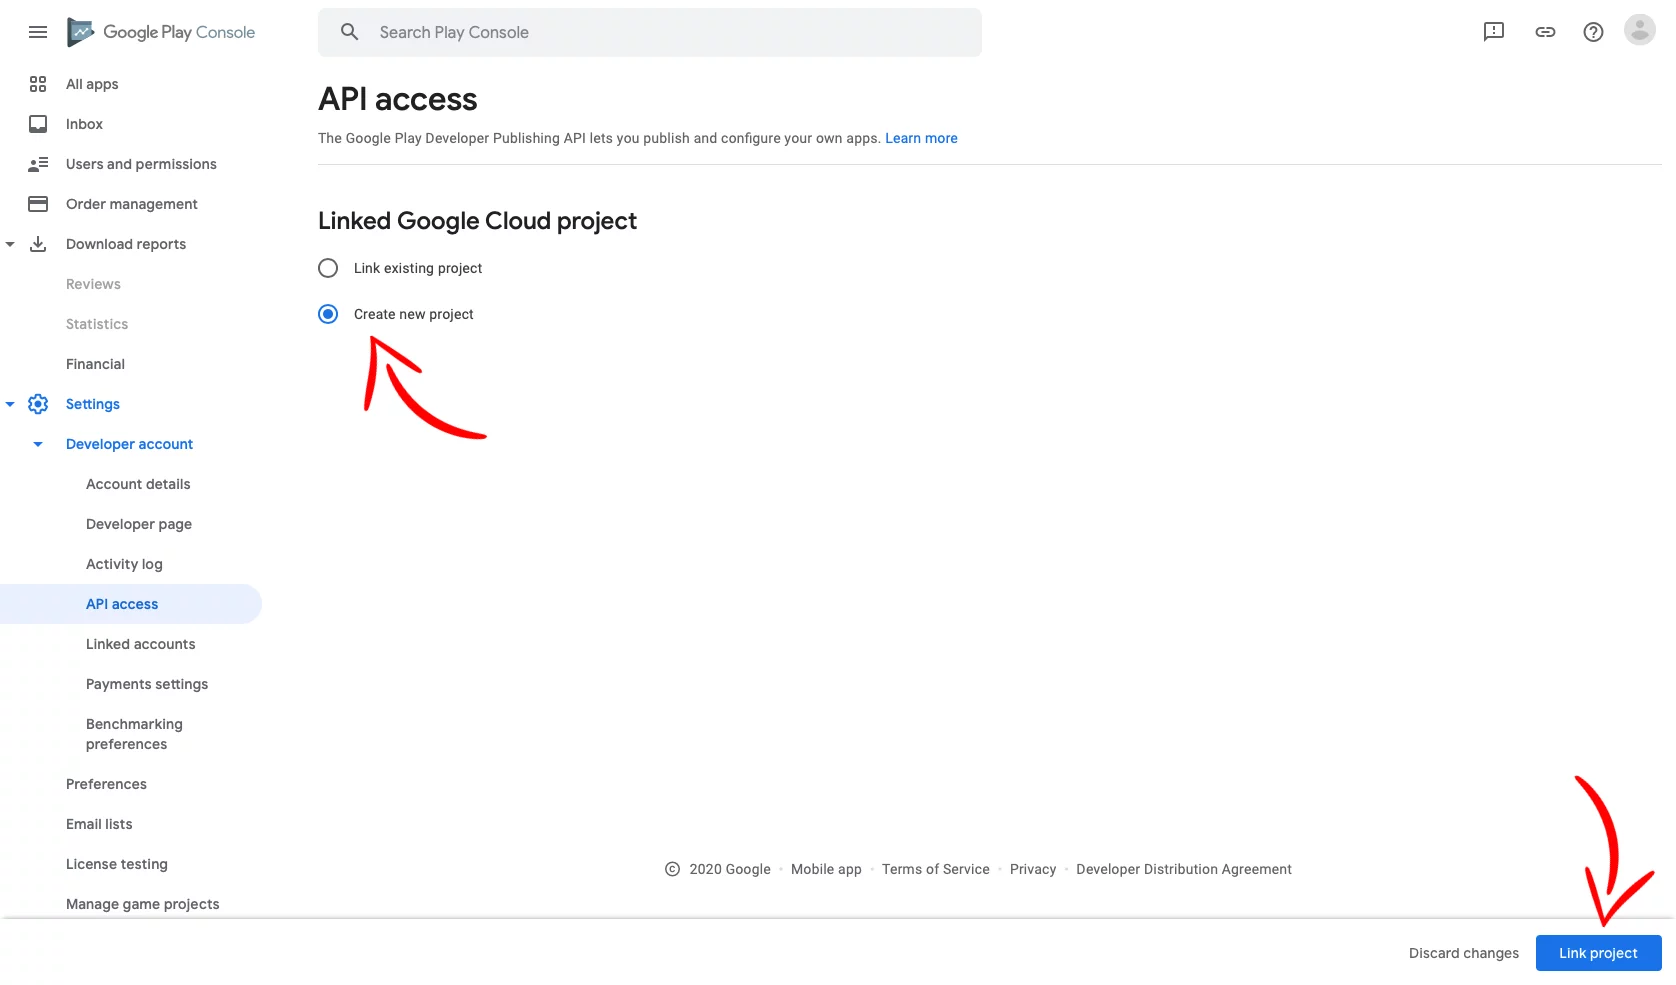
In Google Play Console, go Settings > API Access press Choose a project to link, and then I agree


Next, go Create new project and press the Link project button
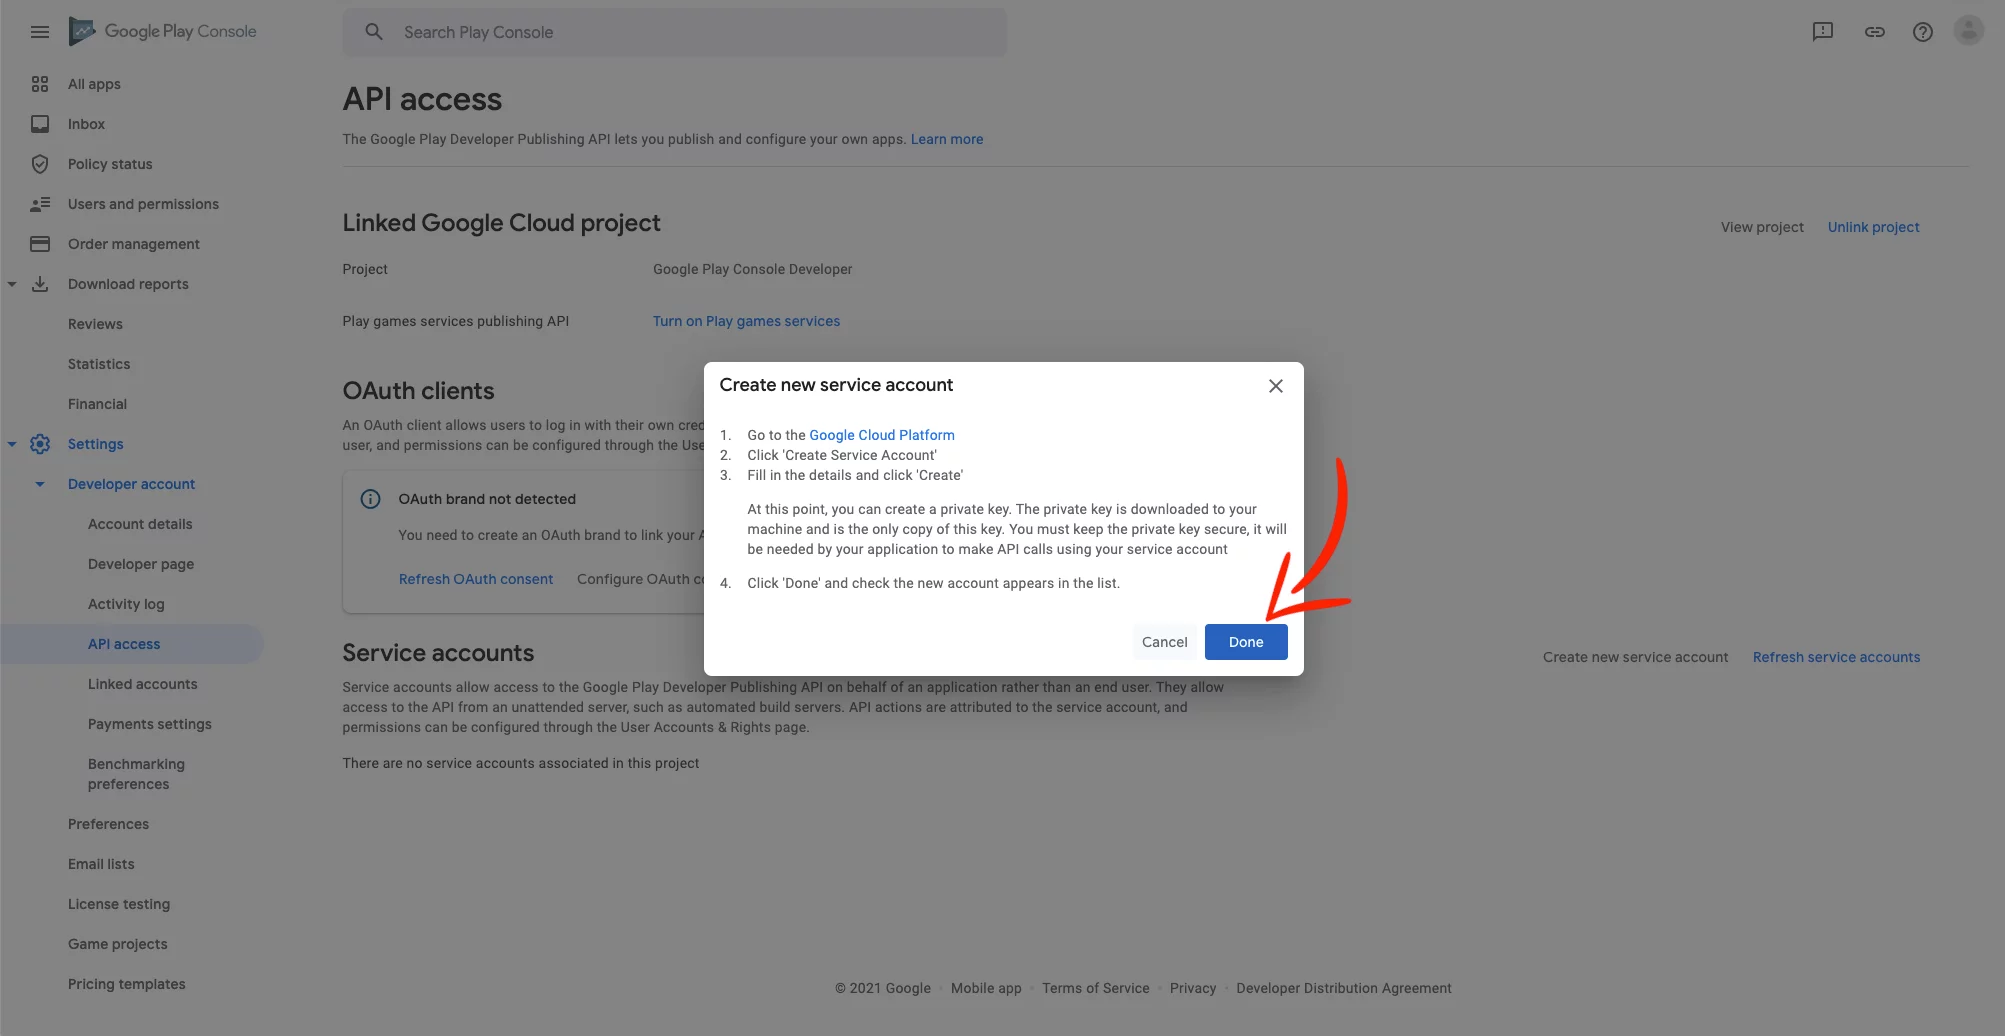
Press Create new service account and open the Google Cloud Platform


In Google Cloud Platform, press + CREATE SERVICE ACCOUNT

Give it a name, and press CREATE

In the next step, select Owner as a role (don’t worry, we’ll remove it later), and press Done


Press the 3 dots on the right side, and press Create key

On the new window, select JSON and CREATE

Rename the .json file to a simpler name, like key.json, and save it in your computer (or in the cloud, like Dropbox, because we’re going to add it in the .gitignore later and every time you download your project from version control, you need to add it back in your project manually)
Now, go back to Google Play Console and press Done
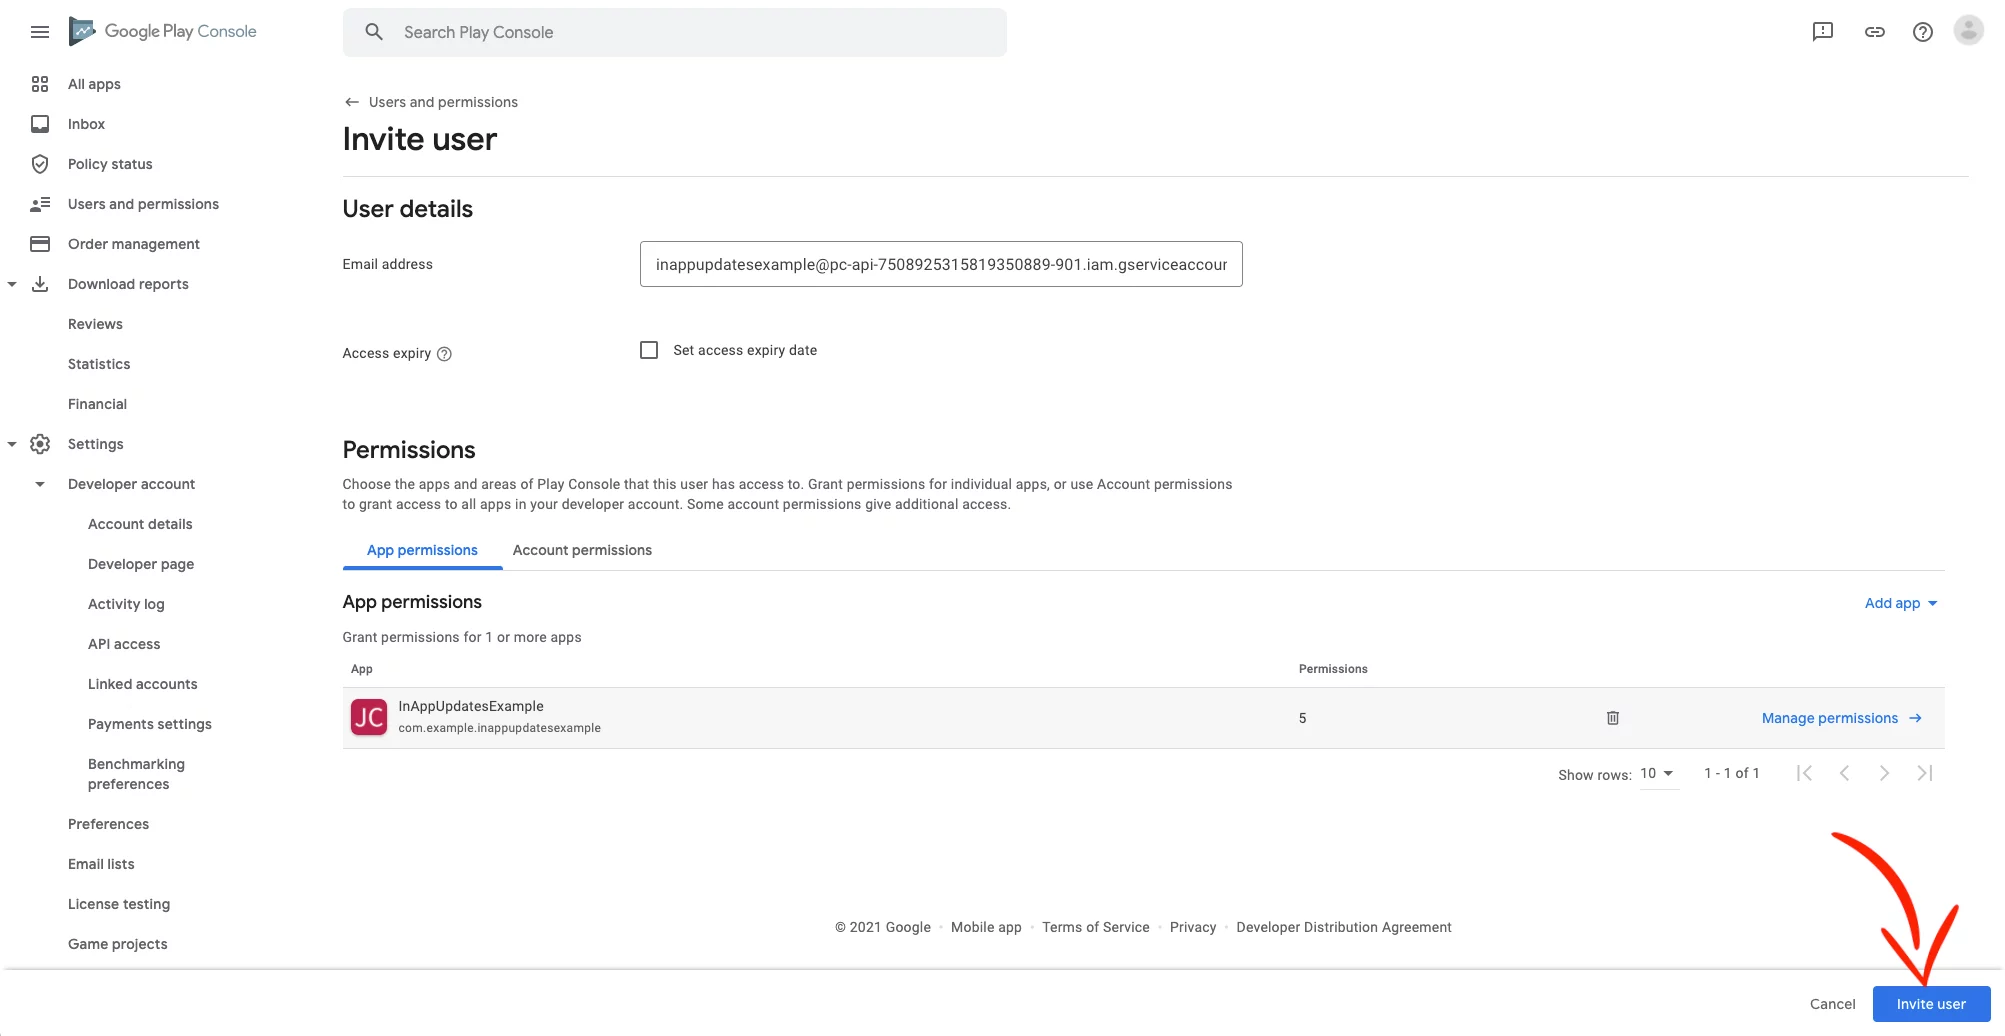
Next, go to the Users and permissions section and press Invite new users

Open the .json file you downloaded before (key.json) with a text editor, copy the email from “client_email” and paste it inside the Email address.
Then, press Add app and select your app from the list

On the new window, select the followings and press Apply

With these permissions, we’ll be able to publish our apps for testing and production using the Gradle Play Publisher.
Next, press Invite user
Now, it’s time to remove the Owner permission we added previously.
Go back to Google Cloud Platform, select the IAM section from the left sidebar, and press the pencil icon to edit the account
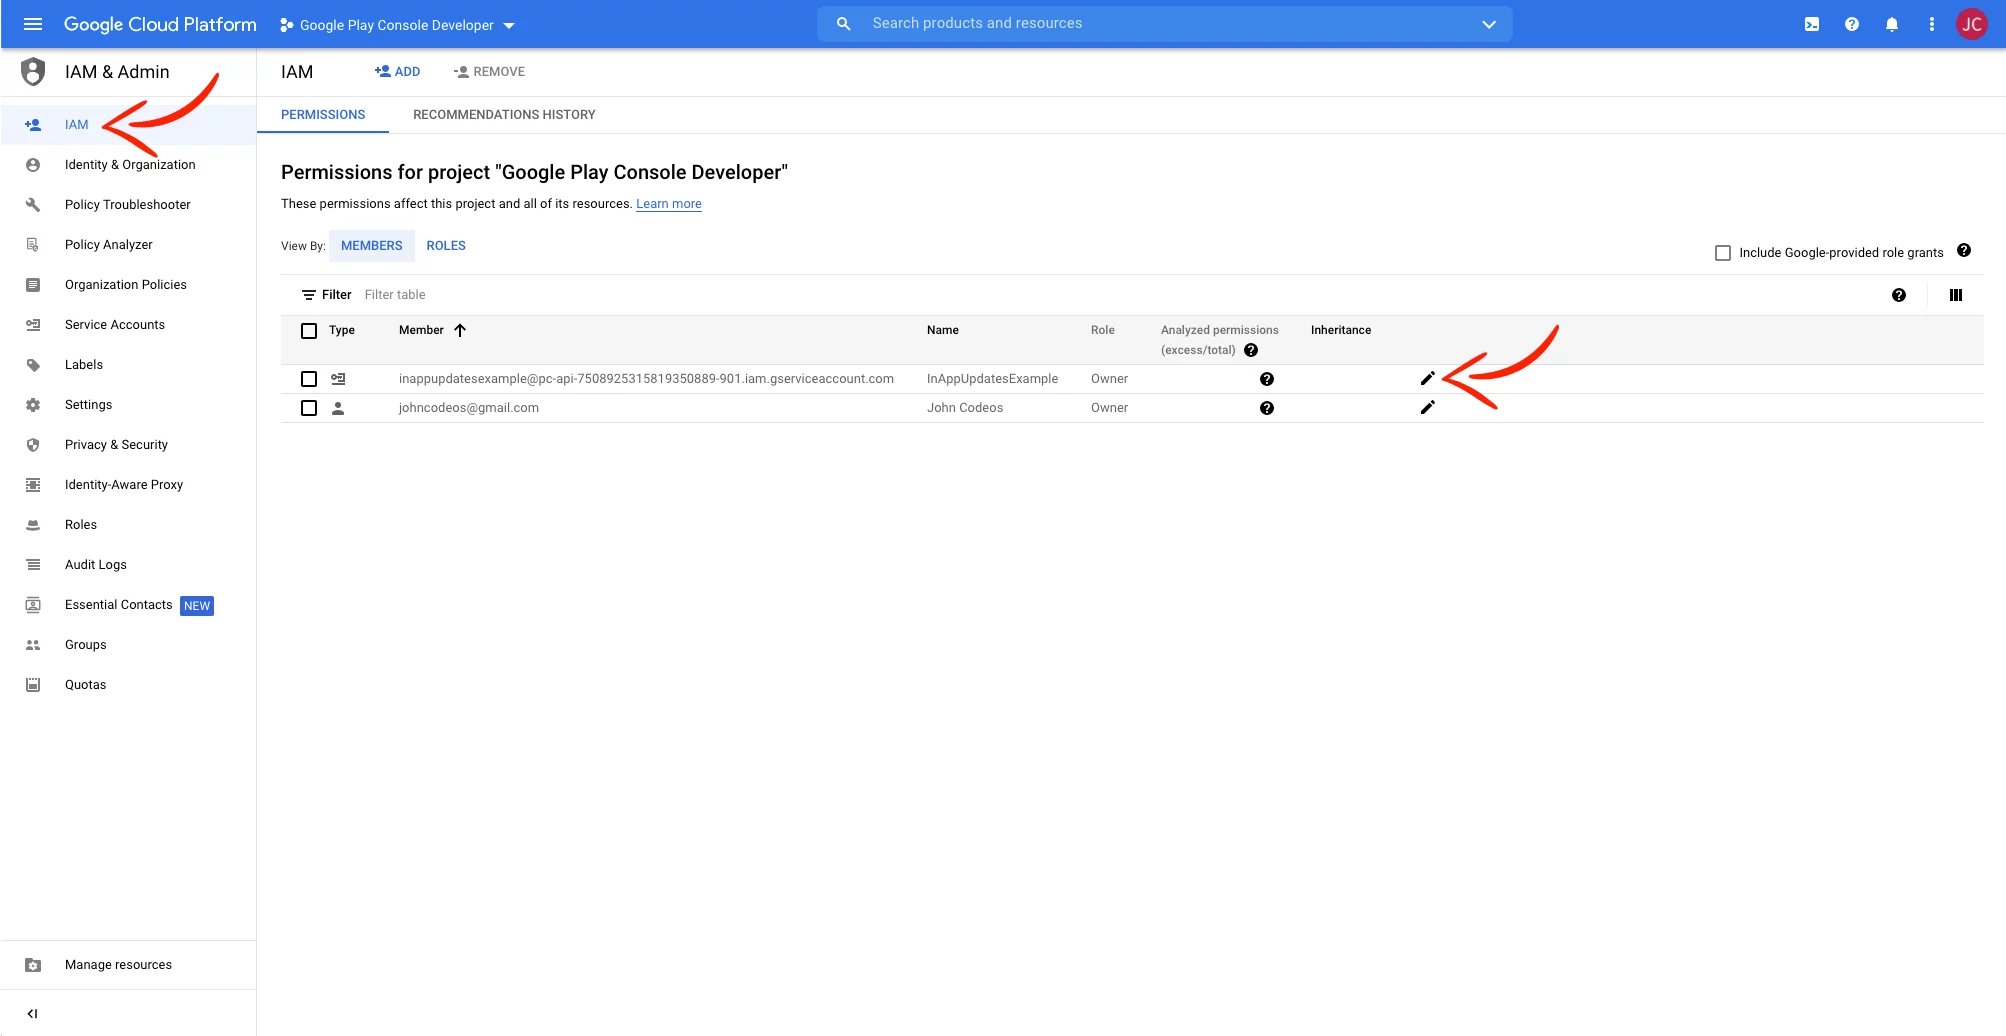
On the new window, press the trash icon to remove the permission and then SAVE

Done! We created the service account!
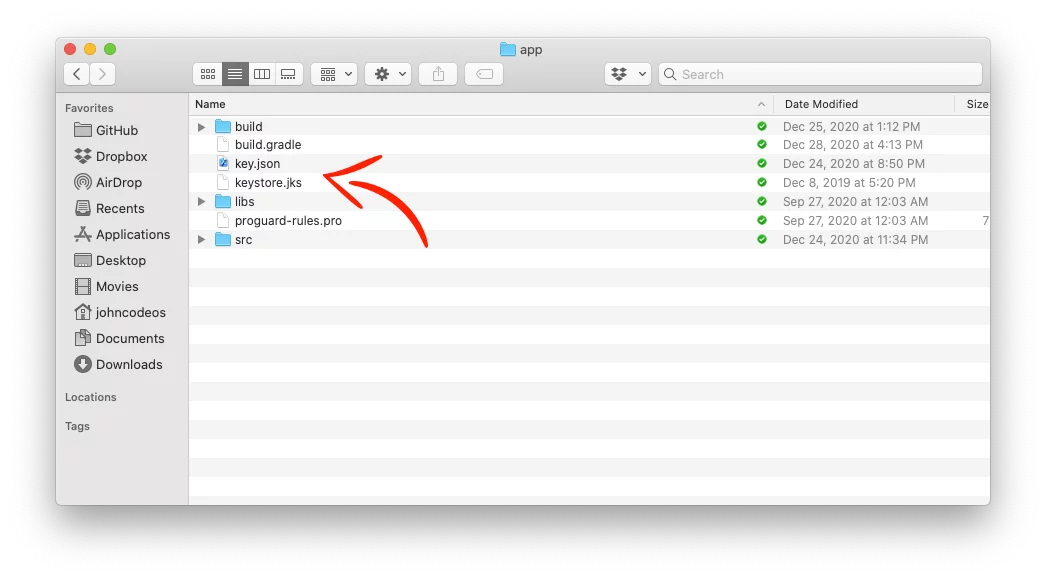
Now let’s copy the key(.json) and the Keystore(.jks) file into our project.
Adding your Service Account and Keystore files in your project
Go to your project’s folder, and inside the app folder, paste the key(.json) and the Keystore(.jks) file:
Next, to edit the .gitignore, we need to unhide the hidden files, press Cmd + Shift + . (dot) and open the file with a text editor (e.g., VS Code), and add the following lines (the .jks lines might be already there, just uncomment them)

We’re doing this because when you have your app on version control, and it’s not a private repo, then everyone can have access to your Google Play Developer account.
Gradle Play Publisher
Adding the plugin
Go to your module-level gradle.build file, and at the top of your file:
If you’re using the plugins DSL, add:
plugins {
  // …

  id "com.github.triplet.play" version "3.1.0"
}Code language: Swift (swift)
If you’re using legacy plugin application, in your top-level build.gradle file add:
buildscript {
  repositories {
    maven { url https://plugins.gradle.org/m2/ }
  }
  dependencies {
    classpath "com.github.triplet.gradle:play-publisher:3.1.0"
  }
}Code language: Swift (swift)
And then, in your module-level build.gradle add:
// …
apply plugin: "com.github.triplet.play"
Code language: Swift (swift)
Setting up the plugin
In the module-level build.gradle file, inside the android { } , and before buildTypes add:
// defaultConfig …

signingConfigs {
    release {
        storeFile file("keystore.jks")
        storePassword "MY_KEYSTORE_PASSWORD"
        keyAlias "MY_KEY_ALIAS"
        keyPassword "MY_KEY_PASSWORD"
    }
}

// buildTypes …
Code language: Swift (swift)
Inside the buildTypes, add:
buildTypes {
    release {
        signingConfig signingConfigs.release
        // ...
    }
}Code language: Swift (swift)
And after buildTypes, add:
// buildTypes …

play {
    track.set("internal") // internal / alpha / beta / production
    updatePriority.set(5) // Between 0 and 5
    serviceAccountCredentials.set(file("key.json"))
}
Code language: Swift (swift)
Replace the storePassword, keyAlias, and keyPassword with your own keys.
Next, if you want to include Release Notes with your release, create a .txt file with the name of the track (e.g., internal.txt, beta.txt, etc.) and paste it inside:
(your project name)/app/src/main/(create a folder and name it play)/(create a folder and name it release-notes)/(create a folder and name it with the language of the release notes, for example, en-US)

Testing
To test your in-app update implementation, you need to upload your app on the internal (or alpha or beta) track, twice.
Go to your module-level build.gradle file, increase the versionCode and the versionName, set your track, and press Sync Now

Then, open the Terminal inside the Android Studio and type ./gradlew publishBundle to publish a bundle.
If you want to publish a .apk, type ./gradlew publishApk
See more details about Gradle Publish Plugin’s terminal commands here


Now, go to your Google Play Console to see the release in the track you set before (Mine is the ‘internal’ track)
Select the Testers tab to add your testers

Press Create email list and add the email address you have on your phone with Google Play Store installed.
Then press the Copy link and open it from your phone to have access to the internal track.

After installing your app through the internal track, do the same steps we did (increase versionCode, upload with the Gradle Play Publisher, etc.), but now, set a number for the priority of the update.
Go to Google Play Store on your phone and check if your app has an update (DO NOT update it from there).
Close the Google Play Store and open your app to see the in-app update.
From now on, this is the way that you have to upload your app (through Gradle Play Publisher). If you upload it from Google Play Console, the app won’t trigger any in-app update flow to the users.
You can find the final project here
If you have any questions, please feel free to leave a comment below