Last updated on: May 27, 2023
In this tutorial, I’ll show you how to make a pop-up window with a semi-transparent background using SwiftUI in iOS.
In SwiftUI, if you use fullScreenCover() to show the view as a full-screen modal, you won’t see the View below.
So I’m going to implement this is by hiding the popup View in the parent View and show it when you tap on a Button
Contents
Creating the PopUp View
First, let’s create a new SwiftUI View for the pop-up.
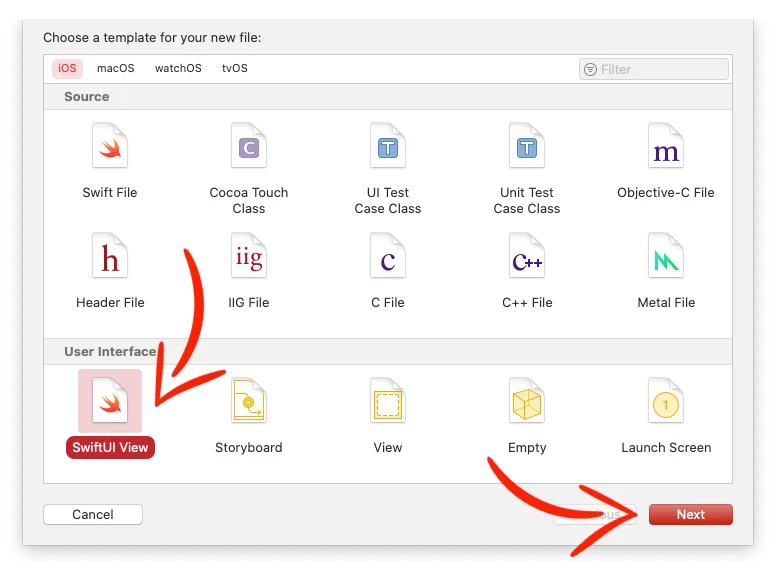
Go to your project folder, Right-Click > New File…

Select SwiftUI View, press Next and name it PopUpWindow
Now, create a new boolean variable with the property wrapper @Binding, to be able to show/hide the view whenever we want:
struct PopUpWindow: View {
// ...
@Binding var show: Bool
var body: some View {
ZStack {
if show {
// semi-transparent background and popup window
}
}
}
}Code language: Swift (swift)This @Binding variable gets updated to true (show) when we tap the button on the parent View, and false (hide) when we press the ‘OK’ button on the popup.
struct PopUpWindow: View {
    var title: String
    var message: String
    var buttonText: String
    @Binding var show: Bool
    var body: some View {
        ZStack {
            if show {
                // PopUp background color
                Color.black.opacity(show ? 0.3 : 0).edgesIgnoringSafeArea(.all)
                // PopUp Window
                VStack(alignment: .center, spacing: 0) {
                    Text(title)
                        .frame(maxWidth: .infinity)
                        .frame(height: 45, alignment: .center)
                        .font(Font.system(size: 23, weight: .semibold))
                        .foregroundColor(Color.white)
                        .background(Color(#colorLiteral(red: 0.6196078431, green: 0.1098039216, blue: 0.2509803922, alpha: 1)))
                    Text(message)
                        .multilineTextAlignment(.center)
                        .font(Font.system(size: 16, weight: .semibold))
                        .padding(EdgeInsets(top: 20, leading: 25, bottom: 20, trailing: 25))
                        .foregroundColor(Color.white)
                    Button(action: {
                        // Dismiss the PopUp
                        withAnimation(.linear(duration: 0.3)) {
                            show = false
                        }
                    }, label: {
                        Text(buttonText)
                            .frame(maxWidth: .infinity)
                            .frame(height: 54, alignment: .center)
                            .foregroundColor(Color.white)
                            .background(Color(#colorLiteral(red: 0.6196078431, green: 0.1098039216, blue: 0.2509803922, alpha: 1)))
                            .font(Font.system(size: 23, weight: .semibold))
                    }).buttonStyle(PlainButtonStyle())
                }
                .frame(maxWidth: 300)
                .border(Color.white, width: 2)
                .background(Color(#colorLiteral(red: 0.737254902, green: 0.1294117647, blue: 0.2941176471, alpha: 1)))
            }
        }
    }
}Code language: Swift (swift)
Adding the PopUp View in the Parent View
Now in the parent View, create a new @State variable with the name showPopUp and set it to false.
Add a ZStack, and at the bottom, add the PopUpWindow we created before, and pass the state property showPopUp
struct ContentView: View {
    @State private var showPopUp: Bool = false
    var body: some View {
        ZStack {
             // Other Views...
            }
            PopUpWindow(title: "Error", message: "Sorry, that email address is already used!", buttonText: "OK", show: $showPopUp)
        }
    }
}Code language: Swift (swift)
Now, to open the popupview, we have set showPopUp to true.
To do this, we’re going to use the .toggle() method to change it.
So, the parent View will look like this:
struct ContentView: View {
    @State private var showPopUp: Bool = false
    init() {
        UINavigationBar.appearance().barTintColor = UIColor(#colorLiteral(red: 0.737254902, green: 0.1294117647, blue: 0.2941176471, alpha: 1))
        UINavigationBar.appearance().titleTextAttributes = [.foregroundColor: UIColor.white]
        UINavigationBar.appearance().isTranslucent = false
    }
    var body: some View {
        ZStack {
            NavigationView {
                ZStack(alignment: .center) {
                    Color(#colorLiteral(red: 0.737254902, green: 0.1294117647, blue: 0.2941176471, alpha: 1)).ignoresSafeArea()
                    Button(action: {
                        withAnimation(.linear(duration: 0.3)) {
                            showPopUp.toggle()
                        }
                    }, label: {
                        Text("Show PopUp Window")
                    })
                        .padding()
                        .background(Color(#colorLiteral(red: 0.6196078431, green: 0.1098039216, blue: 0.2509803922, alpha: 1)))
                }
                .navigationBarTitleDisplayMode(.inline)
                .navigationTitle("PopUpWindowSwiftUIExample")
                .foregroundColor(Color.white)
            }
            PopUpWindow(title: "Error", message: "Sorry, that email address is already used!", buttonText: "OK", show: $showPopUp)
        }
    }
}Code language: Swift (swift)
You can find the final project here
If you have any questions, please feel free to leave a comment below